.svg)
.svg)

Compression is an indispensable tool that’s found across individual tracks, mix buses, and mastering chains.
One of the most popular effects among musicians and engineers, audio compression is used for taming dynamics, manipulating amplitude envelopes, peak limiting, sidechaining, parallel processing, and more. Yet, despite its popularity, compression can be quite enigmatic for novices and veterans alike, since differences in dynamic range are often harder to discern when compared to other sonic properties like pitch and tempo.
So what is compression? In this blog post, let’s demystify audio compression by discussing what it is, what its parameters are, and how it’s used in music production.
Feel free to use the table of contents below to quickly navigate to a specific section.
What you’ll learn:
- What is compression in music?
- What compression sounds like
- How to use compressors in your music
- Why compression is important
Feeling ready? Let’s dive into the world of sound compression!
What is compression in music?
Compression is a processing technique that reduces the overall dynamic range of a piece of audio by detecting when it exceeds a specified level, and then attenuating it by a specified amount. Put simply, it narrows the difference in volume between the loudest and softest parts of a track so that it’s more consistent in level.
This dynamic control can be essential for keeping audio sounding even and preventing sudden jumps in volume. It’s especially helpful on sounds like vocals, where a performance can have sudden jumps in level that a compressor can smooth out.
If you’ve ever drawn automation curves for a track’s level, you’ve likely unknowingly done some manual compression—you probably brought down parts that were excessively loud (downward compression) and brought up parts that were too soft (upward compression). Though it’s generally less customizable, a compressor automates this process for us, which can 1) save us a lot of time, and 2) introduce sonic characteristics and use cases that are unique to compression.
What does audio compression sound like?
Let’s hear how compression sounds in action—below is an uncompressed drum groove:
Now let’s listen to how it sounds compressed:
While there’s a significant difference in level between the hats and the kick / snare in the uncompressed groove, all of the elements are much more even in the compressed version. This is visually reinforced when we compare the two waveforms:
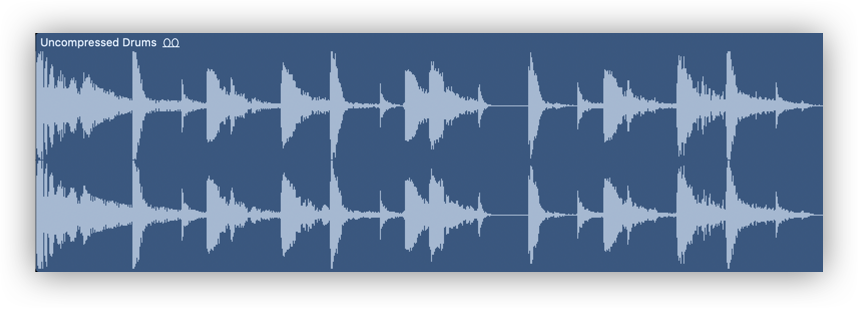
The uncompressed drum groove
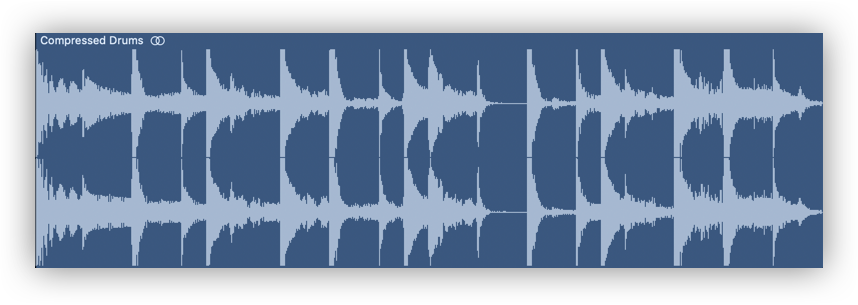
The compressed drum groove
Now that we have a general understanding of audio compression, let’s dive into its parameters.
How to use compressors in your music
A compressor is simply a device—either physical hardware or a virtual plugin—that applies compression.
Although there are always exceptions, most compressors share a common set of parameters. Understanding what each one does will allow us to use compression in our music with more intentionality and ease.
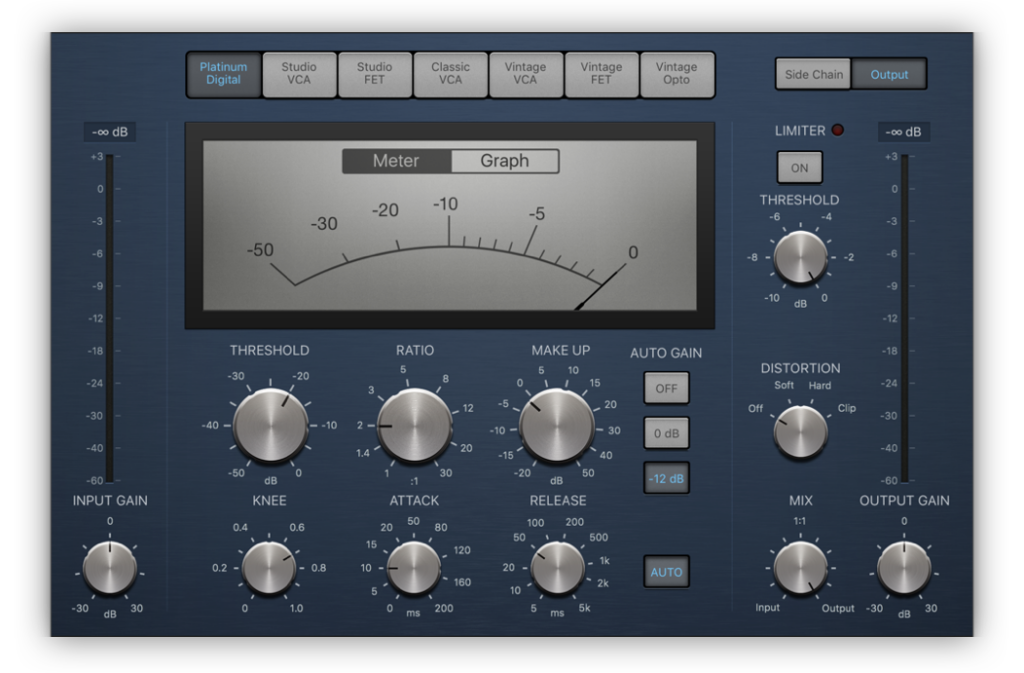
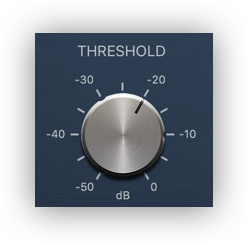
Threshold
A compressor’s threshold, expressed in decibels (dB), determines the level at which the compressor starts compressing.
The threshold can be set strategically to target specific moments in your audio. For example, if a drum groove’s snare is too loud, you can set the threshold so that it’s low enough that the snare exceeds it, but high enough that the rest of the kit is bypassed (the best way to do this is slowly raise or lower the threshold until the meter only reacts to the snare).
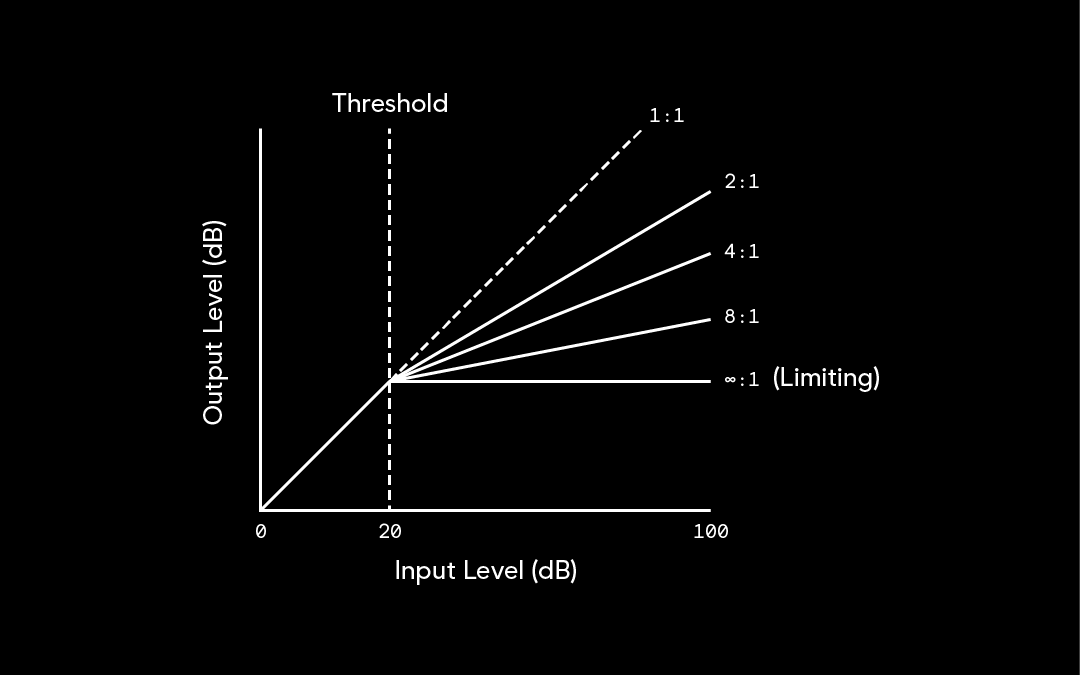
Ratio
Once the compressor has detected that the input signal has exceeded the threshold, it starts attenuating the signal. The amount the level is reduced is determined by the ratio.
As an example, if the threshold is set to -20 dB, the input signal hits -16 dB, and the ratio is set to 2:1, the output signal will be attenuated to -18 dB. Because the input surpassed the threshold by 4 dB, the 2:1 ratio cuts this value in half, resulting in the output of -18 dB.
A limiter is essentially a compressor with an ‘infinite’ ratio (think 10:1 or more). While a compressor (particularly one with a lower ratio) gently tames peaks, a limiter aggressively puts a halt on any level that exceeds the threshold (also referred to as its ceiling).
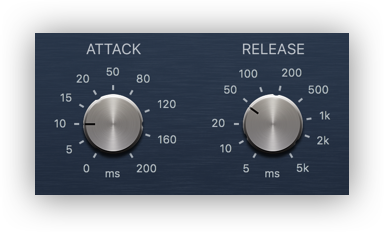
Attack and release
The attack of a compressor, typically measured in milliseconds (ms), determines how quickly it pulls the input signal down to the full ratio value when it exceeds the threshold. Meanwhile, the release is the opposite, representing the total time it takes for the signal to return to an uncompressed state.
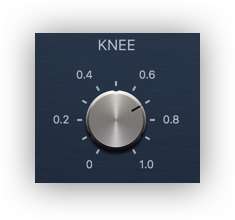
Knee
The knee determines the character of the gain reduction that’s applied to a signal. It ranges from a value of 0.0 to 1.0, with 0.0 being a hard knee and 1.0 being a soft knee. A hard knee begins reducing gain abruptly when the compressor exceeds the threshold, whereas a soft knee introduces gain reduction gradually as the signal approaches the threshold.
A compressor’s knee is more nuanced in its impact than attack and release times, but can be valuable nonetheless. In general, try leaning towards fast attack and release times with a hard knee for more noticeable / aggressive compression, and slow attack and release times with a soft knee for subtle / gentle compression.
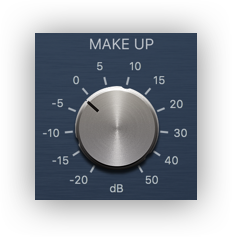
Make up gain
We often associate compression with making a track louder. However, we’ve learned that by definition, compression actually reduces level. Make up gain is what allows compression to make a track louder. We can compensate for the level that we lost using this parameter, and because we tamed the peaks, we can actually make the overall audio louder without running into clipping.
The big picture: Why are compressors important?
Compression is a highly important audio effect to understand because it regularly touches every aspect of digital music creation, from sound design techniques to mixing and mastering. It can be used in creative and musical ways, but it can also turn a dynamic and exciting mix into a flat and fatiguing one if used irresponsibly.
This guide should give you a strong foundational understanding of compression and its common parameters. That said, just like how you can’t learn to ride a bike by reading a book, you can’t become an expert at compression just by checking out an article or watching a single YouTube video; now it’s time for you to open up your DAW and experiment with all of the parameters yourself. Doing so will start to give you a real feel for when compression is helping or hurting your music.
Do you have any questions about compression? Leave them in the comments section of our tutorial video above, and subscribe to the Splice YouTube channel for more tips, tutorials, and insights.
Explore royalty-free one-shots, loops, FX, MIDI, and presets from leading artists, producers, and sound designers:
February 6, 2026