.svg)
.svg)

Parallel compression is a popular but widely-misunderstood concept in music production—let’s demystify it.
Generally speaking, compression is one of those effects that has countless useful applications. Whether it’s limiting, de-essing, or multi-band processing, there’s an incredibly wide array of processes involving manipulating dynamics that employ compression at their core. Parallel compression is yet another one of these applications—below, we examine what it is, how it works, and why you might want to use it in your music.
See the table of contents below to quickly navigate to a specific section.
What you’ll learn about parallel compression:
- A recap of compression
- What is parallel compression?
- How to do parallel compression
- How parallel compression sounds
- Parallel compression plugins
A recap of compression
Before we dive into parallel compression, let’s quickly recap how compression works. Compression is a process that reduces the overall dynamic range of a piece of audio by detecting when it exceeds a designated level (the threshold), and then attenuating those portions by a designated amount (the ratio).
While compression technically makes things softer, in conjunction with make-up gain, we often use the effect to bring elements forward in our mix, or to ‘glue’ things together.
For a more in-depth explanation with examples, check out our introductory guide to compression:
The risk of over-compression
While traditional compression is incredibly useful as-is, one risk we need to always be weary of is over-compression. When the effect is taken too far, compression will wind up removing not only dynamic range on the macro level, but also the instantaneous transients in our music—the short but high-amplitude attacks that add energy to audio.
Over-compressing your tracks might make them louder strictly in terms of level, but at the expense of dynamics and excitement, which are often more valuable to the quality of your music (and also play an integral role in perceived loudness).
This is where parallel compression comes in.
What is parallel compression?
Parallel compression is a processing technique where a small amount of highly-compressed audio is blended with unprocessed audio, instead of applying a moderate amount of compression to the entire signal.
When used effectively, the effect allows us to get the best of both worlds: the punch and glue of compression, alongside the transients and dynamics of unprocessed audio. While there are no hard rules for what you can or should apply parallel compression to, the effect is popularly used in mixing to thicken, color, and add cohesion to large and prominent groups like drum buses and vocal stacks.
How to do parallel compression
There are two main ways in which you can apply parallel compression in your DAW: (1) via a manually-created bus, or (2) via the dry / wet knob available in many plugins. Let’s explore each approach in detail.
1. Creating a bus for manual parallel compression
Though slightly more complex, this is what most would consider the ‘traditional’ approach for using parallel compression. Basically, you would create a dedicated channel that whatever track(s) you want compressed is being sent to, and apply your compressor plugin on that channel alone. Then, using the track’s fader, you can dial in a modest amount of that signal alongside the unprocessed sound.
While the exact method may differ slightly from DAW to DAW, this approach is generally much easier understood when it’s demonstrated for you—see 0:45 of this video from In The Mix for an example.
The pro to getting acquainted with this method is that busing can also be used for virtually any other effect, from reverb to delay and more—check out our guide below for more on the technique:
2. Using the dry / wet knob on plugins
This is an approach that’s much simpler that effectively allows you to do the exact same thing. Many modern compression plugins will have a dry / wet or mix knob that allows you to create a blend between your compressed and bypassed audio.
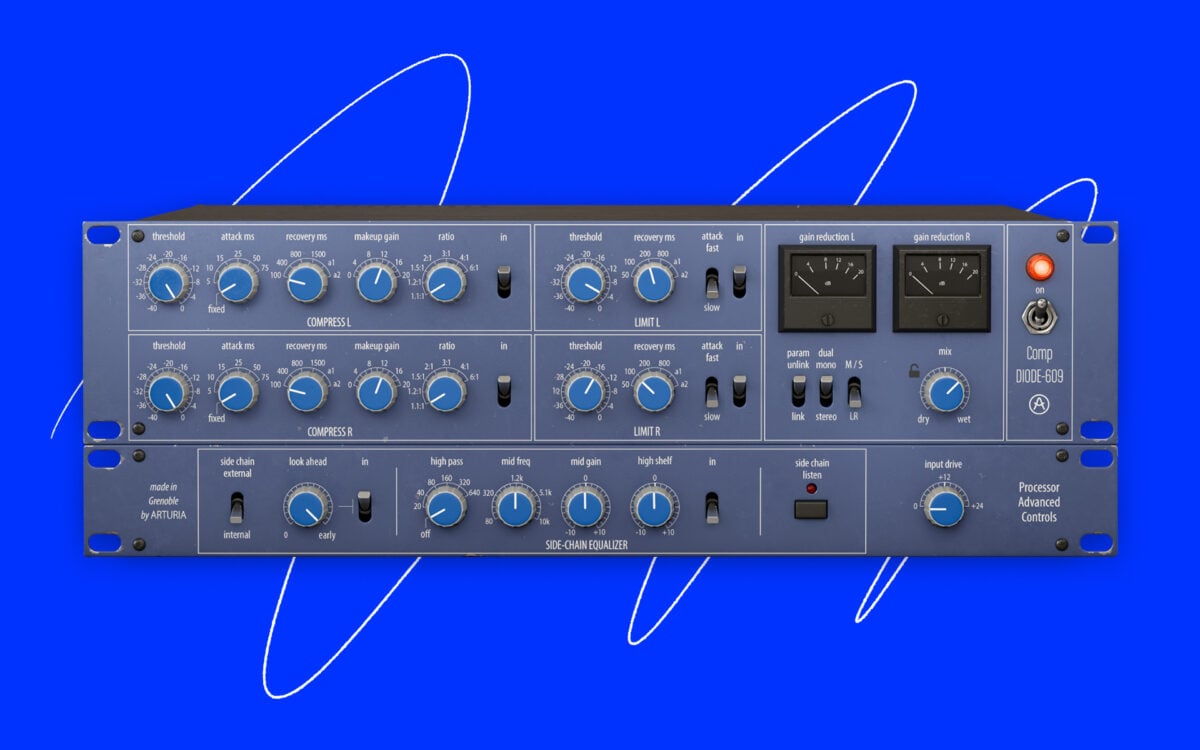
See the mix knob underneath the meters on Arturia’s skeuomorphic Comp DIODE-609 plugin for example, a bus compressor that’s part of their FX Collection:
The mix knob in Arturia’s Comp DIODE-609 (we’ll explore how to put it to use below)
Parallel compression on drums
Let’s take a listen to how parallel compression sounds in action. Below is an excerpt from a track that features a drum loop, without any parallel compression applied:
Going back to the Comp DIODE-609, let’s start by dialing in some compression using the plugin on the drums. Regardless of which of the two aforementioned approaches you’re taking, don’t hesitate to go more aggressive on the settings (e.g. low thresholds, high ratios, fast attack and release times, etc.) than you would in any other context here—remember, it’ll be blended in with the uncompressed audio.
For reference, here’s what our compressed drum loop sounds like when the ‘wet’ sound is isolated using the mix knob:
Feels pretty extreme, right? Well, here’s what it sounds like back in the context of our track, when the mix knob is set to just 25% instead of 100%:
While relatively subtle, in this example we used parallel compression to glue together some of the components that were previously jumping out in the drums a bit (like some of the hi-hats), without completely compromising the transients in the process.

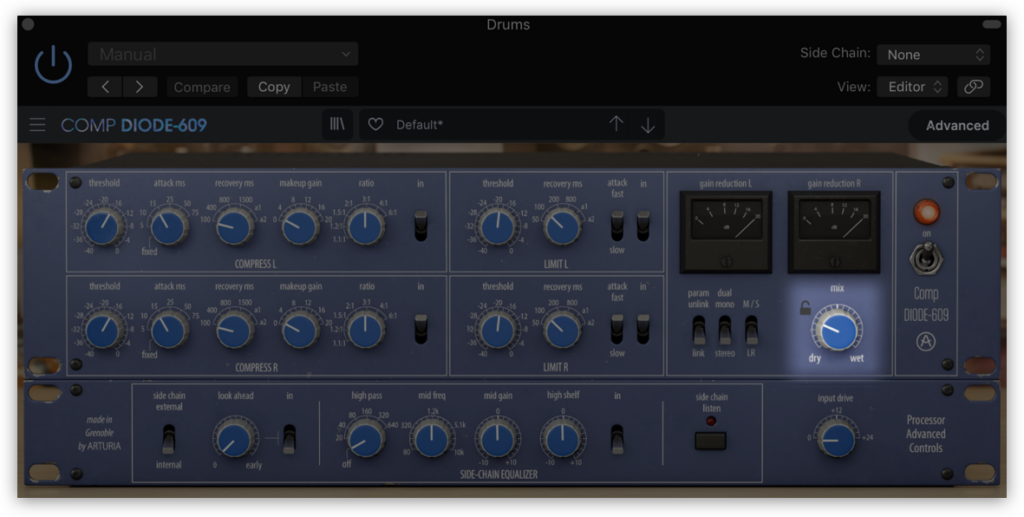
Our final settings on the Comp DIODE-609—modeled off of the iconic Neve™ stereo compressor and limiter, this plugin particularly excels at adding its own distinct color to your sounds
Parallel compression plugins
Due to the way it works, any standard compression plugin can be used to apply parallel compression, including those that are native to your DAW. Logic Pro’s stock compressors, for example, have a dry / wet knob that allows you to experiment with the technique very easily.
If you’re specifically looking for a more classic sound, emulation-based plugins like the aforementioned Comp DIODE-609 can help, while free plugins like OTT are also used to quickly dial in the more extreme settings that are a key part of parallel compression.
Going further with parallel processing
So there you have it! We hope this article helped you develop a better understanding around what parallel compression is and what it does in the context of producing a track.
As we hinted in our conversation around busing, what’s really cool is that parallel processing isn’t a concept that’s solely limited to compression. Whether it’s EQ, distortion, or anything in between, blending dry and heavily altered sounds can be a great way to introduce new sonic interest while preserving a piece of audio’s existing core characteristics.
Do you have any questions about this topic? What other production techniques would you like to see us discuss next? Start a conversation with us via the Splice Discord.
Try the Comp DIODE-609 in addition to an array of other top-notch effects plugins in Arturia’s FX Collection:
February 27, 2025