.svg)
.svg)


Illustration: Michael Haddad
Automation is one of the most fundamental yet flexible tools available in music production.
In this guide, let’s break down what automation is in the context of making music, and a few of the countless ways you can use it to achieve unique sounds.
Let’s dive in!
What is automation in music?
In music, automation is a technique that allows you to automatically (hence the name) adjust a specific parameter over time. Perhaps you want an instrument to be quieter for a particular section of a song, or you want your entire track to gradually fade out in the outro—automation allows you to achieve these sorts of changes (and much more, as we’ll explore shortly).
How to use automation in the DAW
All popular DAWs will have some sort of an automation curve feature, which allows you to adjust a parameter across specific moments in time by drawing in points and lines with your cursor that represent different values. If you own a MIDI controller, you could also use its knobs or faders to record automation in real time.
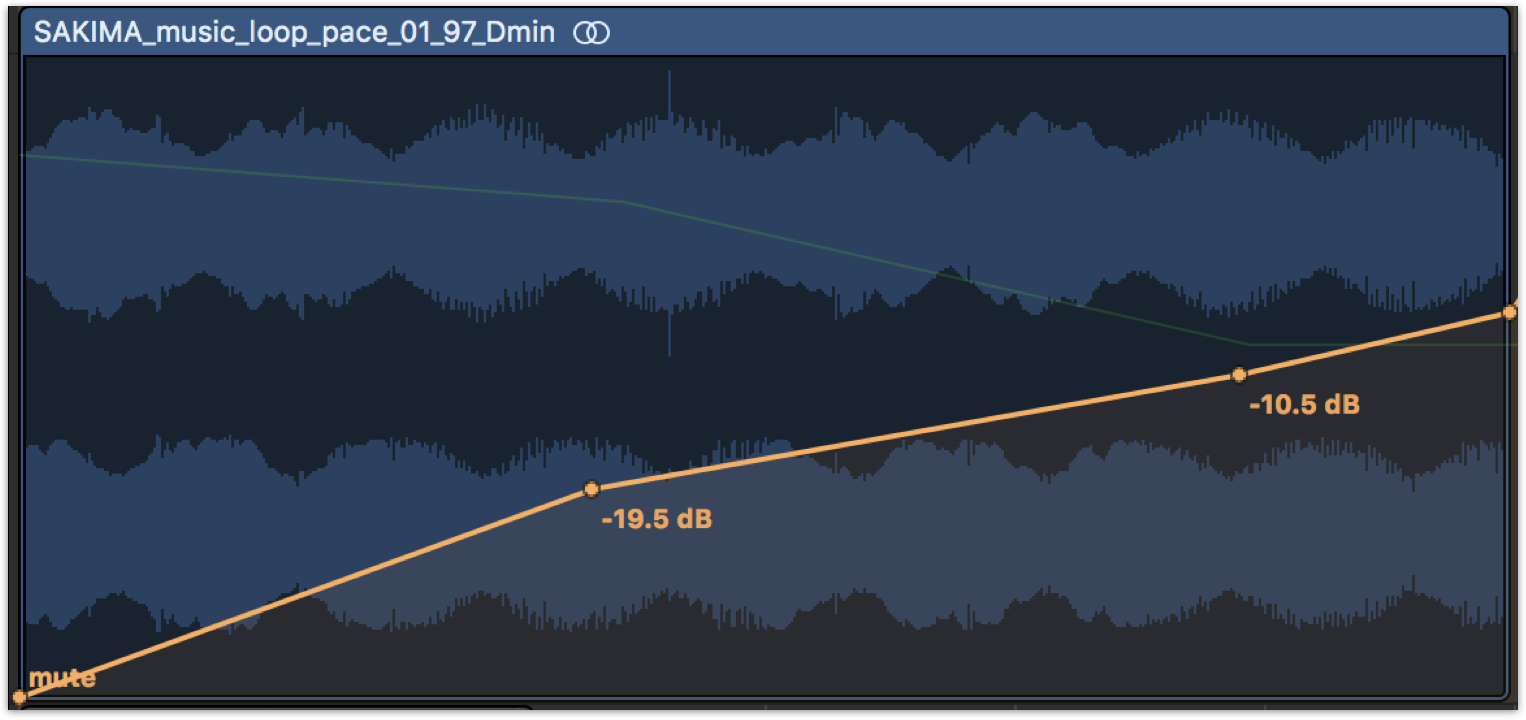
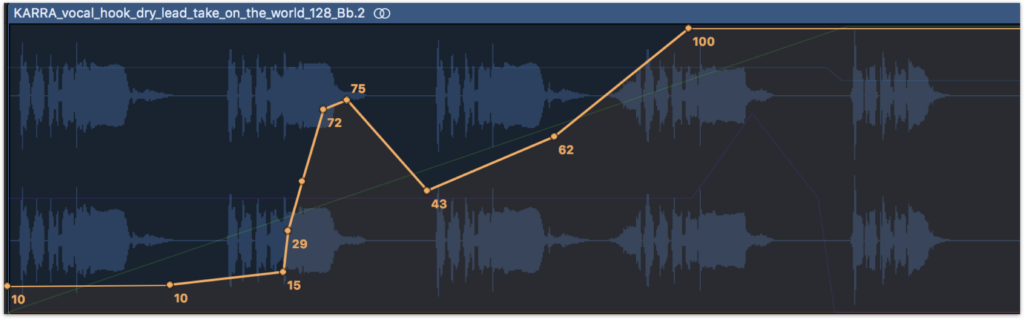
That said, let’s assume that all we have is our DAW for the sake of this tutorial—below, you can see how automation is manually added to the volume of a track in Logic Pro to create a fade-out effect:

Take a listen to the resulting sound:
Compare it with the unprocessed sample
Notice how the volume stays consistent for the first half of the sample, but gradually decreases in the second half, following the line that we established with automation.
In music production, automation tends to be most heavily associated with changes in volume like the one above. This is likely largely due to the fact that most DAWs first display automation lanes in relation to volume by default, unless you configure them in some other way (and in the early days of your music production journey, you might not even know that this is possible).
However, the reality is that automation can be used for volume and so much more—and once you discover that it can be applied to add movement to literally any parameter, your sound design possibilities expand exponentially.
Using automation for sound design
While there are a near infinite number of parameters that you can add automation to, below we take a look at five effects that you can get started with to get your creativity flowing.
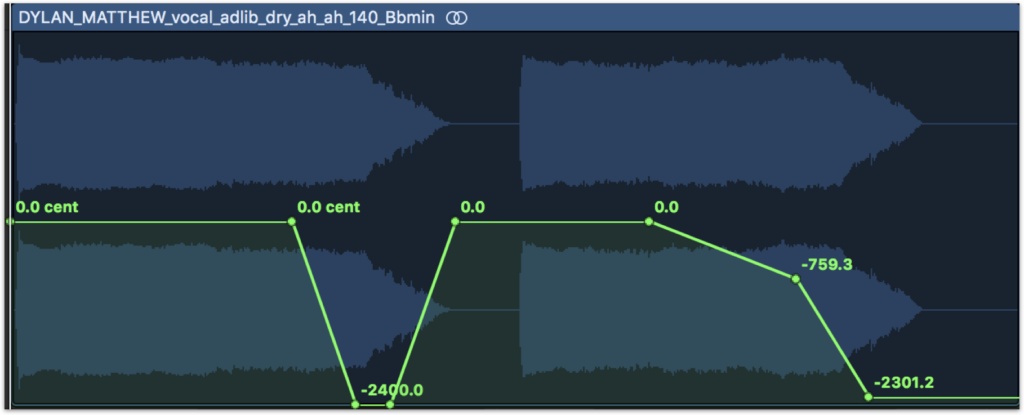
1. EQ
Right alongside volume faders, EQ is one of the most fundamental tools that many of us find ourselves constantly adjusting across the tracks in our projects. It also happens to be something that can be a great entry point for creative automation.
Two particularly versatile tricks that you may want to try starting out with are automating the cutoff frequency of low-cut and high-cut filters over any number of beats or bars.
Automating the former sounds like weight is gradually being added or removed to a sound:
Compare it with the unprocessed sample

On the other hand, automating the high-cut filter’s cutoff frequency creates the feeling of the sound being submerged or removed from under water:
Compare it with the unprocessed sample

Automating different aspects of EQ can be great for both designing these sorts of pronounced effects as well as making more subtle moment-to-moment adjustments when mixing that create space for the different sounds in your arrangement.
2. Panning (stereo image)
Another common target for automation is panning. By moving the stereo position of a sound over time, you can create an exciting effect where the sound source travels from one headphone or speaker to the other.
Compare it with the unprocessed sample
You can further experiment with this sort of effect via stereo tremolo plugins. These will often let you also sync the movement with the BPM of your DAW for a more rhythmic character, without you having to painstakingly align your automation curves to the grid by hand.
Compare it with the unprocessed sample
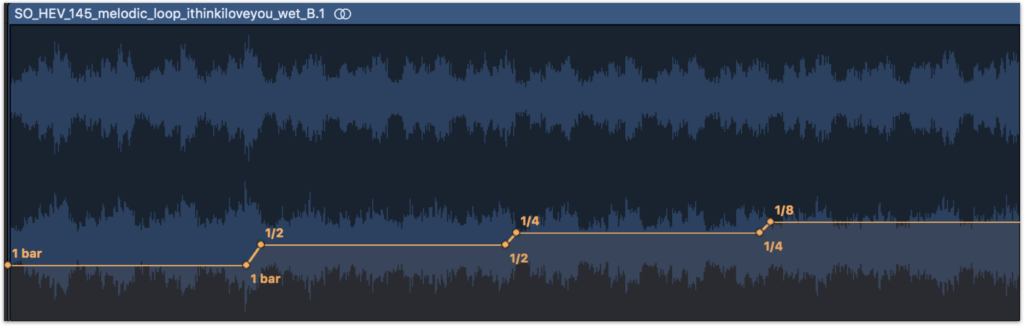
3. Reverb
In the real world, reverb is often an unchanging effect, determined by fixed properties like the size, shape, and reflectivity of the space we’re in. But what if we had the superpower to move and warp our walls dynamically?
Automation allows us to simulate this and more. Changing the size or decay time can make the virtual room feel like it’s expanding or shrinking, while adjusting the wet / dry balance can wash out a sound (as heard below) or bring it into focus.
Compare it with the unprocessed sample
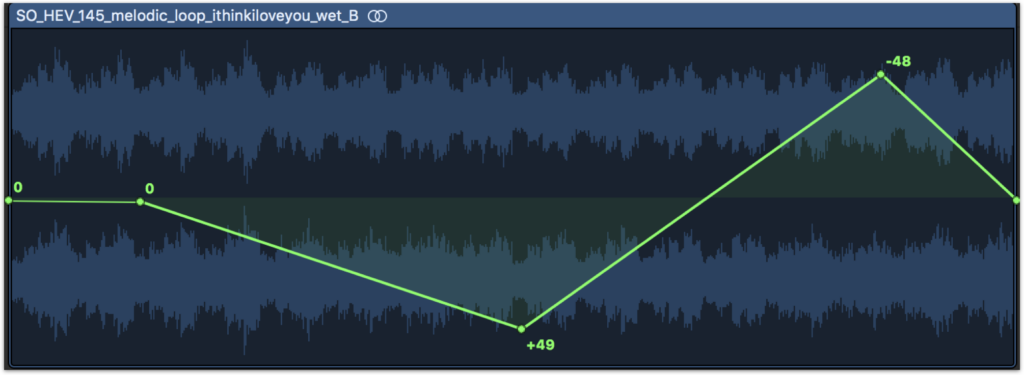
4. Pitch
Have you ever wanted to achieve a tape stop or whammy effect? It turns out you might not need a specialized third-party plugin to pull these off—all you need to do is automate the pitch of your sounds.
Compare it with the unprocessed sample
What’s key for achieving these effects is to make sure you’re automating the fine pitch (which is displayed in cents), rather than the transposition (which is displayed in semitones)—this will ensure that your glides are smooth and continuous, rather than occurring in staggered half-step increments. Combining it with panning and delay edits can also further help the effect come to life.
5. Synthesis parameters
Last but not least, things also get really interesting when you start automating different aspects of synthesis within your software instruments and effects. What if a synth pluck’s sustain evolved over the course of a melody? What if you sped up or slowed down an LFO rate over time, or shifted the balance between two parameters on an XY pad? The sky is truly the limit here.
Below, we’ve automated the Nasal, Formant, Humanize, and Output Level parameters of modules across iZotope’s VocalSynth to achieve an evolving, otherworldly effect with our vocals.
Compare it with the unprocessed sample
If you look closely, you can see all of the other automation lanes underneath the one that’s currently being displayed
How to use audio buses for automation
Whether it’s the gradual release of a high-cut filter for an intro or a climb in pitch that builds anticipation before a drop, let’s say that you want to add the same automated effect to a bunch of different tracks. Of course, one thing you can do is add the effect plugin to every relevant track, and then draw or copy-and-paste the same automation curves on each of them.
However, a more efficient path (for both your time and your CPU) could be to use audio buses, which can let you route all of your tracks to just one instance of the effect. To learn how to do this for your specific DAW, be sure to check out our in-depth guide on busing and routing audio tracks.
Conclusion
As you can see, the intersection between automation, mixing, and sound design is incredibly vast—and we’ve truly only scratched the surface here. Did any of these examples spark any new ideas for you? What parameters do you enjoy automating in your music that we didn’t cover above? Share your thoughts and creative results with a community of other musicians over at the Splice Discord.
Explore Splice INSTRUMENT, our virtual instrument plugin that puts an ever-growing catalog of free and premium sounds at your fingertips:
September 20, 2023


