VocalSynth 2 is a plugin that allows you to elevate your vocal track from great to epic.
Containing a suite of synthesizer-based modules and otherworldly sounds, the plugin allows you to craft the unique sound for your vocals that you’ve been searching for. VocalSynth 2 is iZotope’s brand-new successor to VocalSynth, and showcases an improved UI and a host of additional features. This feature guide will overview some of the essential components of VocalSynth 2 that you’ll want to be aware of to get the most out of the powerful plugin.
Voice to verse—anywhere. With the addition of Splice Mic, you can instantly test and record ideas, explore genres, and unlock new creative possibilities, all from the Splice mobile app.
Overview

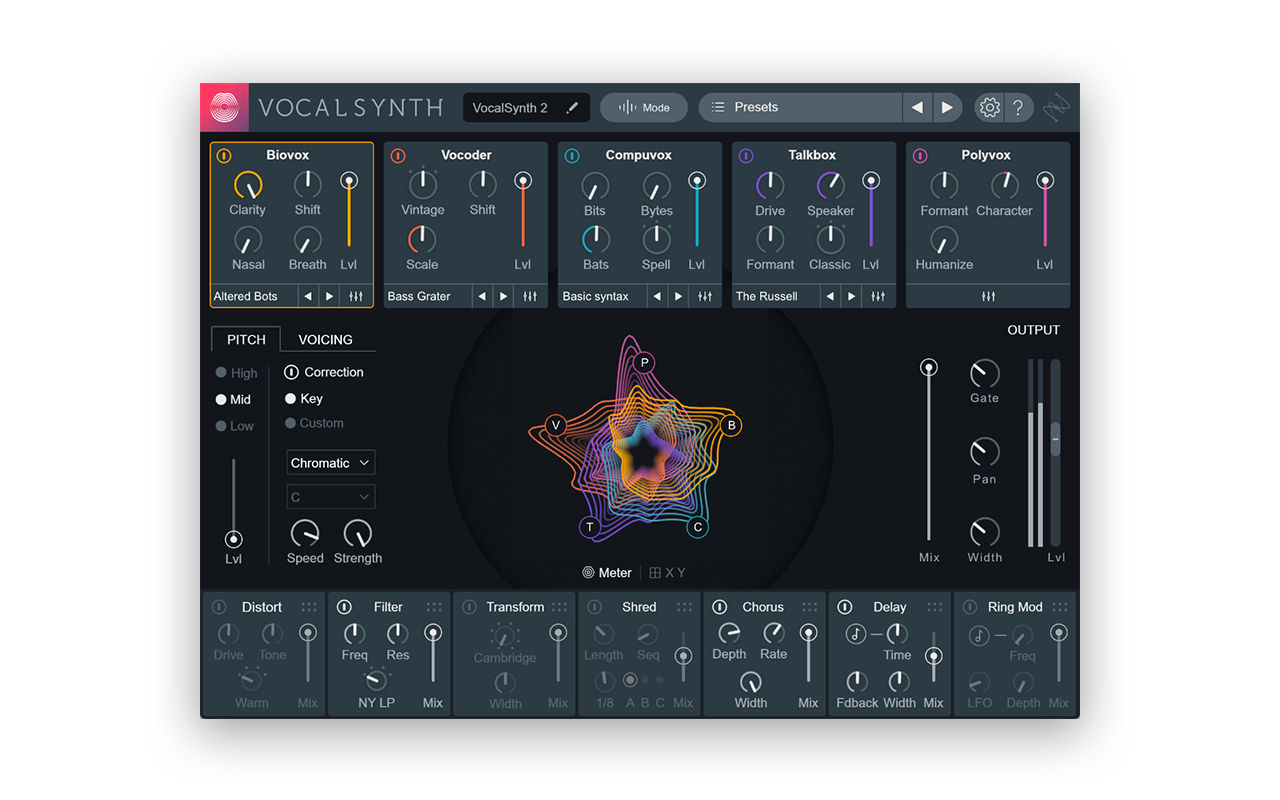
An understanding of the key areas of the interface will allow you to maximize your workflow with VocalSynth 2. The first thing to pay attention to is the Mode button at the top of the GUI, which allows you to operate the plugin in one of three ways:
- Auto Mode relies on pitch detection and internal synthesizers to generate notes, allowing you to simply insert the plugin on an audio track and hit play.
- MIDI Mode lets you play harmonies into VocalSynth 2 by adding the plugin to a software instrument and sidechaining a vocal.
- Sidechain Mode can be used to route non-traditional audio sources (guitars, synthesizers, etc) to the sidechain input of VocalSynth 2, turning any sound imaginable into a vocal effect.
Directly below the Mode button lies five synthesis modules that are the essential tools for creating your sound: Biovox, Vocoder, Compuvox, Talkbox, and Polyvox, each with its own controls and characteristics. At the center is the anemone, an animation that reacts in real-time as you bring in new modules. This anemone isn’t just a pretty visualizer – it’s also interactive, allowing you to adjust the slider icons for each module to create the perfect blend. Pitch and Voicing control panels located to the left of the animation allow for key-based pitch correction and voice synthesis. Lastly, at the bottom of the interface there’s an effects chain, which lets you manipulate your signal using various effects to create a wide range of sounds.
Now that we have a high-level understanding of the major components in VocalSynth 2, let’s explore some of these features in greater detail.
1. The synthesis modules

Biovox, Vocoder, Compuvox, Talkbox, and Polyvox are the five modules that are responsible for creating the unique timbres of VocalSynth 2. Each has a regular view containing essential controls as well as an Advanced View that can be accessed by clicking on the arrow tab at the bottom of the module’s panel. Let’s take a look at the parameters in the regular view of each module to get a broad understanding of its sonic signature.

1.1 BiovoxBiovox is a module that’s unique to VocalSynth 2, and is one of the most powerful features offered by the plugin. Inspired by articulatory synthesis, the module estimates a vocal tract shape by analyzing incoming audio and allows you to freely manipulate the vocal tract length and shape using just a few controls:
- Clarity controls the balance between the synth signal and vocal intelligibility.
- Shift alters the vocal tract length to shift the formants of the processed vocal higher or deeper, spanning chipmunk-like sounds to monster-like sounds.
- Nasal changes properties related to the soft palate to introduce a more nasal quality in the processed vocal.
- Breath mixes in a breathy, whisper-like character to the vocal.

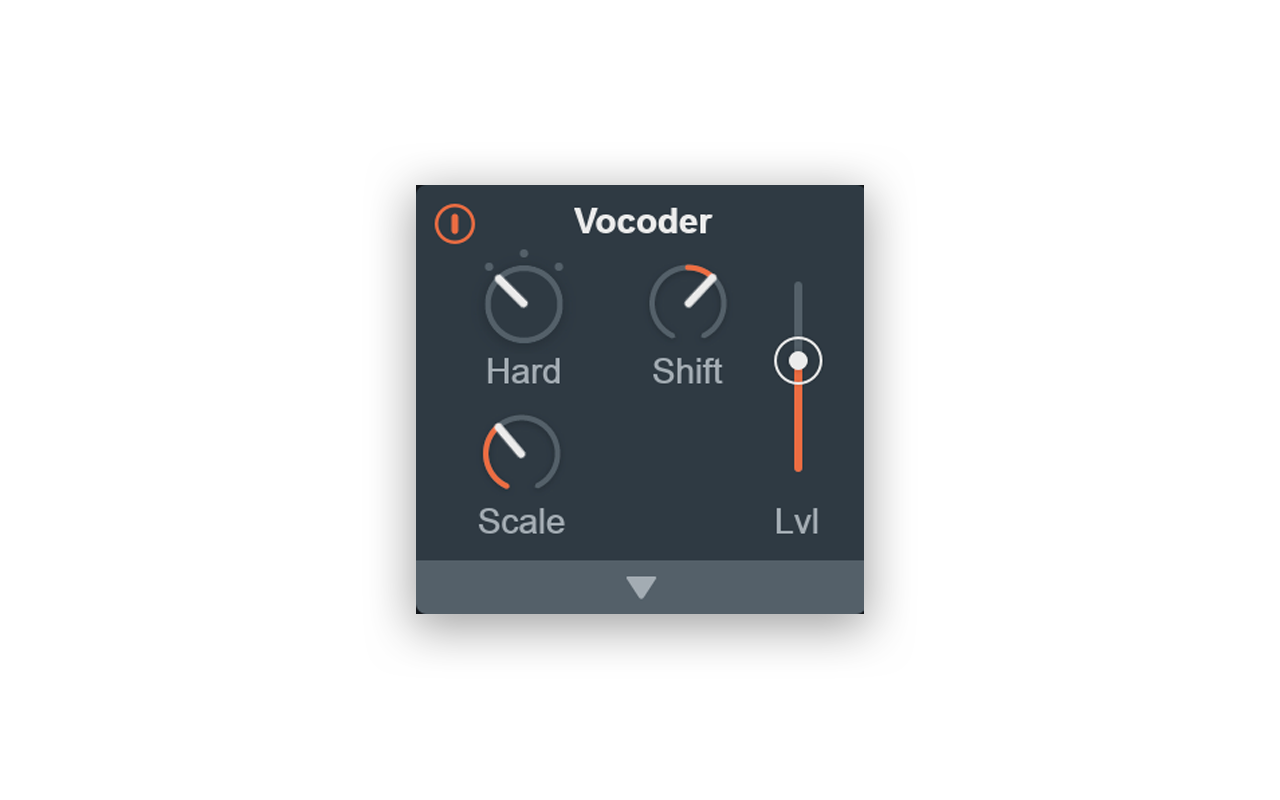
Pro Tip: The Vowel Chart in Biovox, available in the Advanced View, is an incredible tool worth highlighting. The chart controller can be used to impose the sound of a particular vowel onto the signal by moving a node to different locations on the chart. Automating this node can create interesting effects surrounding pronunciation. 1.2 VocoderThe vocoder module creates a texture that sounds as though synthesizers are speaking, a sound popularized by the likes of Daft Punk. Several parameters of the module can be fine-tuned:
- The Mode can be toggled between Smooth, Vintage, and Hard, with each having a different number of frequency bands and spacing characteristics.
- Shift alters the amount of frequency shift applied to each vocoder frequency band, affecting the overall brightness.
- Scale determines how quickly the vocoder responds to changing vowel sounds. Higher values will increase articulation, whereas lower values might sacrifice intelligibility for a softer, pad-like result.

1.3 CompuvoxCompuvox is based on Linear Predictive Coding (LPC), a technology which has existed since the late 1960s. LPC was originally a communications technology for encoding intelligible speech while preserving bandwidth, but nowadays its mechanical sound is commonly used as an effect in electronic music. Let’s take a look at Compuvox’s most central parameters:
- Bits adds digital aliasing noise to the signal. Use it gently to add a compelling inharmonic quality to your vocals, or crank the dial to reduce your audio to digital chaos.
- Bytes artificially prolongs vowel sounds, creating distinctly non-human yet musically useful effects.
- Bats increases noise and vocal gravel for a sound that resembles the voice of a very certain winged-animal-man.
- The Mode can be toggled between Spell, Read, and Math, which each represent different flavors of LPC processing.

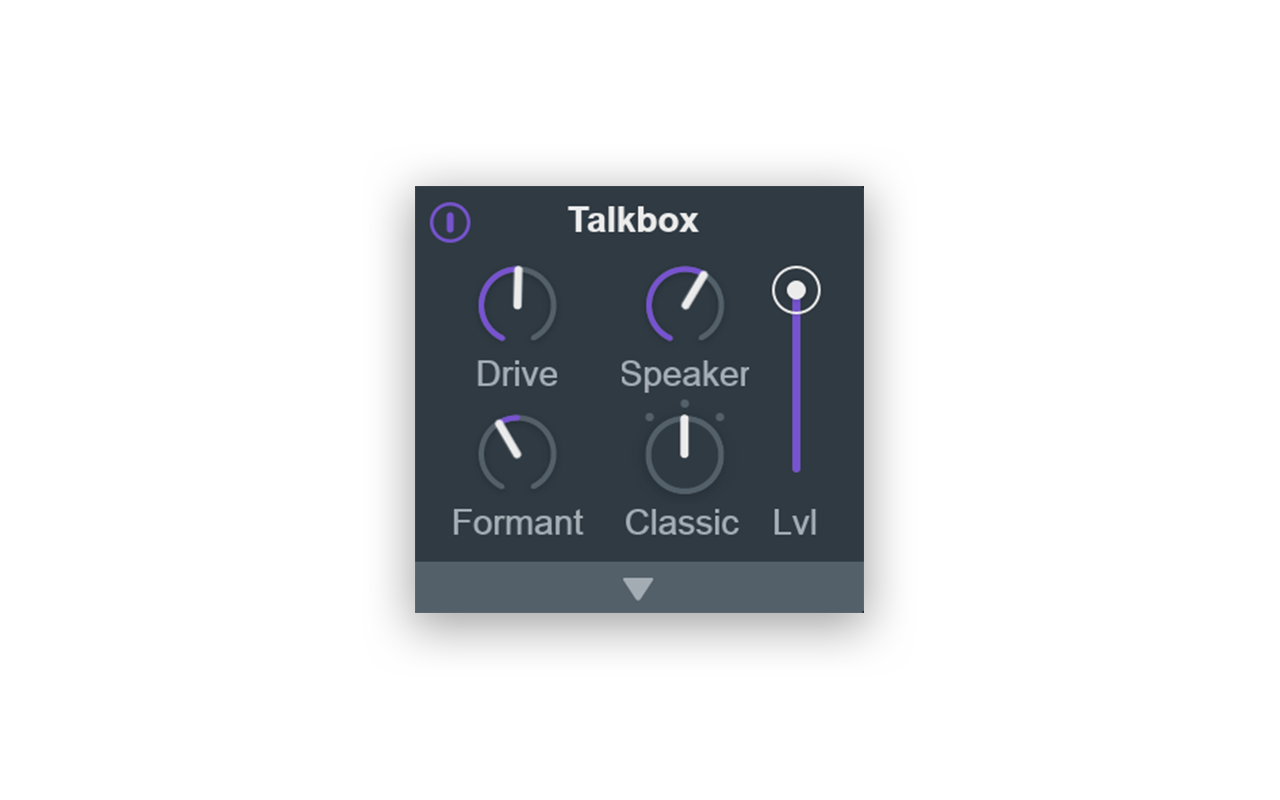
1.4 TalkboxThe Talkbox module emulates the hardware talkbox effect popularized by rock artists such as The Who, Stevie Wonder, and Bon Jovi, to name just a few. With its tube-free design and unique formant shifting feature, VocalSynth 2’s Talkbox module is an unbeatable alternative to the traditional Talkbox pedal. Several parameters can be freely manipulated:
- Drive boosts the input gain into Talkbox, with higher values adding a crunchy distortion to the vocals.
- Speaker controls the amount of talkbox convolution.
- Formant adjusts the amount of formant shift applied to the signal.
- The Mode can be toggled between Dark, Classic, and Bright, with each influencing the high frequency response.

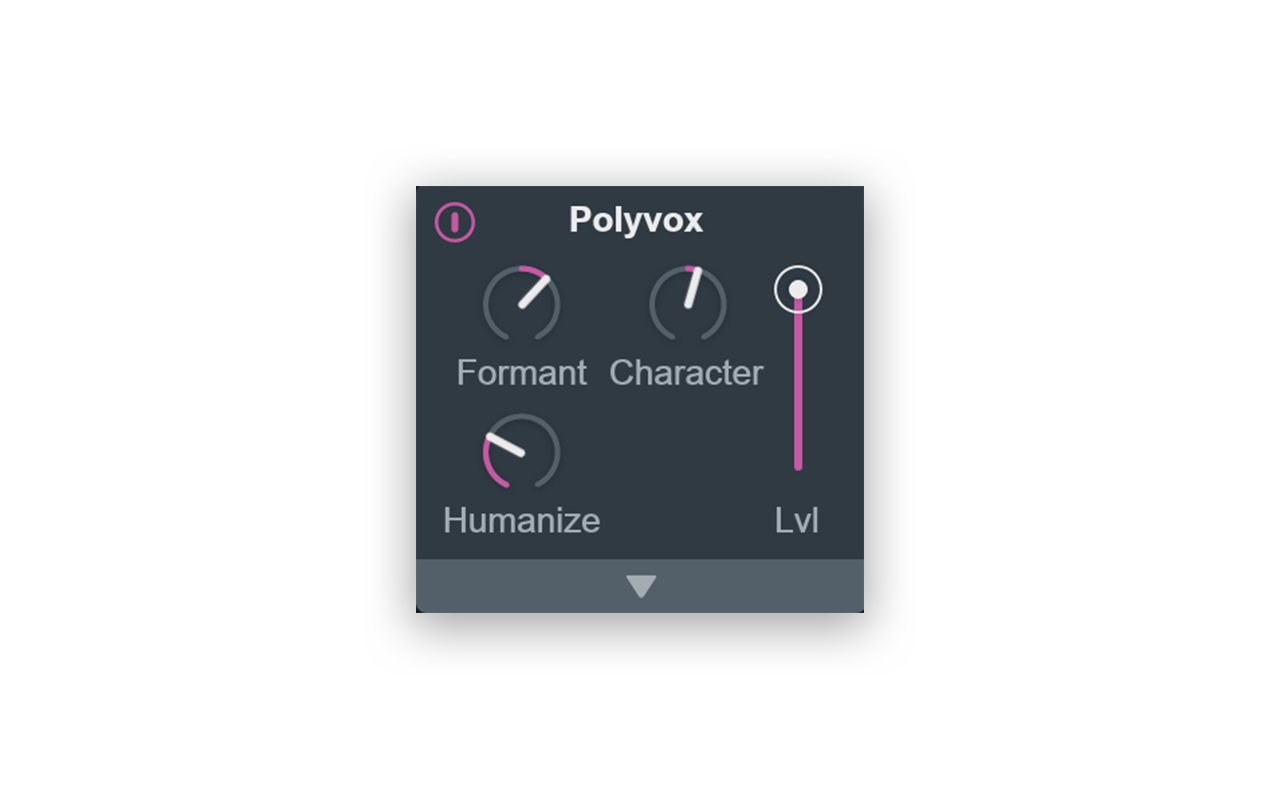
1.5 PolyvoxLast but not least, Polyvox is a voice generator that creates vocal harmonies based on your vocal track. While other vocal harmony effects units may be excessively complex, Polybox allows for you to achieve the same results by commanding just a few dynamic controls (while also offering additional granularity in the Advanced View):
- Formant, as in Talkbox, transposes the vocal formants of the signal.
- Character determines the relationship between the incoming vocal’s formant envelopes and how they’re applied to the outgoing sound.
- Humanize varies time and pitch values, and can be used to enhance realism or reduce phase cancellation.
2. Pitch and Voicing control panels
While the synthesis modules are responsible for crafting the timbre, the Pitch and Voicing control panels allow you to set pitch detection and correction parameters, dry voice gain, and synth voice parameters. You can easily toggle between the two by clicking on their respective tabs. The Pitch control panel lets you identify a predefined or custom Scale Type and Key, while the Voicing control panel offers options for Mono / Poly modes, Interval distance between generated auto voices, and more.
Pro Tip: The Glide parameter in the Voicing control panel is a hidden gem, allowing you to adjust the portamento speed when transitioning from one note to another in Mono mode.
3. The effects chain

The effects chain at the bottom of the GUI allows you to add distortion, filter, transform, shred, chorus, delay, and ring modulation effects to your sound. Each effect’s position in the chain can be freely rearranged by clicking and dragging the dots above the mix slider in any effect panel. While most of the effects available are quite common, the shred effect is one that’s unique to VocalSynth 2 – the effect takes chunks of audio and repeats them at a user-defined rate, allowing for cool stutter and glitch effects.
4. Inter-plugin communication

One last detail worth mentioning is VocalSynth 2’s ability to integrate with Neutron 2 Advanced via iZotope’s inter-plugin communication. All you have to do is follow the steps below:
- Create several aux tracks and route your vocals to them.
- Insert an instance of VocalSynth 2 on each aux track.
- Craft unique sounds using VocalSynth 2 and title each instance something that’s easy to remember.
- Insert the Visual Mixer on any track and open it.
All of the copies of VocalSynth 2 will show up in the Visual Mixer in pink, and your robot chorus can now be mixed effortlessly – iZotope plugins are absolutely powerful and viable on their own, but their full potential is realized when they’re used in conjunction with one another.
This concludes our tour of VocalSynth 2’s main features! There’s plenty more to explore with the plugin such as presets, different view modes, advanced controls, and more, but hopefully this guide gives you a solid foundation to get started.
Explore industry-leading plugins, bundles, DAWs, and more:
May 23, 2018

.svg)
.svg)


