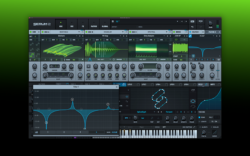
.svg)
.svg)

Since their inception, synthesizers have played a central role in the art of making music.
From Michael Jackson’s “Thriller” to Daft Punk’s “Around the World,” some of the most beloved music in history was created with synthesizers at the center. Synths are a gift to creativity—but what doesn’t feel like as much of a gift is the high price point that comes with many of them. Fortunately, today there are countless software instruments that allow you to explore synthesis at a fraction of the price to hardware counterparts, with some even emulating iconic analog units rather faithfully.
But how does one actually use synths effectively? Above, Isaac Duarte returned to the Splice YouTube channel to walk through some synthesizer basics, covering an array of topics including oscillators, ADSR envelopes, and more—watch along to hear him demonstrate the concepts with Analog Lab and V Collection, and read on for more insights below.
Feel free to use the table of contents below to navigate to a specific section.
Synthesizer basics: What you’ll learn
- What is an oscillator?
- What are ADSR envelopes?
- What are filters?
- What are modulators?
- What are audio effects?
- How to get started
- Best synths for beginners
Feeling ready? Let’s dive in!
Splice INSTRUMENT is a virtual instrument plugin that puts world-class sounds at your fingertips. Download it for free and start making music with hundreds of pro-quality presets—plus new, exclusive Free Drops every month to keep your ideas flowing.
What is an oscillator?
An oscillator is a device that creates a repeating signal, usually in the form of a wave that cycles over time like a sine wave, square wave, triangle wave, etc. Oscillators are at the heart of synthesis, although they’re also used in many non-musical applications as well.
Many synthesizers will generate these simple waveforms with an oscillator, which can then be shaped by ADSR envelopes, filters, modulators, and effects to become the sounds you hear as leads, basses, pads, etc. Let’s explore each of these levers in more detail.
What are ADSR envelopes?
ADSR envelopes are a core part of audio synthesis, allowing you to shape how a sound behaves over time. ADSR stands for attack, decay, sustain, and release:
- Attack: How long it takes the sound to go from silence to its peak level when a note is pressed.
- Decay: How long it takes the sound to drop from its peak level to the sustain level.
- Sustain: The volume level that stays constant while you hold the note.
- Release: How long it takes the sound to fade to silence after you let go of the note.

The ADSR envelope plays a key role in shaping your synth sound into a pad, lead, pluck, etc. For example, if you have a slow attack, decay, sustain, and release, you’ll create a pad-like sound. Meanwhile, if you tighten up the attack, decay, sustain, and release, it’ll start to sound more like a pluck.
What are filters?
Filters shape the tone of a sound by altering the harmonic content, cutting or boosting certain frequencies. For example, to make a sound darker, you might use a low-pass filter to cut high frequencies. On the other hand, if you want a focused, thinner sound for a lead, you might use a band-pass filter to only let a specific range of frequencies through.
Filter vs. EQ
Filters are essentially synonymous with EQ, with the key difference that in synthesis, they’re often dynamic—meaning their behavior can change over time using something like a modulator.
What are modulators?
Modulators change or control other parameters of a synth over time, and are key for breathing life into static sounds. Some common parameters that might be modulated include:
- Filter cutoff: Great for effects that involve frequency movements like sweeps and growls.
- Pitch: Great for vibratos, glides, and subtle detuning that can emulate analog synths.
- Wavetable position: Great for morphing, evolving textures if your synth supports wavetables.
- Panning: Great for creating a sense of motion in the stereo field.
You might use an ADSR envelope or LFO (low frequency oscillator) to determine the behavior of your modulator, and use a single modulator to affect multiple characteristics of your sound. As you get more advanced, you can even do things like modulate your modulator to achieve more chaotic or complex sounds.
What are audio effects?
Last but not least, audio effects can be applied to your synth to further alter or enhance your sound. Some synths will have these effects built directly into them, but you can also use separate units or plugins to add them as well. Here are just a few of the most common audio effects you’ll see:
- Reverb: Simulates a sense of space, often used to make sounds feel bigger or more atmospheric.
- EQ: Boosts or cuts specific frequencies, often used to sculpt sounds.
- Delay: Repeats the sound to create echoes or rhythmic patterns.
- Distortion: Adds harmonic content by clipping a signal, often used to make sounds warmer, crunchier, or more aggressive-sounding.
- Compression: Controls dynamics by attenuating loud parts of a signal, often used to make sounds feel more controlled or ‘glued’ with the rest of the mix.
- Chorus: Slightly detunes and delays duplicates of the sound, often used to make sounds feel bigger or more lush.
Exploring synthesizer basics firsthand
While it’s great to understand what the fundamental topics above mean on paper, the best way to get started with synthesizer basics is by diving into a synth and exploring them firsthand.
In the tutorial above, Duarte suggests two possible approaches: reverse engineering and tweaking presets. “Reverse engineering is basically taking something apart and seeing how it works,” he explains. “What I might do is pick a synth preset I like, duplicate it, open both up at the same time, and then initialize one. From there, I would literally just go through and try to match all the knobs. Just hear what it does, one by one—experience is the best teacher.”
“When it comes to tweaking presets, I don’t know about you, but I don’t believe in reinventing the wheel. There are already so many great sounds that have been made that you can use as starting points and learn from. And then once you know how a synth works, you can do things like turn a bass into a lead.”
Best synths for beginners
Whether it’s Logic Pro’s Alchemy or Ableton’s Operator, most DAWs will have a built-in software instrument or two that you can use to explore these synthesizer basics for absolutely free. That said, if you’re looking to take your synthesis to the next level, a third-party plugin could help you expand your sonic horizons.
If you’re looking for analog-inspired sounds, Arturia’s Analog Lab is a great option because it offers a collection of high-quality emulations that are packaged with a beginner-friendly interface—this is the synth that Durate showcases in his tutorial above. You can also try it for free and rent-to-own it, which minimizes the financial barrier to entry.
While its UI might look more daunting by comparison, Xfer Records’ Serum can be another great option. Unlike Analog Lab, it primarily focuses on digital sound design and synthesis over analog emulation. That said, like Analog Lab you can also try it for free and rent-to-own it, and because it’s one of the most widely-used software synths on the market, there are a near-infinite amount of videos and educational resources available to help beginners on their journey. You might be relying on its presets at first, but it’s a worthwhile synth to invest in that you’ll never outgrow.
Synthesizer basics: Conclusion
And there you have it! Hopefully this article made exploring synthesizer basics a little less intimidating and gave you some ideas for how you might get started. Do you have any questions on any of the concepts covered? What other topics in music production would you like to see us explore next? Let us know in the comments section of the video, and subscribe to the Splice YouTube channel for more producer-led tips, tutorials, and insights.
Try Analog Lab for free, and then rent-to-own it until it’s yours:
April 23, 2025