.svg)
.svg)


iZotope’s RX is best known for its audio repair and enhancement capabilities, adored by the largest broadcast and post-production facilities across the globe.
That said, RX 7, the latest version of the toolkit, also boasts various features that make it a powerful asset for commanding and elevating musical performances. Whether you’re working with post production or music production, this feature guide will overview some of the essential components that you’ll want to be aware of to get the most out of RX 7 Standard.
Overview
RX 7 Standard has two primary components: the standalone RX Audio Editor, and a collection of plugins that can be used right within your DAW. We’re going to focus primarily on the standalone editor, which hosts some of the most powerful functionalities RX 7 Standard has to offer (and also includes all of the individual plugins).
When you open up the editor, you’ll be greeted by a blank slate that looks something like this:

To get started, select an audio file from your computer using the “Open File” button, or simply drag and drop it right into RX 7 Standard. Up to 16 audio files can be opened at a time, so feel free to work on many different audio files in parallel. Once an audio file is loaded up, the GUI will display a spectrogram representation of your waveform:
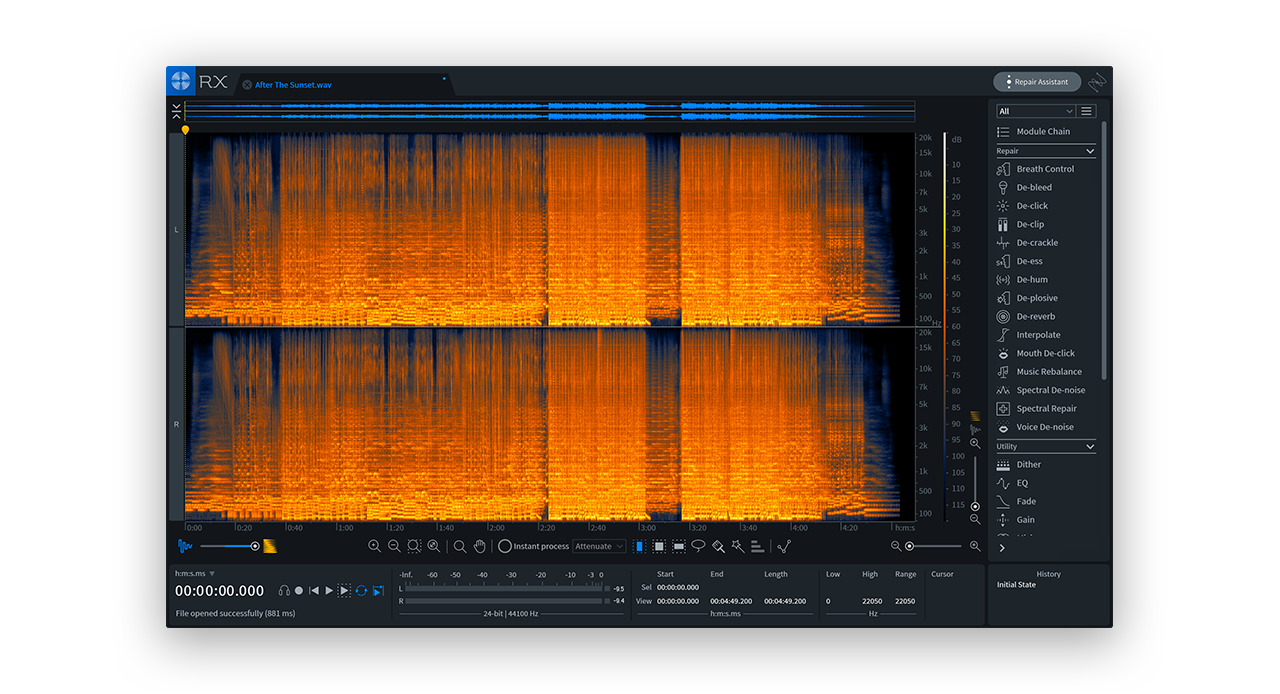
Pro Tip: Want to see a standard waveform rather than a spectrogram display (or a little bit of both)? Use the slider on the bottom left of the GUI to adjust the waveform / spectrogram opacity:

This is the basic setup for using RX 7 Standard – you can now begin editing and enhancing your audio using the modules accessible via the right-hand bar. Though we won’t go through all of them, we’ll highlight some key components – starting with Music Rebalance.
Music Rebalance
One of the biggest new features introduced in RX 7 Standard is Music Rebalance, an intelligent tool that employs a machine learning-trained algorithm to identify voice, bass, percussion and other individual components within a greater mix. With Music Rebalance, a mix can be adjusted and re-animated regardless of whether you have the stems at hand. Subtly boost your bass and percussion, or fearlessly isolate or remove vocals from a track according to your needs.
Once you click on the Music Rebalance feature, it’ll open up a separate window that looks something like this:
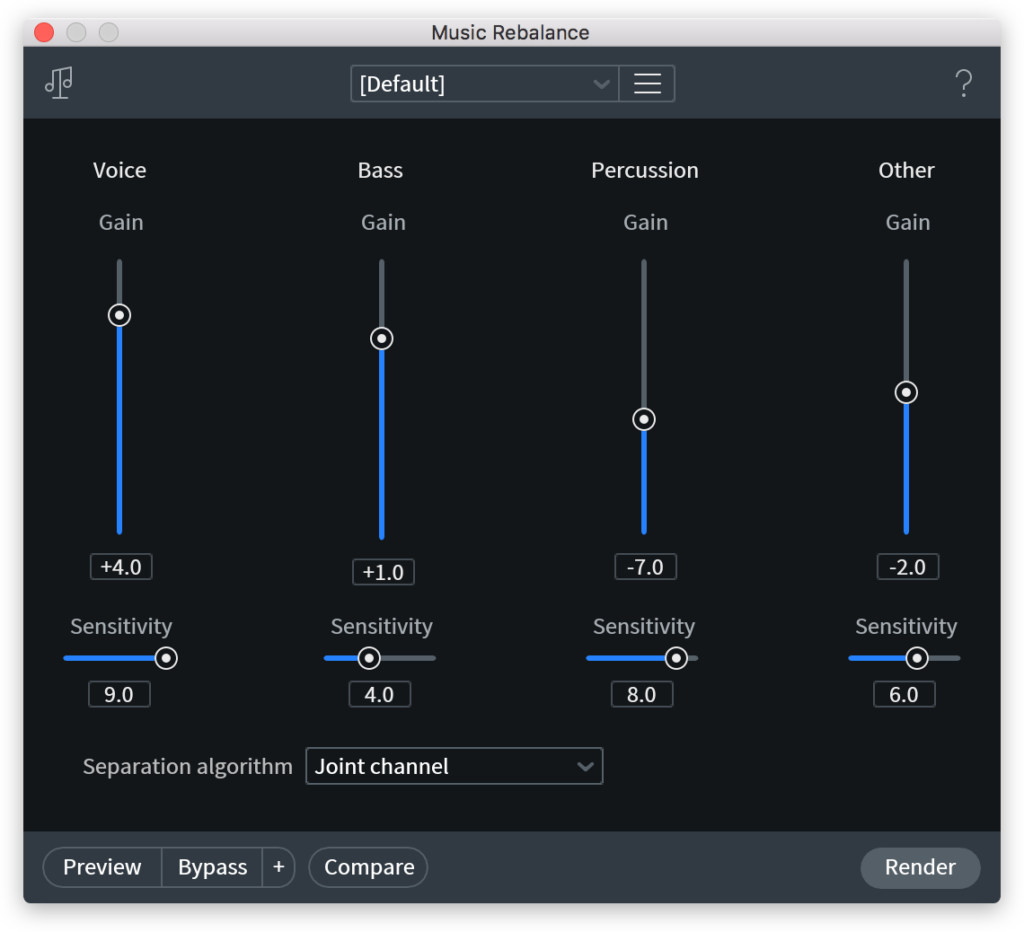
Let’s explore some of the adjustable parameters in greater detail:
- Gain adjusts the dB level of the particular component (voice, bass, percussion, or other).
- Sensitivity sets how strict the separation algorithm will be in defining what it considers to be a particular type of sound. Low values will contain less bleed in exchange for more artifacts, while higher values will contain more bleed in exchange for less artifacts. Note that the sensitivity values are relative to one another, meaning that setting all values to 3.0 is the same as setting all values to 9.0.
- The separation algorithm determines how the module separates the sound sources, and can be set to channel independent, joint channel, or advanced joint channel mode. The channel independent mode offers the fastest but lowest quality separation, while the advanced joint channel mode takes more processing time but offers the highest quality separation.
Pro Tip: Each setting you create can be previewed, bypassed, compared, and rendered. Consider previewing a lower quality demo before comparing, since the latter can take some time to load. That said, the compare function is extremely helpful for experimenting with and A/Bing different sensitivity and gain settings before choosing one to render.
Repair Assistant
Another significant addition brought to RX 7 Standard is Repair Assistant, a feature that detects noise, clicks, sibilance, and more so that you can clean up your audio with more efficiency and effectivity than ever. You can access this intelligent helper by pressing Repair Assistant button on the top right corner of the application. This will initiate a menu that prompts you to identify a material type – dialogue, music, or other:

Once you select the appropriate source and hit “Start analysis,” Repair Assistant will begin analyzing your audio for issues in clipping, clicks, hum, and noise:

Pro Tip: Confident that your audio already sounds great? If Repair Assistant doesn’t find any issues in these categories, it will still generate some subtle cleanup processing chains for you.
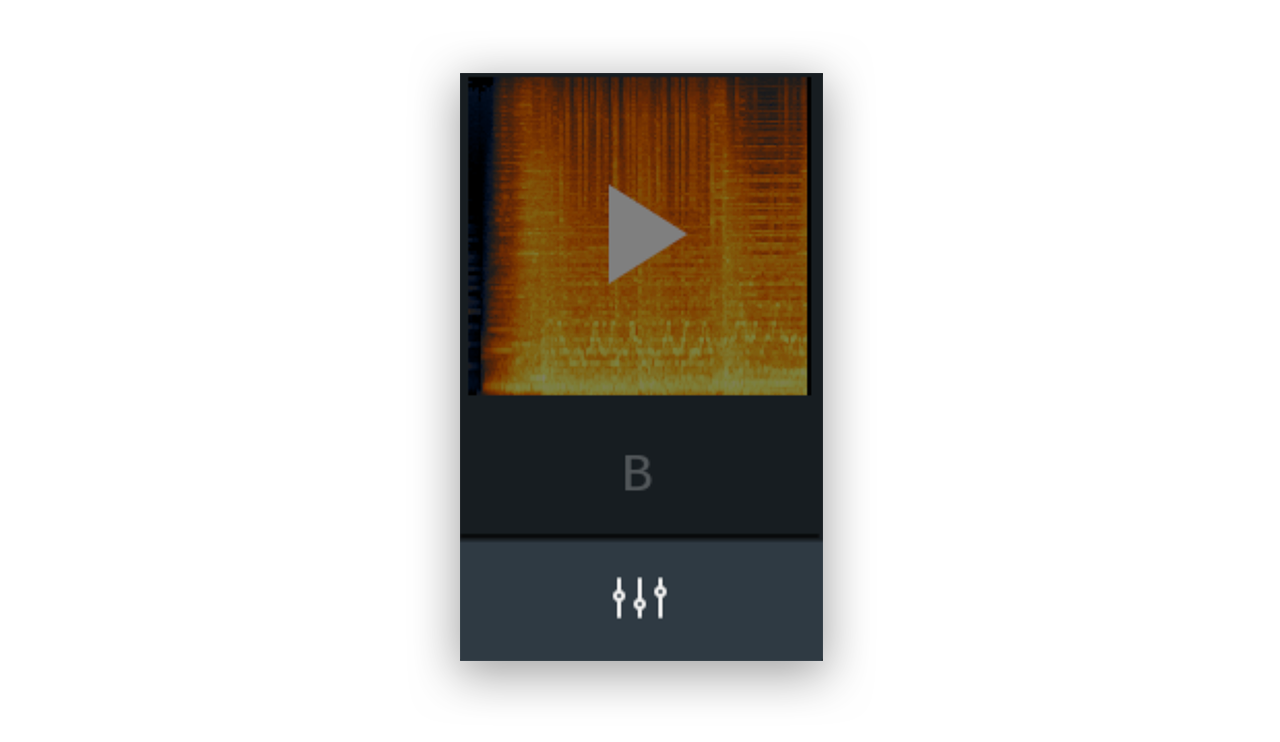
After its analysis, Repair Assistant offers you three possible solutions with 10 second previews that can be easily compared and contrasted against the original audio:

Pro Tip: Use the intensity variant buttons (right below each preview spectrogram) to generate two additional intensity variations of a single processing chain:
De-bleed, de-ess, de-plosive, de-X
One of the first things you may have noticed about RX 7 Standard is how many ‘de-somethings’ occupy the list of modules:

Most of these features address the need to attenuate something undesirable that was captured in a recording, and their parameters are pretty straightforward. Let’s just quickly outline what each module targets:
- De-bleed attenuates the leakage of one signal into another, most commonly used to combat microphone and headphone bleed.
- De-click eliminates undesirable short impulses that are often the result of digital errors, mouth noises, etc.
- De-clip removes digital and analog clipping artifacts, particularly useful for salvaging one-take recordings that would be perfect if not for a moment of clipping.
- De-crackle removes clicks that are close together in time and soft in volume, great when utilized in conjunction with de-clip.
- De-ess attenuates sibilance, most commonly used with vocal recordings.
- De-hum targets and eliminates stable tonal noises, often caused by air conditioners or other electrical appliances.
- De-plosive reduces plosives in a signal, particularly handy if a pop filter was not utilized during the recording process.
- De-reverb allows you to control the amount of ambient space in a recording, using signal analysis techniques to propose optimal setting suggestions.
Depending on whether you’re doing post production, dialogue editing, music production, or something else altogether, you may find that you use some of these modules more than others. What’s key is learning to identify what issue is present in your signal, and then finding the tool that addresses your particular issue (and for many of the most common problems, Repair Assistant is there to help you out). The above modules are all available as plugins too, which means they can be quickly accessed directly within your DAW.
This concludes our tour of RX 7 Standard’s key features – there’s so much more to explore with the toolkit, but hopefully this guide gives you some starting points for you to get your feet wet. If you have a question, leave it in the comments below.
September 13, 2018