.svg)
.svg)


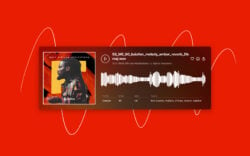
We’ve removed dynamics processing to make sample previews more true to life.
Since 2015, we’ve applied dynamics processing to our Sounds previews to prevent drastic volume differences between different samples in our library. Though this tech made selecting sounds from different packs, genres, and labels easier on the ear, it sometimes made users wonder why the sounds they downloaded felt quieter, thinner, or just generally different from when they auditioned them on the Splice website or Desktop app.
Using dynamics processing was always a compromise; we traded the audio quality of individual sounds for the admittedly huge creative benefit of being able to compare different sounds alongside each other without huge jumps in volume. But, we’ve decided that it’s better to give you a faithful representation of the samples you’re previewing, rather than smoothing them out and potentially changing the way they sound before you download.
What’s helped our decision is the fact that, with Splice Bridge, you can achieve the exact same effect yourself, by adding your own compression and tweaking the setting to fit your preferences. Keep reading to find out how.
Why is it better to remove dynamics processing from audio previews?
Now that we’ve removed the automatic compression effect, you can be confident that the sounds you preview will sound the same as what you download. In particular, loud sounds with a lot of bass content—like electronic kick drums—will sound more true-to-life, because previously our compressors would reduce the dynamic range of the preview, but apply no makeup gain, making them sound less full than their original, unprocessed counterparts.
How do I create the Splice preview compression effect?
If you want to reenact the dynamics processing effect formerly found on Splice previews, all you need is a compressor. First, you need to be using the latest version of Splice Desktop. You also need the Bridge plugin, which is free if you have a Sounds+, Creator, or Creator+ plan, and comes bundled in the Splice Desktop installer. This knowledgebase article guides you through the process if you’re stuck.
Drag-and-drop the Bridge plugin onto an empty DAW channel, and add your compressor plugin as an insert effect on that channel. Any compressor will work, but the more esoteric compressors like the Comp TUBE-STA from Arturia’s FC Collection 3 (available on Rent-to-Own) will add more unpredictable sonic characteristics than your factory plugins.
Now for the secret sauce—it’s pretty aggressive compression, you’ll notice. Set the compressor’s threshold to -24 dB and set the ratio to 12:1. You might want to tweak the makeup gain to make the preview sit nicely in your track. What’s great about this approach is you can adjust the settings to suit your ear, and even adjust the compression for different genres—heavy for gentle styles, lighter for more in-your-face moments, etc. That’s all up to you.
We’re confident that your sample browsing experience will be more fulfilling with this new change, which is part of our series of product updates to make Splice a more creatively inspiring place for music makers everywhere. Keep your eyes peeled for more.
At the time of writing, these changes have taken effect on the Splice website. They will be included in the next version of Splice Desktop, coming mid-March, 2023.
See the latest news from Splice on product updates and system improvements:
March 2, 2023