.svg)
.svg)


Splice Bridge is the VST3 / AU plugin that connects the Splice Desktop app with your DAW to allow you to preview samples in the key and tempo of your track, and then copy them straight to your project.
With Splice Bridge, you can easily try out sounds in the context of your musical compositions before you buy them. By hearing samples in the way you intend to use them, you can choose the most suitable sounds, save time, save credits, and save your creative energy.
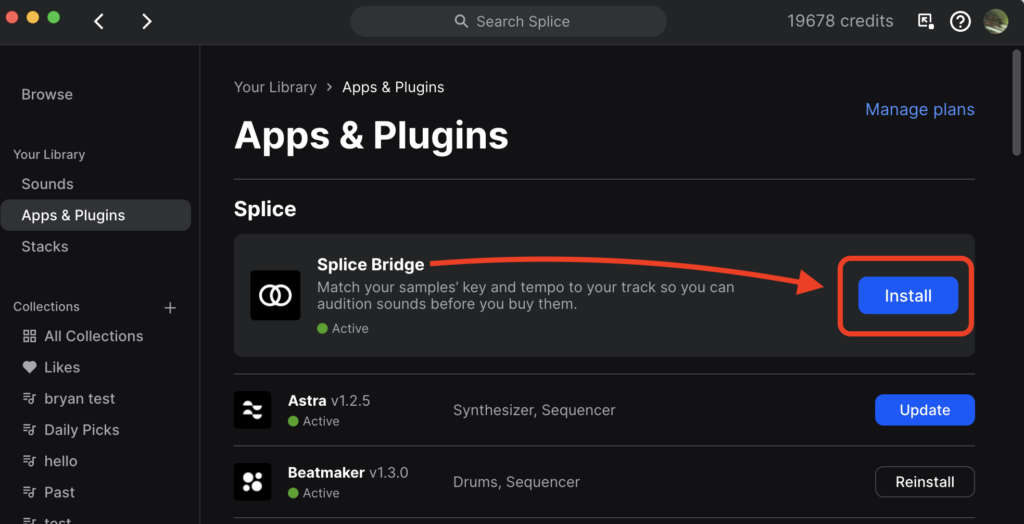
Bridge is included with all Splice subscriptions, and setup is straightforward. To use Bridge, first make sure that Splice Desktop is up to date, and ensure that ‘Splice Bridge’ is installed in the Apps & Plugins tab.
Then, open your DAW and insert the Splice Bridge VST3 / AU plugin on a MIDI track. Splice Desktop will start communicating with the plugin. You can check the connection by looking for the blue-lit Bridge logo in the bottom-right corner of Splice Desktop.
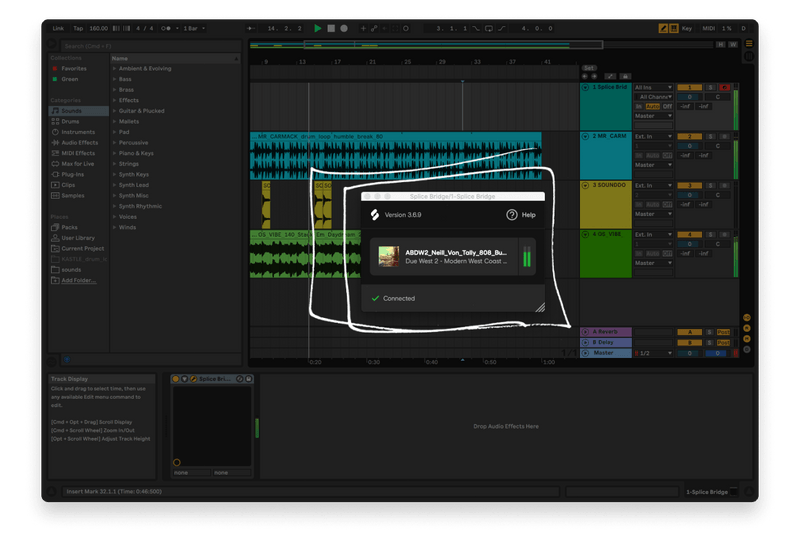
Bridge is a VST3 / AU plugin that connects Splice Desktop to your DAW—insert Bridge on a MIDI track in your DAW to activate it
Bring Splice directly into your DAW with the Sounds Plugin (beta). Audition millions of samples, explore our latest search tools, and instantly create variations of any Splice sample.
How to transpose with Bridge in Splice Desktop
To open Bridge’s Transpose pane, click on the Key section of the Bridge controls in Splice Desktop. From here, you can set the Desktop app to the same key as your DAW, so the Splice samples you preview sound harmonically correct. Not only does this let you match the content of your DAW session to the samples you’re previewing, but it also lets you experiment with flipping the sample into different keys.
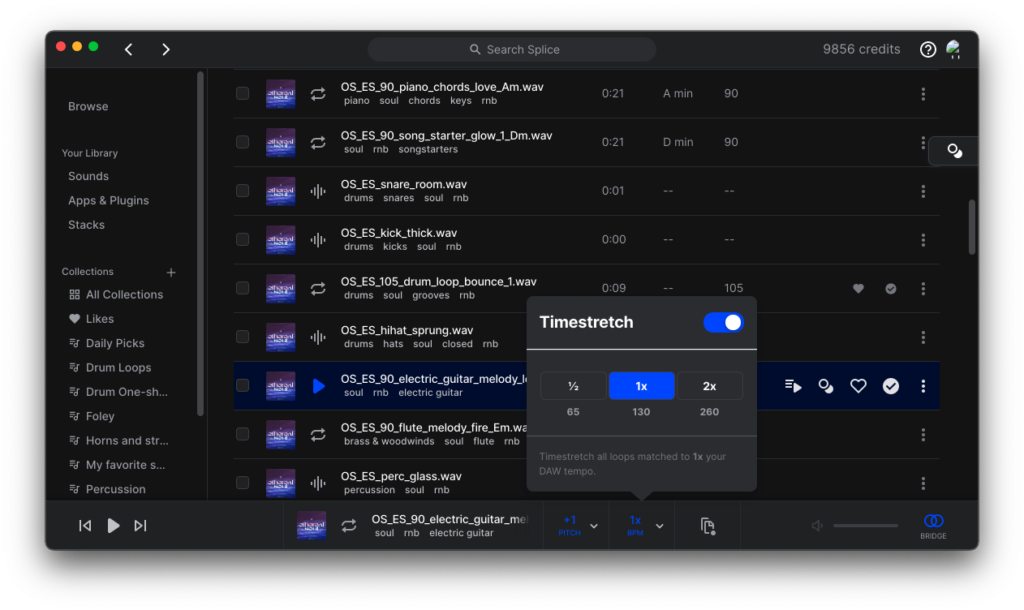
The Timestretch pane provides options to play back samples in normal, half, and double speed
How to play Splice samples at half and double speed
Click on the BPM readout, and the Timestretch window will pop up. Here, you can choose to play back samples at normal (1x), half (x0.5), or double (x2) speed. This gives you options to flip drum loops into different time ranges, and also experiment with extreme time-stretching. Try it out on vocal samples or harmonic content—it’s bound to lead to happy accidents.
Copy a modified sample from Splice Desktop to your DAW
The last and most underrated feature of Bridge is the Copy modified sample feature. Once you find a sample you love, hit the + button to download the sound. Once it has downloaded, this button changes state to Copy modified sample. Click this, then navigate to your DAW, and paste the sample (ctrl + V or cmd + V) onto a new audio track. The file created has the pitch-shifting and time-stretching applied, so it plays back perfectly.
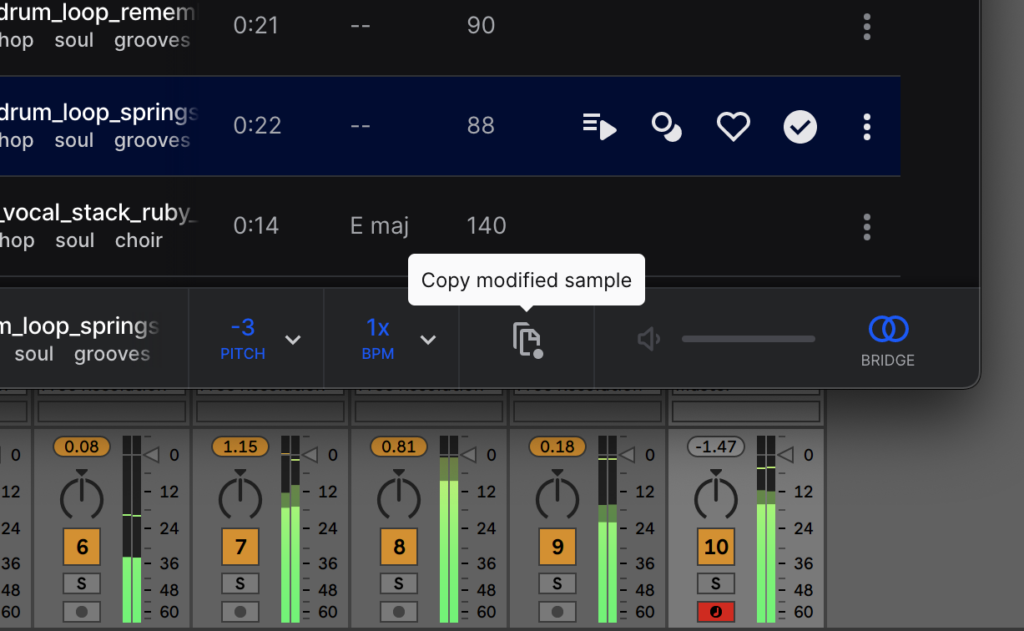
This button copies a transposed and time-stretched version of the sample you’re previewing, so you can paste it right into the DAW
For a step-by-step walkthrough on how to use Splice Bridge with Logic Pro, Cubase, FL Studio, and Ableton Live, check out our video walkthroughs here.
To download Splice Desktop, click here.
Explore Bridge to easily audition sounds in your DAW:
August 4, 2023