.svg)
.svg)


How do you choose the sound that fits perfectly with your project?
With royalty-free sample libraries like Splice Sounds, having millions of samples at your fingertips is a more accessible reality than ever before. However, having so many options can sometimes be a little paralyzing—how many times have you been unsure which kick, vocal one-shot, or guitar lick to use?
Regardless of whether you’re exploring a sample library, crate digging, or picking from your own recordings, in this article we discuss some strategies you can apply to arrive to a decision the next time you’re stuck between two (or ten) sounds.
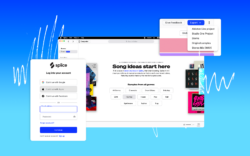
Bring Splice directly into your DAW with the Sounds Plugin (beta). Audition millions of samples, explore our latest search tools, and instantly create variations of any Splice sample.
1. Analyze the timbre
When we’re making music, we’re often drawing from an array of sources—different sample packs, software instruments, live recordings, etc.—and it’s our job to arrange all of these things so they feel like they’re a part of the same, cohesive whole.
When you’re comparing different samples, think critically about timbre and how each sound’s characteristics will fit into the larger track. Will sound A nicely fill out an unoccupied part of your track’s frequency spectrum, while sound B would mask an existing instrument? Is a particular snare too ‘hi-fi’ for your lo-fi hip hop track?
Of course, some of these ‘flaws’ can be remedied with processing; we could EQ sound B so that it conflicts less with the rest of the mix, or use a plugin like XLN Audio’s RC-20 Retro Color to add some lo-fi grittiness to the snare in question. The point is that we want to choose the sample that’s either (1) naturally set up for success in our mix (the ideal scenario), or (2) could be set up for success with the tools we have at our disposal, without totally compromising the aspects that drew us to it in the process.
2. Break down the notes
If you’re A/Bing melodic ideas, another strategy that might help you arrive to a decision is analyzing the shape, or contour, of each sample. Sometimes, a melody sounds great in isolation, but simply doesn’t work with the chord progression that has already been established in your track.
If you can pick up on this by ear, great. If you’re struggling, try transcribing the samples using MIDI—even if it’s just outlining the most important pitches (as opposed to recreating every detail). From there, see how they interact with what’s going on in your composition. Does your chord progression end on a dominant V chord, while the melody lands firmly on the tonic? Does the sample actually revolve around a mode that clashes with your track? If tension is desired as an aesthetic effect, these things can be totally fine—if not, perhaps that sample isn’t the best fit.
One thing to note is that similar to timbre, there’s always some room for manipulation here. If you’re auditioning pitched vocal chops, for example, you can easily cut and rearrange the waveform to better align with your chords, or re-pitch a particular note by a few semitones to complement your cadence. However, if you’re looking for a more organic sound—say a trumpet melody for a jazz breakdown—then chopping or re-pitching might introduce undesired artifacts.
3. Dig deep for your samples
Lastly, if you’re auditioning sample after sample and just can’t seem to find ‘the one,’ consider experimenting with how you’re searching. Are you always ordering your results by ‘Popular’ on Splice Sounds? Do you tend to instinctively reach for the same batch of samples you recorded a few years ago?
If you’re using Splice, consider browsing samples by pack (especially if you’re already using sounds from a particular collection). Alternatively, perhaps you can try ordering your sounds by ‘Recent,’ ‘Relevant,’ or even ‘Random’ and see if something piques your interest. You can also use Create to explore and discover samples that you may have never naturally come across in your searches. Rare Finds is another extremely powerful search feature for narrowing down your search to a curated list of sounds still undiscovered by most users.
Many of us gravitate towards auditioning the same handful of sounds out of habit, even when they might not be the best match for our track—being a little more intentional about changing up our process can spark new ideas and inspiration.
Context is key
The salient theme that permeates all of the techniques we explored today is that context is key when it comes to auditioning samples. Rather than evaluating a sound in isolation, we want to always be thinking about how it’ll add value to our track. The Splice Bridge plugin was built with this principle in mind—with it, you can hear samples right within your project, automatically synced to its key and tempo before you commit to spending a credit. The next time you’re auditioning samples, consider using the plugin in conjunction with the above strategies to craft your best music yet.
Do you have any tips for auditioning and choosing between samples? Share your insights with us and other music creators via the Splice Discord.
Try using Bridge to easily audition audition Splice Sounds in your DAW:
December 28, 2023