.svg)
.svg)


Richard D. James, better known to the world as the innovative composer and producer Aphex Twin, is no stranger to creative sequencing and beat mashing. Throughout his long career and almost innumerable releases, James has consistently showcased his unique abilities and talents for joining seemingly disparate elements in to a cohesive melting pot of beautifully melodic and rhythmic compositions. His latest offerings – Computer Controlled Acoustic Instruments 2 and the acclaimed Syro – are certainly no exception. From more chilled out tracks like Minipops 67 and Produk 29 to quicker and often chaotic tracks such as Cirlont 14 and S950tx16wasr10, Aphex Twin’s work is rich with innovative sampling and sequencing techniques that push the limits of creativity and remind us as producers to always think outside of the box.
This blog post mentions Splice Studio, which is no longer active. Learn more about the shutdown here.
Idea One: Straightforward “Chopping” of Audio Samples
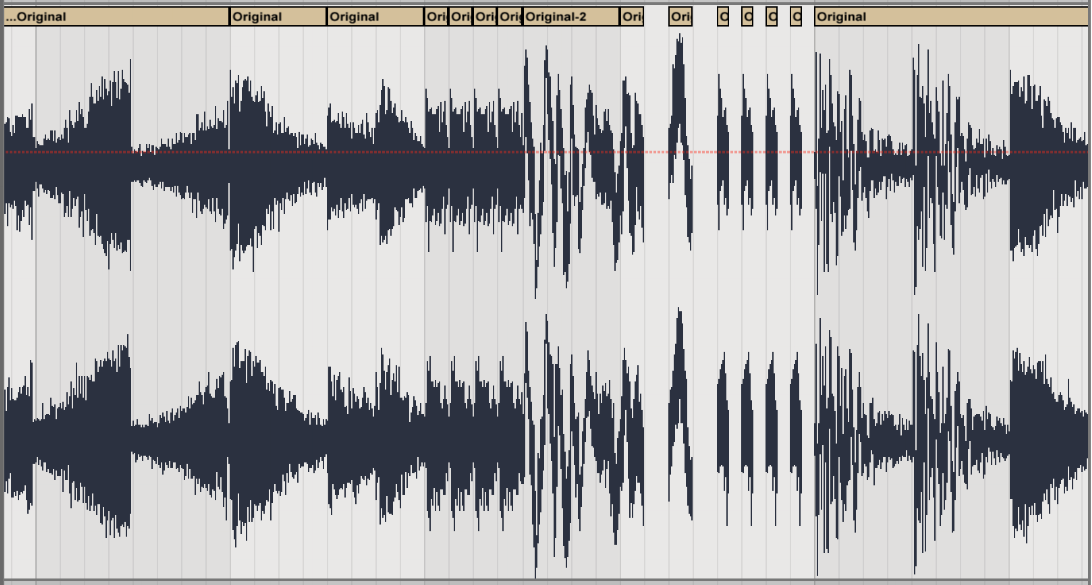
This is the most traditional and straightforward of methods, as it involves manually “chopping” audio clips in to slices and rearranging them. This can involve a fair amount of effort, but also allows for the highest degree of simplicity and control. One of the hallmarks of Aphex Twin’s signature sound is his ability to take a simple loop and manipulate it almost beyond recognition. Here, we’ve taken one of our favorite drum breaks and manipulated it through the use of processed chopping, reversing, gating, stretching, pitching, re-ordering, and stuttering, to create beats that barely resemble the original.
Idea Two: Triggering Samples from a Drum Rack
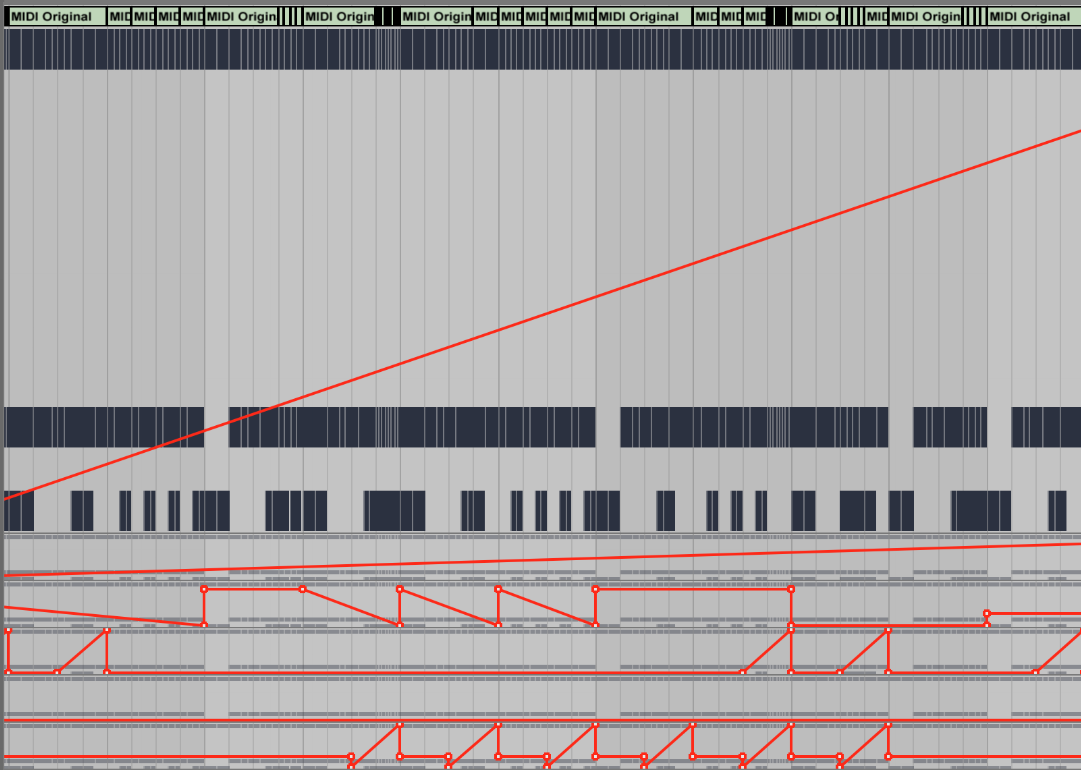
This slightly more abstract and intermediate method involves loading one shot samples in to a DRUM RACK and then triggering the samples via MIDI. For this layer, we’ve taken the same drum break and used Live’s built-in CONVERT DRUMS TO NEW MIDI TRACK function to create a MIDI clip that represents the break. Once that’s done, we loaded a DRUM RACK preset and were off and running. We chopped and rearranged the clips somewhat, just as we did in the first layer. The standard DRUM RACK preset that we selected already had plenty of MACRO CONTROLS to play around with, so we went ahead and automated these to create even more interesting textures and fills.
Download top samples and presets each month
Start browsing and find the sound that will inspire your next track.
Idea Three: Randomizing Sample Selection with LFOs
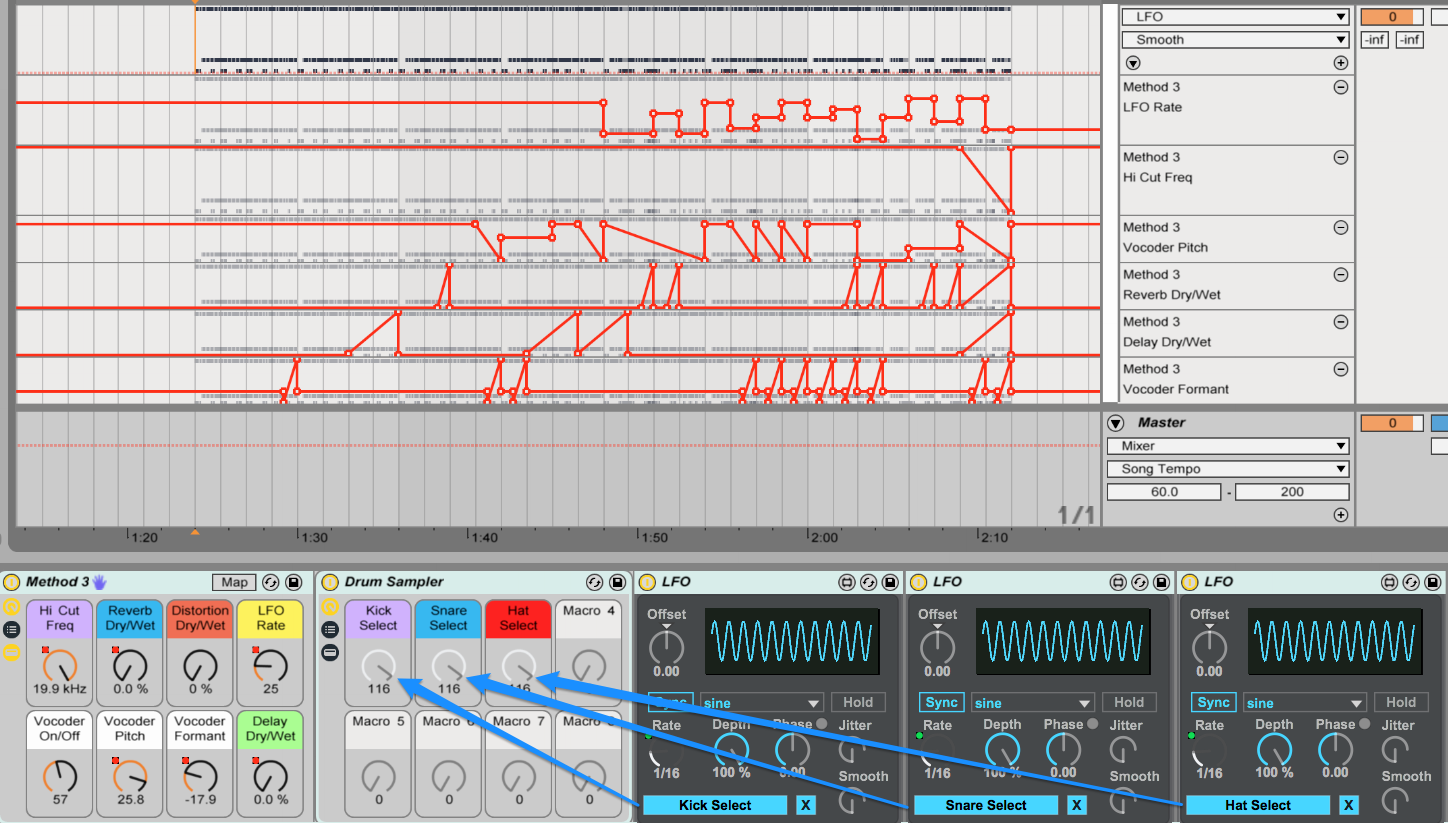
This method kicks things up a notch and is the most advanced. We duplicated the Step 2 track and made some huge adjustments. In place of the DRUM RACK module, we’ve inserted an INSTRUMENT RACK called Drum Sampler that contains 3 instances of SAMPLER via its CHAIN LIST – Kick Sampler, Snare Sampler, and Hat Sampler – one for each of the MIDI notes present in the pattern. We then loaded 15 samples of each type into each of the 3 SAMPLER modules – 15 Kicks, 15 Snares, and 15 Hats. This is where things get interesting.
We mapped 3 of the MACRO CONTROLS at the INSTRUMENT RACK level to correspond to the SAMPLE SELECTION slider located in each SAMPLER’s ZONE menu. For instance, adjusting the Kick Select MACRO CONTROL would allow us to choose from 1 of the 15 kicks that we loaded into its respective SAMPLER module. In this step, make sure to use the DISTRIBUTE RANGES EQUALLY function and to only trigger each sample from its respective MIDI note – in this case, C1 for Kick, D1 for Snare, and B1 for Hi-Hat. We then went ahead and created 3 instances of Max for Live’s LFO module within the INSTRUMENT RACK, mapping each to one of the SAMPLE SELECTION MACRO KNOB’s we created earlier.
The last step is to map the LFO RATE knob on each instance to one master RATE MACRO CONTROL at the top level so that you can synchronize, adjust, and automate the rate of all LFO modules simultaneously.
There’s no need to stop there – why not print the new groove to audio via Live’s built-in RESAMPLE function and start all over again? Or chop up all the new grooves you’ve made in to some fresh loops? Experimentation often yields unpredictable results, which in this case is precisely what we’re after. One of the greatest advantages of composing with modern software is that you don’t necessarily have to approach it with a preconceived notion of where your track is headed – you can feel free to explore, experiment, and see where you end up. Go ahead and apply some of these techniques to your own productions and share them with the Splice community – we can’t wait to hear what you create!
Browse, preview, and license Splice samples directly inside Ableton Live with our new in-DAW integration:
January 27, 2015


