Are you a beginner in audio production looking for the right software to get started?
We’re happy for you, and welcome you to the start of an incredible journey in making music. While getting started can be intimidating, there’s also no better time than the present. So, today, we’ll take some time to look at Pro Tools—one of the original digital audio workstations—and dive into its features, use cases, and if it’s right for you.
Designed for beginner audio engineers and musicians, this comprehensive tutorial on how to use Pro Tools covers key setup steps, navigation tips, and how to record, edit, and bounce your first project. Once you have a grasp on these topics, the fun can truly begin.
Introduction to Pro Tools for new users
Pro Tools, first released at the turn of the 1990s, has undoubtedly defined the digitalization of the recording studio. The dashboard’s ability to seamlessly mirror the functions of a physical mixing board, and often link directly with those boards to expand the power of each tool individually, would change how we experience recording, mixing, and mastering sessions forever.
It’s therefore nearly impossible to begin your journey with digital music production and not come across the name Pro Tools. The product’s early versions in the late ’80s were acquired by and robustly developed to its current version by Avid. If you happened to take music classes growing up, you might also know some of Avid’s free tools such as Sibelius for music notation.
However, any producer can tell you that two things happened before long: (1) the choice of digital audio workstations (DAWs for short) expanded rapidly, and (2) the accessibility of these tools enabled the studio to move into the home, or the producer to access its magic wherever they went on the go.
Yet, Pro Tools has stuck in the game through all this time, today touting an iPad integration and a sketch view, which might feel familiar to regular users of a DAW like Bitwig.
With Pro Tools, your projects can sound professional even with the most basic functions, and once you give it a little time, there are endless shortcuts and tricks to speed up your workflow and allow the software to work for you, and leave you to focusing on the creative decisions.
How to try Pro Tools for free
If you’re wondering how to use Pro Tools, there’s good news: Avid offers Pro Tools Intro, a free version of its iconic software! This is not an offering available to you with every DAW, so you should take advantage of it. With a limit of 16 tracks per project, this is the absolute perfect way to learn the tool and be sure about it before investing. You can learn more and download Pro Tools Intro here.
Even with this lighter version, it can still be easy to feel overwhelmed by the interface, terminology, and tools. But don’t worry—learning how to use any DAW is an incremental journey. Each piece of knowledge builds on top of another, and even after years of making music, there’s always another trick or function to discover. What’s important is that you’re creating and staying inspired!
Setting up your first session
There are various applications that you might need to download depending on how you’re setting up your projects. If you’re saving projects to the cloud (a great option to minimize the load on your hard drive), you’ll need an extra download than just the Pro Tools software. Still, you’ll want to make sure your computer is ready for the basic space that a DAW takes up, which is more than an average application.
Avid also uses iLok for security purposes, which can be cloud-based or connect to a physical USB or USB-C key. When learning how to use Pro Tools, this is one of the more unique steps in the workflow that isn’t present with all DAWs.
How to create a new Pro Tools session
Once everything is downloaded, you can start up your first session.
In short steps, you will:
- Launch Pro Tools and choose Create New Session
- Start by keeping Session selected at the top, rather than the Sketch option
- Set a name, save location, and session parameters:
- Sample Rate: 44.1 kHz (standard for music and podcasts) or 48 kHz (for video projects, as one example)
- Bit Depth: 24 (generally recommended) or 16 (for using less drive space)
- I/O Settings: Leave on default for now
How to connect your audio interface
If you have one, you’ll also want to make sure your audio interface is connected as well as any instruments or other microphones.
In the following steps, you’ll ensure that the software is communicating with your hardware the way that you expect:
- Choose your Playback Engine (usually your audio interface or the built-in output of your computer)
- Open the I/O Setup to see your input / output paths, such as those microphones or studio monitors connected to your interface
- Go to Track > New and select the type—start by adding one each of the following:
- Audio Track (mono or stereo)
- Instrument Track (for virtual instruments to control via a hardware MIDI device)
You might also add things like a Master Fader, a MIDI Track, or AUX Input, but for now, just get used to the flow of adding, renaming, reordering, and deleting. Be sure to name your tracks clearly, such as “Lead Vocals,” “Kick Drum,” or perhaps the name of the device / instrument.
Navigating Pro Tools: A beginner’s tour
Understanding the software’s layout is a crucial part of learning how to use Pro Tools. You’ll find the session view of Pro Tools to be divided into several key visualizations:
- Edit Window: Where you arrange, edit, and view audio and MIDI tracks
- Mix Window: The visual layout of your session’s mixer—this looks like a physical sound board would, with faders, knobs, and spaces to add your plugins
- Transport Bar: Controls playback, recording, and tempo
- Toolbar: Selection, editing, and zoom tools
Have a look at each of these and see where your curiosity leads you. Can you intuitively tell which icons mean what? What happens when you click that? When in doubt, there will generally be explainer text available to you as you hover over any control.
You’ll remember that we selected Session as our type of project here. If you’re completely new to DAWs, we recommend starting by learning this visual layout. Once you’re feeling comfortable, the Sketch layout can act as more of a creative scratchpad, a place to jam with yourself, or a place to prepare dynamic live sets. A few other DAWs out there champion this type of view as their primary interface, but as of 2023, it’s also available on Pro Tools.
Basic recording and editing in Pro Tools
You should already have a few tracks added. If you don’t have at least one instrument and one audio track ready, do so now.
Recording audio and MIDI
Firstly, don’t forget: Audio tracks are for capturing physical sound, such as a voice, electric guitar, trumpet, or live percussion. Meanwhile, MIDI is a medium for capturing musical data, which can be applied to infinite types of virtual instruments.
When you add an instrument track in Pro Tools, you’re creating a channel to process and express MIDI data through a virtual instrument. There are a number of such instruments included in Pro Tools, and there are also a plethora of third-party virtual instruments out there.
The most important button for recording is one that you might recognize from analog audio equipment: the small red circle. This button is used to specify that you intend to record a particular track, also called arming, and the same button on the top bar will actually enable recording.
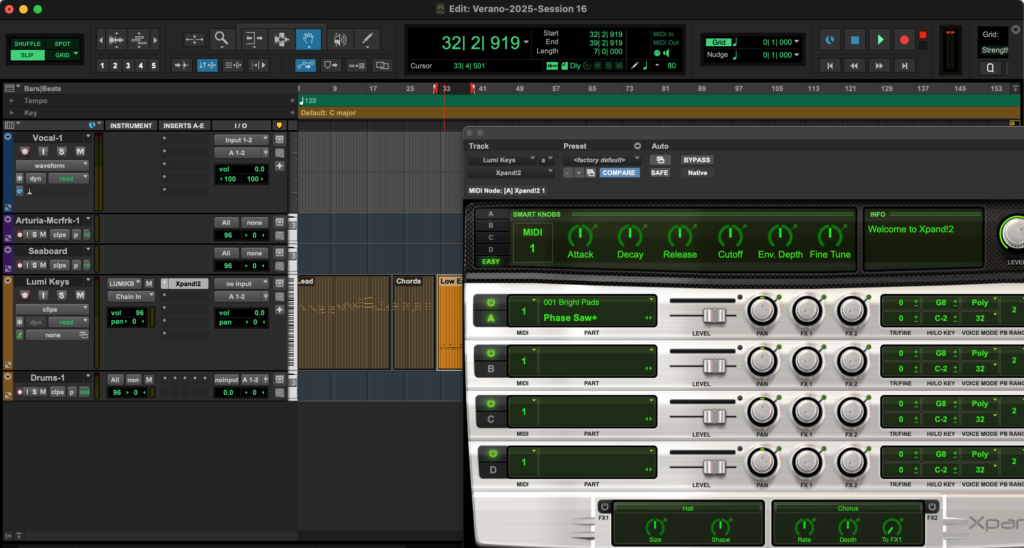
Give this a try a few times with your audio as well as your MIDI tracks. Capture two or three clips like below, using the Xpand!2 plugin:

Xpand!2 offers four stereo channels that can be tweaked individually, allowing you to design unique patches made up of multiple sounds.
Try the same with an audio track. If you’re using a microphone, try out different locations or positions of the vocalist and microphone. See what differences you notice in how the sound is captured prior to adding any effects in the mixing stage.
Basic editing techniques (cut, copy and paste, and fades)
Pro Tools shortcuts are essential to getting the most out of the tool—so much so that there are plenty of products like mousepads, keyboard covers, and posters to help producers memorize the expansive list of ways to skip past the tedious steps.
When you’re getting started, it’s very much okay to go the long way around! But, being able to quickly cut, copy, paste, and add dynamic adjustments like a fade-out is the best way to conserve your energy for the most creative parts of the process.
Let’s cover these basic functions, most of which can be found and selected manually under the Edit menu:
- Cut is a function that allows you to take one clip and slice it up into two or more. You might do this to isolate a single word or phrase in a vocal track, to adjust its timing slightly, or isolate in a separate track to add an effect to only that specific part. This is an action that quickly becomes second nature with a shortcut, which on a Mac is CTRL+X (you can quickly memorize by thinking of the letter X as two lines cutting through each other).
- Copy & Paste correlates to the same shortcuts that you might already know for text. On a Mac, that’s CTRL+C and CTRL+V, respectively. You might use this to double a vocal or paste a repeating section. Once you get a bit further into your journey, you might use it to grab a tiny piece of a Splice sample to manipulate it some way. Some options would be to time stretch, transpose, invert, or use that soundbite in a virtual drum kit.
- Fade refers to a production method that everyone has heard, even if they don’t know the name. A fade is the gradual increase or decrease of something, usually related to volume. A song might end with a gentle fade-out (decreasing volume) of the entire mix, whereas you might use a fade for one particular track or sample. You can easily create fades with a simple mouse motion at the corner of any piece of audio.
This example brings up another important basic concept for navigating Pro Tools: The software is laid out on a grid representing time (also known as a timeline), and where you click on a clip of audio will heed different results. This is a small feature that saves a ton of time and space, but will take some getting used to.
You can add a fade in Pro Tools by clicking the corner of the audio file and dragging it to where you want the fade to begin and end. Pro Tools will adjust the visual of the waveform, allowing you to see how the dynamics change with the fade included.
How to move audio files in Pro Tools
Let’s say that you want to select a clip of audio and move it a few seconds or measures later in your track. If you click on the bottom half of the audio, you will not move it, but rather highlight it.
This would set you up to copy or cut a part of the recording, but not change it’s place on the grid. To do the latter, you should click the top half of the clip, but not all the way on the corner as we just showed you for the fade function.
Clicking the bottom half of an audio clip will allow you to move the audio file, while clicking on the top half lets you select a portion of an audio clip, which can then be cut or copied.
Basic mixing techniques
Once you’ve recorded something and laid it out on the grid as you’d like, it’s time to think about mixing. In music production, you can think about three key phases: (1) recording (what you’ve just done), (2) mixing, and (3) mastering.
The mix is when you get to further shape what you’ve captured and create balance between all of the components. On the Mix Window, you’ll find various controls laid out in a vertical fashion, similar to how a physical board would look in a studio. Each track has its own column, where you can easily make adjustments when listening to all of the tracks together.
The absolute basics to know here are:
- The fader controls the volume of each track. While a podcast with two speakers might not need too much adjusting here, a song with 40 tracks certainly will.
- The knob(s) at the top are for panning, or, how much the listener will hear on the left side, right side, or both / centered. One classic use of panning is recording a part with a vocalist two times. Instead of picking only one, the producer will use both recordings—one panned to the left and one panned to the right—to achieve a sense of width.
Adding plugins to a track
One other way we mix is with plugins, or pieces of software that alter an audio or MIDI file in some way. Want to reduce harshness? Create space? Muddy or clean up a vocal? To begin experimenting with these sorts of effects and building your producer vocabulary, you’ll want to find the part of a track that’s labeled Inserts. This can be found on both the Mix and Session windows.
Add a plugin and explore what comes up. All plugins will include a pop-out window to make adjustments to their settings. Have a look, adjust some knobs, and playback your track. What do you notice? What about when you change a few things on the pop-out window?
When plugins are added to a track, you can start to manipulate what you’ve recorded. In production, we refer to this as post-production, meaning the steps you take with a recording after you’ve initially recorded (or, produced) it.
Some of these effects are words we also use in day-to-day life, like talking about the reverb of a church or concert hall. Other effects are words where you might need the context of playing an instrument, like drive or distortion as a guitar player.
Some plugins refer to exactly the thing they do, such as delay, which will play something some amount of milliseconds or seconds later than it’s been recorded. Other plugins take more extensive production knowledge to truly understand, such as the effect that even experienced producers may not be able to explain in words: compression.
Bit by bit, you’ll learn these tools and how you’re supposed to use them, as well as how you prefer to use them against those expectations or rules. Just like music theory!
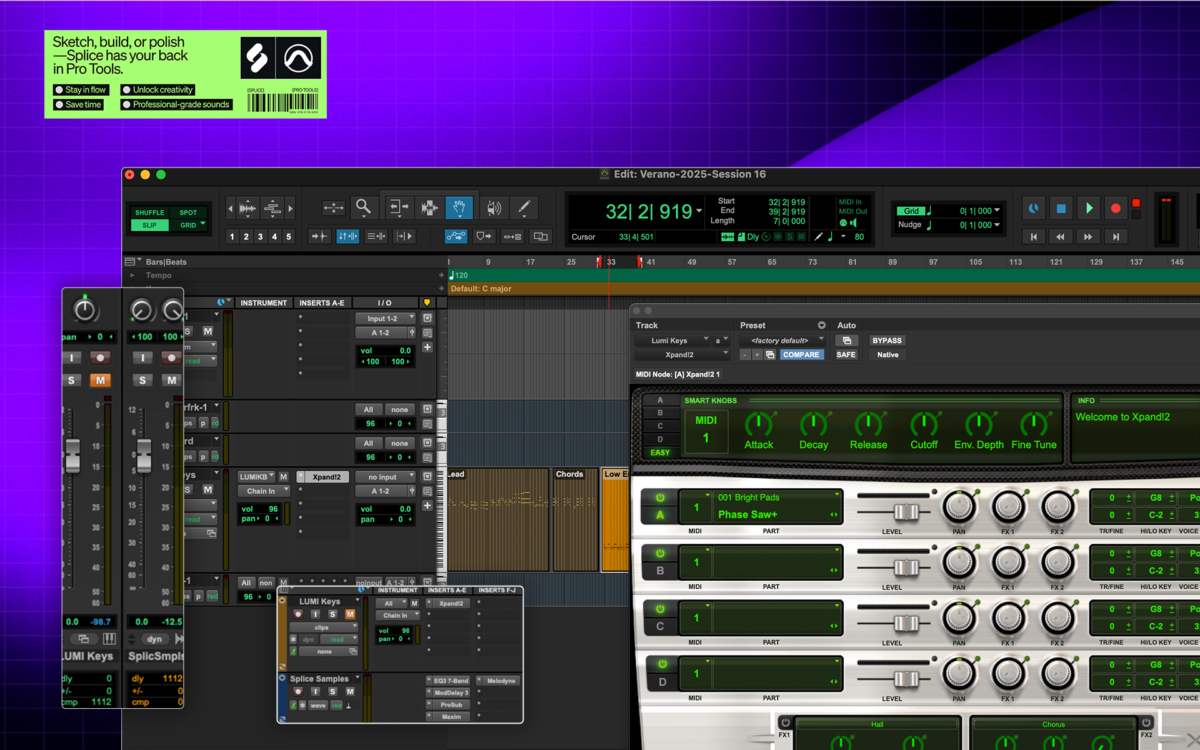
Splice INSTRUMENT is a virtual instrument plugin that puts world-class sounds at your fingertips. Download it for free and start making music with hundreds of pro-quality presets—plus new, exclusive Free Drops every month to keep your ideas flowing.
Exporting and saving your work
Last but not least, like any creative file, it’s recommended to save as often as possible. The Mac shortcut CTRL+S should become an instinctual action after any new piece of audio has been recorded or a new plugin setting has been perfected. Save As can also be used to keep records of larger changes or stages of your project.
As you grow in your producer’s journey, you’ll also want to consider an external hard drive for backups of your projects should anything happen to your computer. Like we said at the beginning—DAWs are larger than your average software, and the files can also take up a lot of space.
When you’re ready to export a file to send to a friend for feedback or post to a streaming platform, you can do so via File > Bounce Mix. There, you can select the type of file such as .wav (large, highest-quality) or .mp3 (compressed) as well as a range of other export settings.
And there you have it—while by no means exhaustive, hopefully this guide equips you with the knowledge to kickstart your journey in Pro Tools. And if you have any questions along the way or want to share your creations, you can join the Splice Discord to engage with an ever-growing community of music creators.
We wish you the best of luck!
Discover, build, and create with Splice—right inside Pro Tools:
August 29, 2025

.svg)
.svg)


