.svg)
.svg)


Illustration: Mushbuh
MOVEMENT is a powerful rhythm effects processor capable of adding life to any sound. In this walkthrough, we look at how to use MOVEMENT on a vocal loop to create vocal chops.
Load in a vocal loop and add MOVEMENT to the track. Initialize MOVEMENT by loading up the preset 000.Init so that we can start from scratch.
Voice to verse—anywhere. With the addition of Splice Mic, you can instantly test and record ideas, explore genres, and unlock new creative possibilities, all from the Splice mobile app.
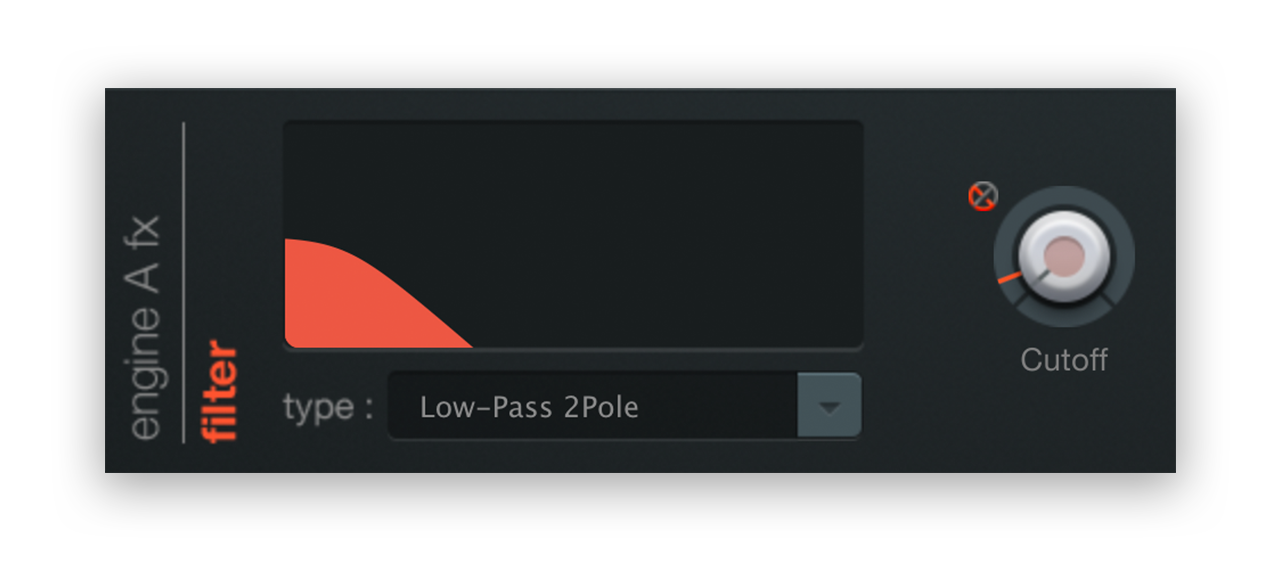
Using the filter module
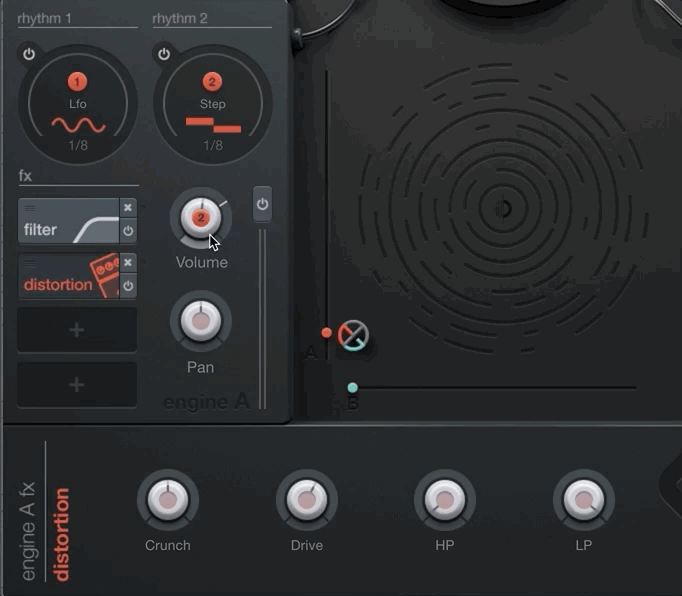
Add a filter module to engine A, and keep its type on Low-Pass 2Pole. Bring the cutoff level all the way down to around 70 Hz – this will make the sweeping movement of the filter more pronounced.
Apply the rhythm 2 modulator to the filter by dragging-and-dropping the orange circle onto the cutoff parameter. This will make the filter wobble, adding the heart of the motion characteristic to your vocal.
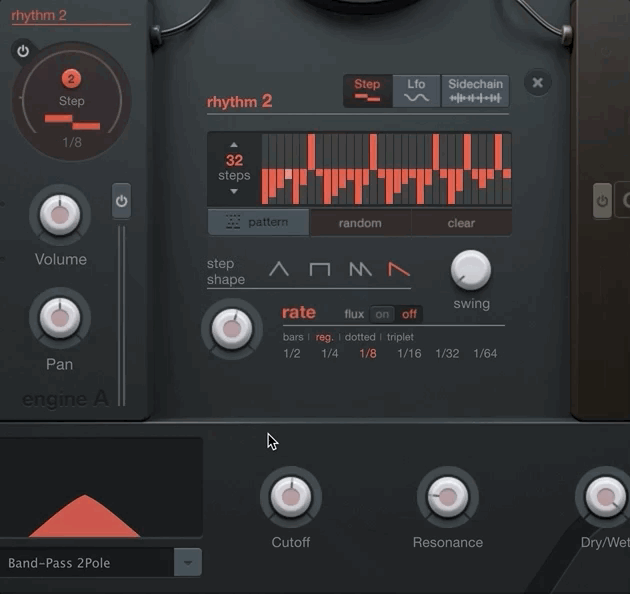
This is the core of MOVEMENT’s workflow. You can drag-and-drop the rhythm modulators onto any of the effect parameters.
You can adjust the range of modulation on any parameter by clicking and dragging the small white section on the bottom of the modulation circle.

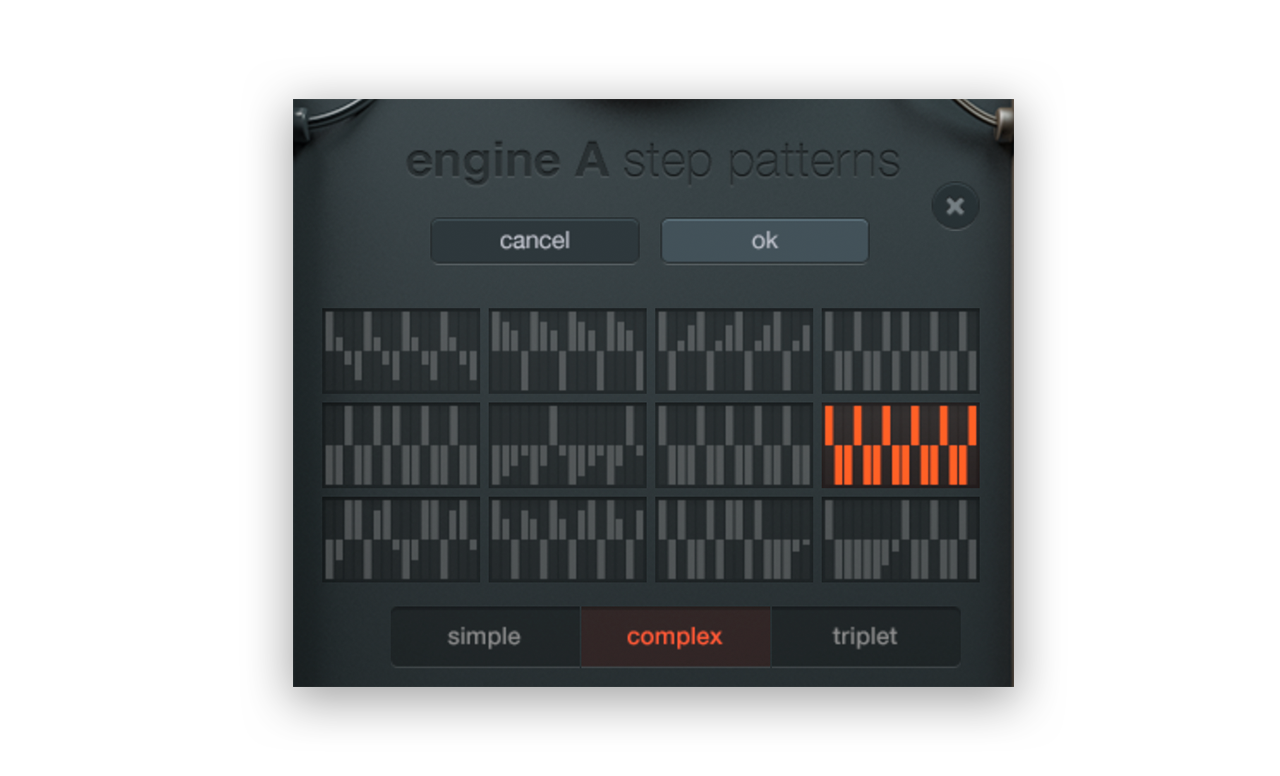
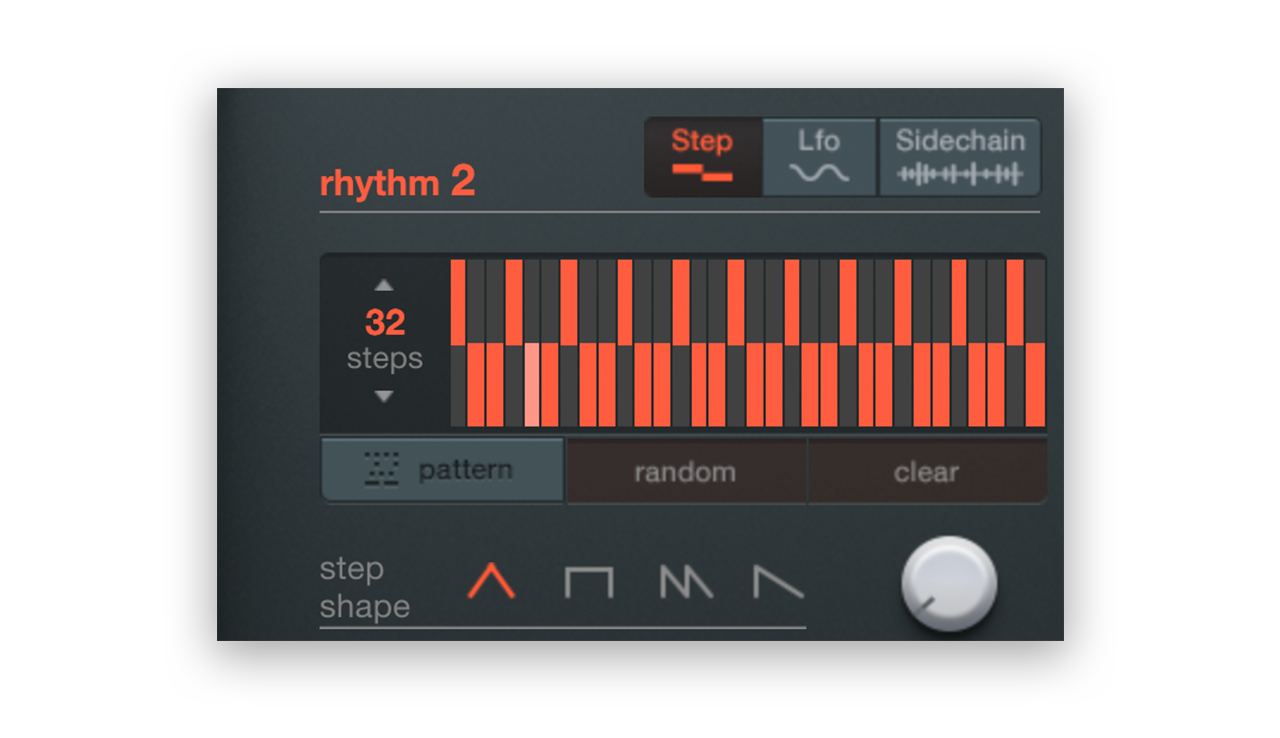
One of the best features in MOVEMENT is the step sequencer, which includes preset patterns that are all very musical and well thought out. Click the pattern button to reveal the preset patterns.
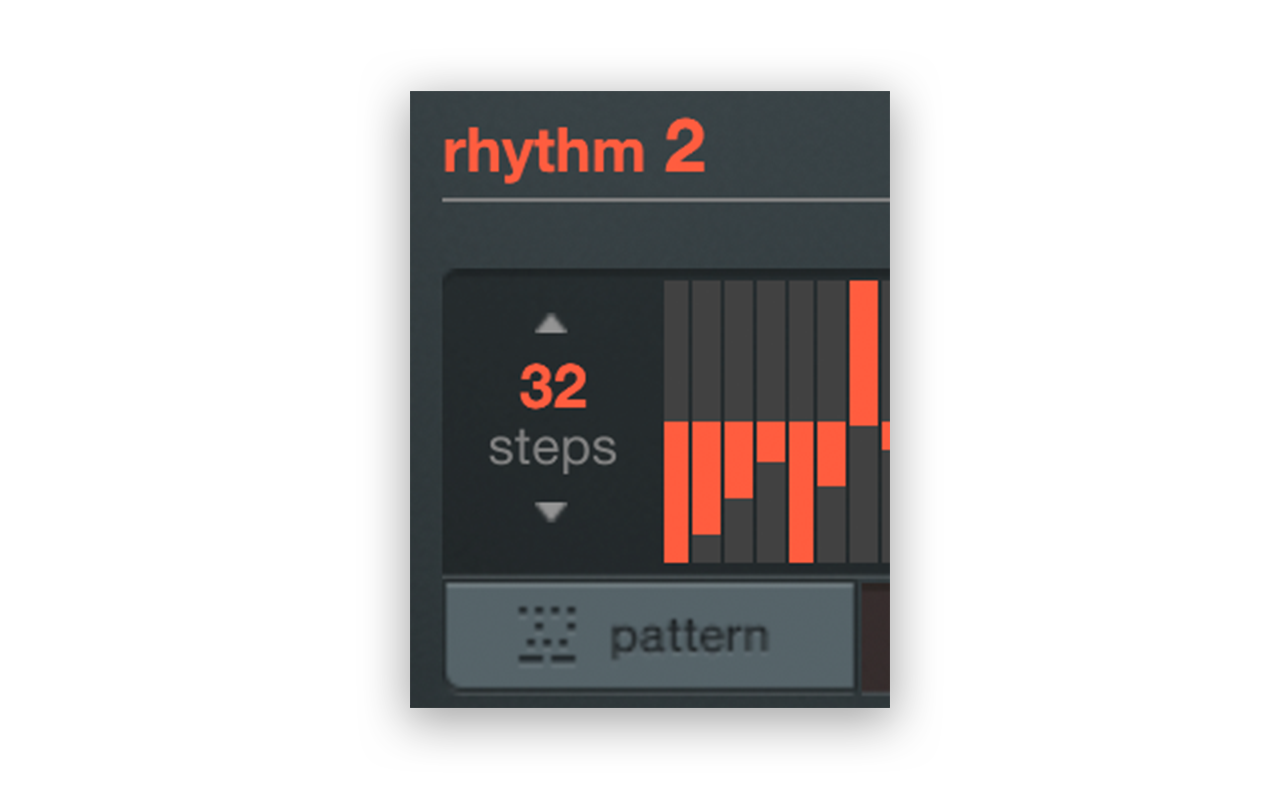
Here’s the one we selected:
Lastly, change the step shape to the triangle waveform to smoothen the effect.
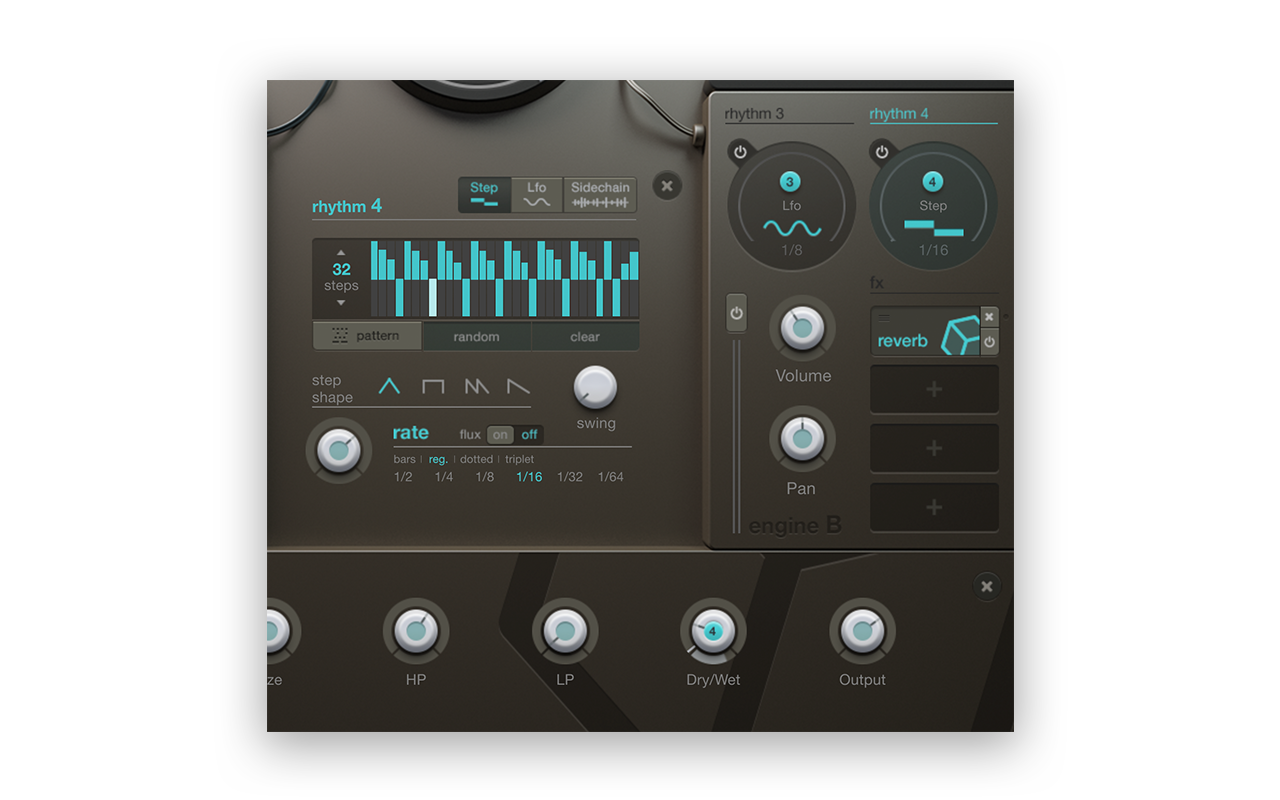
Using the reverb module
Next, add the reverb module to engine B and drag-and-drop rhythm 4 onto the reverb’s dry / wet knob. Set the dry / wet ratio to around 30%. This will create a polyrhythmic pattern between the filter and reverb, resulting in a unique texture.
Try picking a complex pattern for the step sequencer that contrasts nicely with the pattern from engine A.
Using the XY Pad
One of MOVEMENT’s greatest features is the XY Pad. You can map any parameter to the XY Pad by right-clicking on the parameter and selecting “Assign to XY Control.” All engine A parameters are mappable to the y-axis, and all engine B parameters are mappable to the x-axis.
You can adjust the range of the XY Pad using the XY Slider (see below):
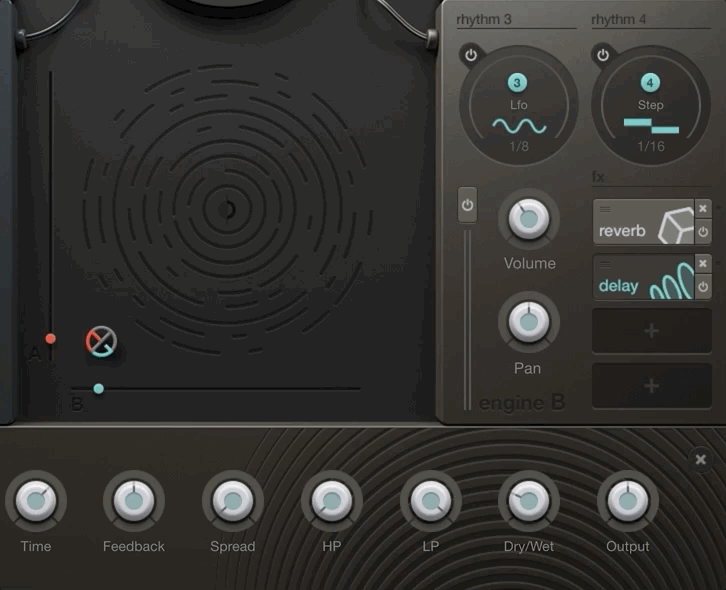
Add a delay module to engine B, then assign the dry / wet parameter to the XY Control. Make sure the range is set to its full value.
Lastly, add a distortion module to engine A, and then assign the crunch parameter to the XY Control.
Try moving the XY Pad around – this will create slight changes in the delay and crunch amounts. This will sound best when automated to match the flow of your track.
There are a lot of other great techniques in MOVEMENT as well – if you know of any, let us know your favorites in the comments below!
Use Splice Mobile to instantly test and record ideas, explore genres, and unlock new creative possibilities—all from your phone:
May 11, 2018


