.svg)
.svg)


Creating a unique sound for your vocals is key when it comes to producing a track that stands out from the rest.
While there are many ways to do this, today’s largest artists such as Zedd, Daft Punk, and Halsey have been embracing vocoders and other similar harmonic effects as their go-to method for adding interest to their vocals. You can distinctly hear these techniques in the choruses of Zedd, Maren Morris, and Grey’s “The Middle” and more recently, Halsey’s “Without Me.” iZotope’s VocalSynth 2 allows you to bring these sorts of vocal effects to your own production with ease – in this blog post, let’s dive into how to create compelling vocal harmonies with VocalSynth 2.
We’ll be using the project below for demonstration purposes:
The session is 16 bars of perhaps the pre-dop chorus of a larger song, and the vocals I’m using are from the versatile “Karra Sample Pack Vol. 2.” Splice the project to download the Logic session and experiment with it yourself – you can use a free trial of VocalSynth 2 to follow along and tweak the settings I’ve dialed in.
Adding these kinds of harmonies in an otherwise stripped-down section is a great way to introduce depth and power to your vocals. The digital timbre also creates a fresh and forward-thinking feel that’s distinct from traditional vocal harmonies – let’s walk through how this unique sound was achieved, step-by-step.
Voice to verse—anywhere. With the addition of Splice Mic, you can instantly test and record ideas, explore genres, and unlock new creative possibilities, all from the Splice mobile app.
1. Set up VocalSynth 2 on a software instrument
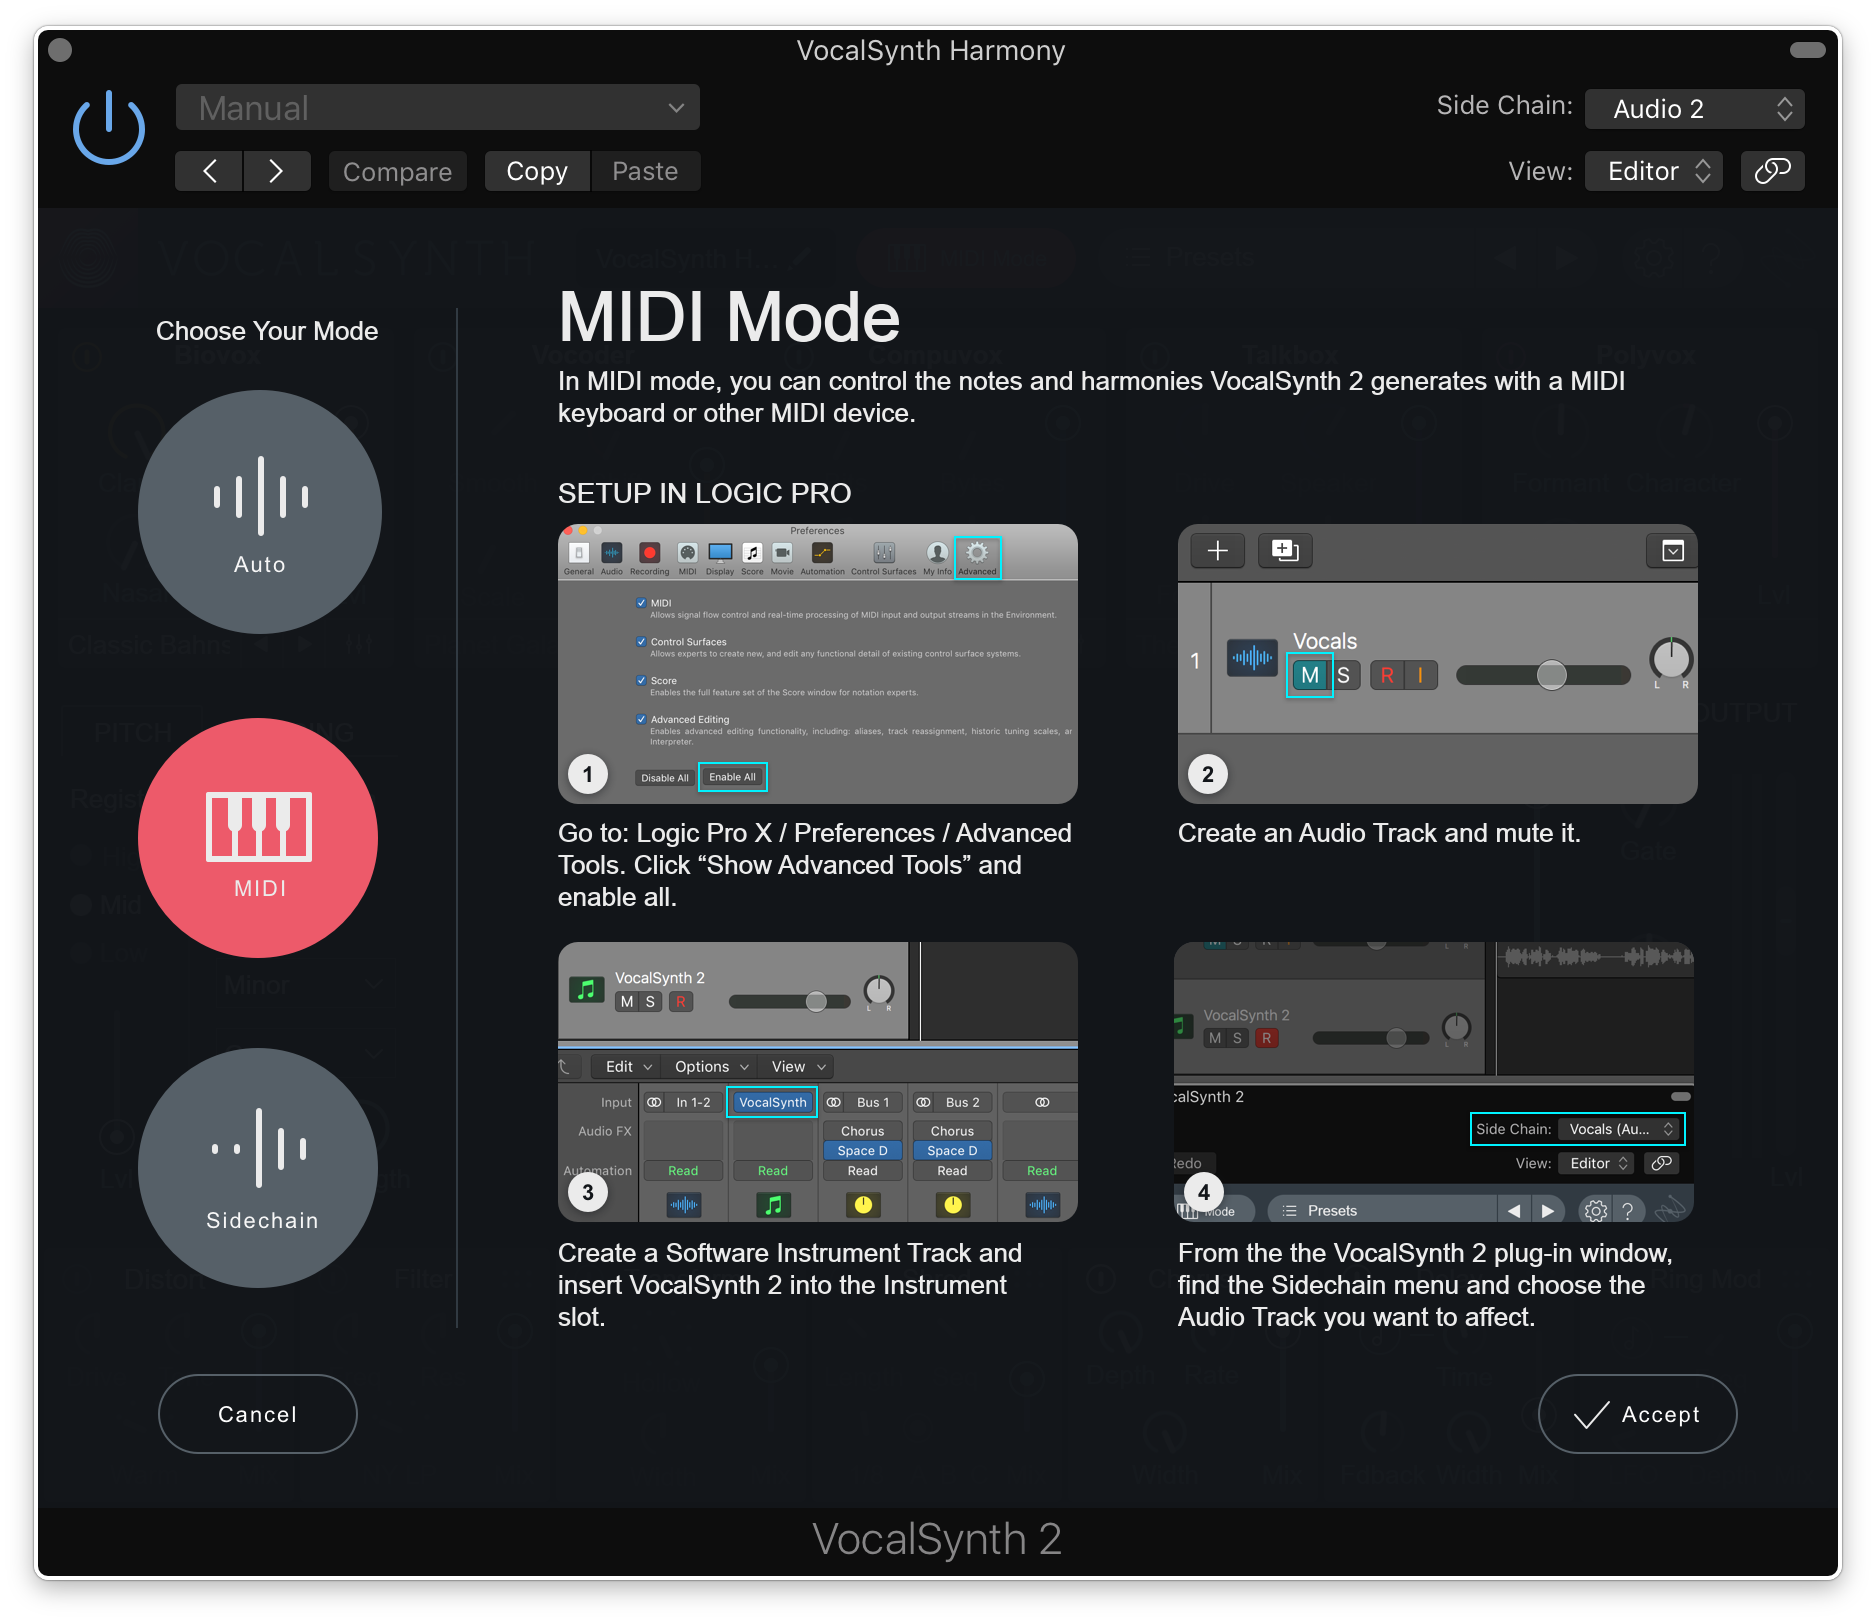
First, create a new software instrument track in whichever DAW you’re using, and select VocalSynth 2 from your plugins as the instrument. Then, open up VocalSynth 2 and click on the Auto Mode button on the top bar. This will open up a window that displays VocalSynth 2’s three modes: Auto, MIDI, and Sidechain. Because we want to draw our own custom harmonies using MIDI, we’re going to select MIDI and hit Accept.
Once that’s set, navigate to the top right of the GUI to find the Side Chain menu, and select the audio track that contains the vocal you want to harmonize. In my case, I’ll select an audio track that I created named “Side Chain Vocals.”
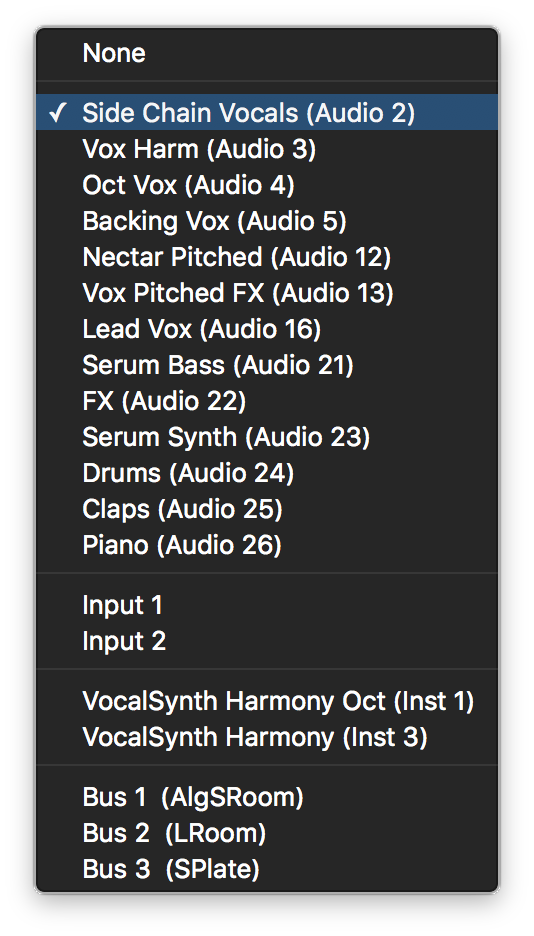
Pro Tip: Although we could select the lead vocal we’re hearing in the production as the source, it’s not a bad idea to create a separate dry and muted audio track that we can dedicate to our sidechaining needs. This allows us to process the lead vocal and harmonies separately – otherwise, any reverbs, delays, etc. that we add to the lead vocal will bleed into the VocalSynth 2 track as well.
2. Insert MIDI for the harmonies onto your software instrument track
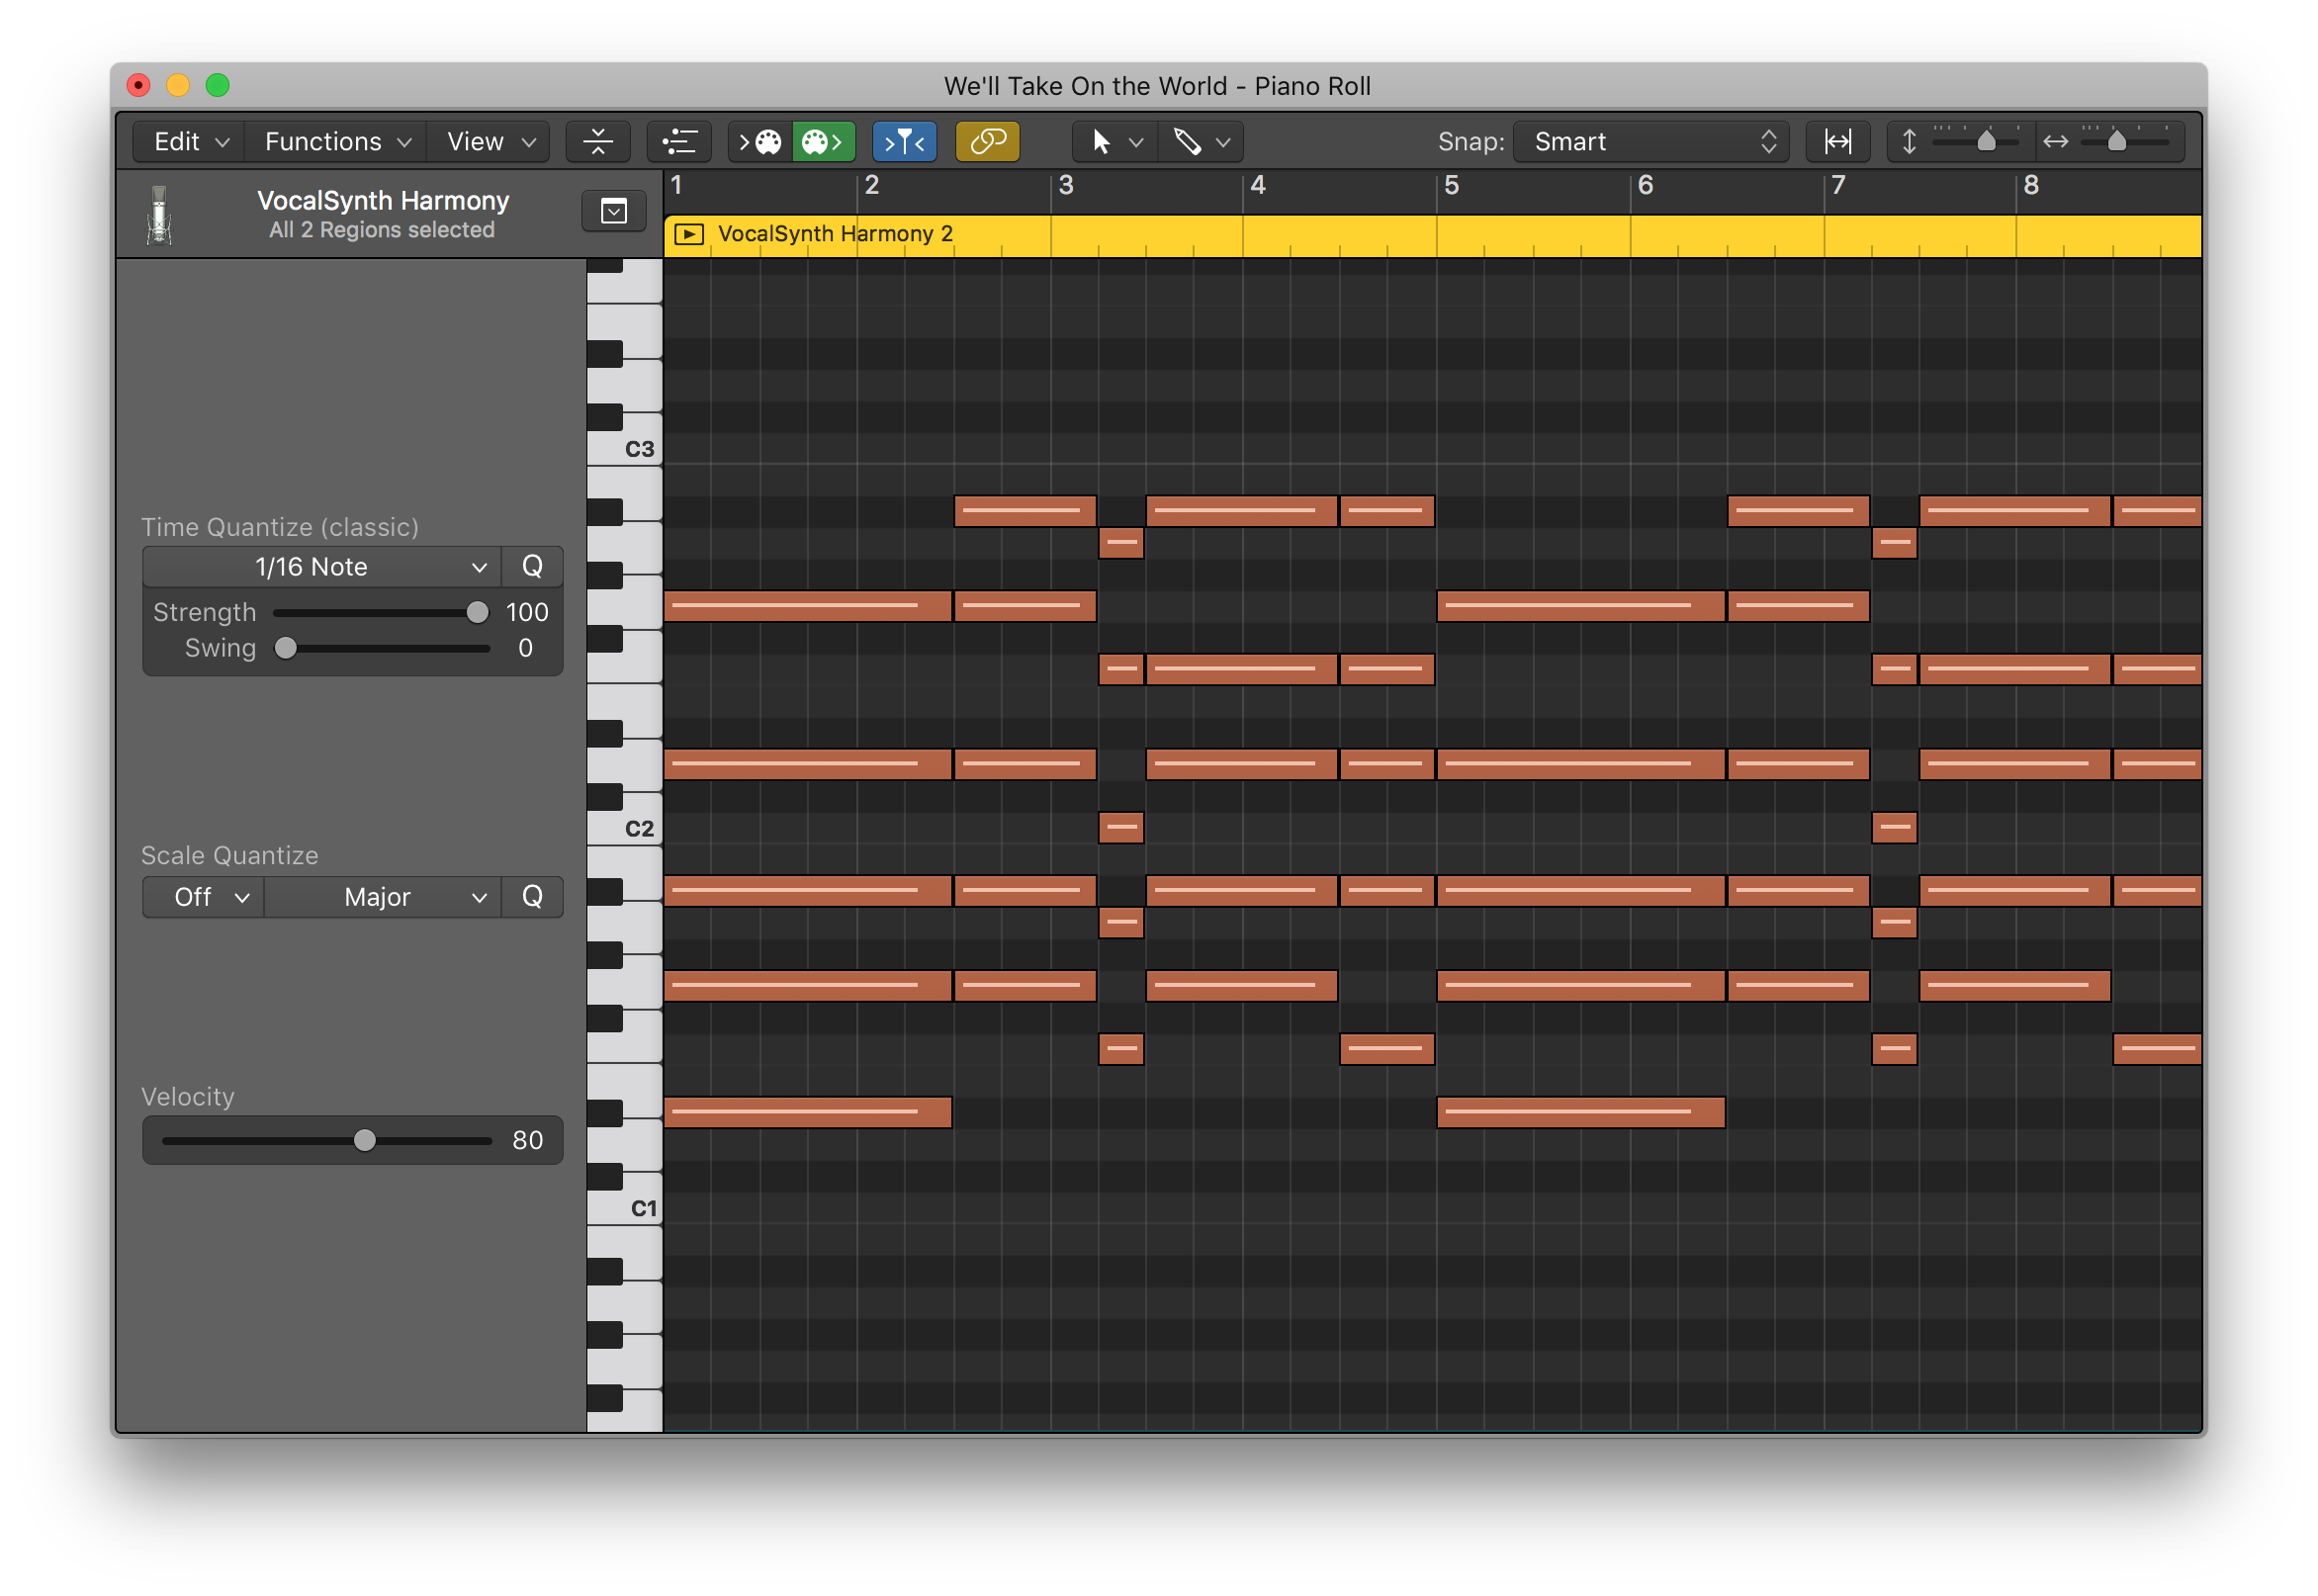
Next, add MIDI to the VocalSynth 2 track that outlines your harmonies. Relatively smooth voice-leading (avoiding huge jumps or leaps) tends to work best for vocal harmonies, but definitely experiment with different options to find what works best for your particular project. It’s also good to be aware of the range your lead vocal sits in, so that you can fill out the frequency spectrum with voices that sit below and / or above it. For this track, I’m more-or-less just borrowing the chord voicings played by the piano that enters a few bars into the section.
Once you’ve mapped out your MIDI, hit play and hear VocalSynth 2 work its magic. This is what my harmonies sound like on their own:
3. Tweak your sound within VocalSynth 2
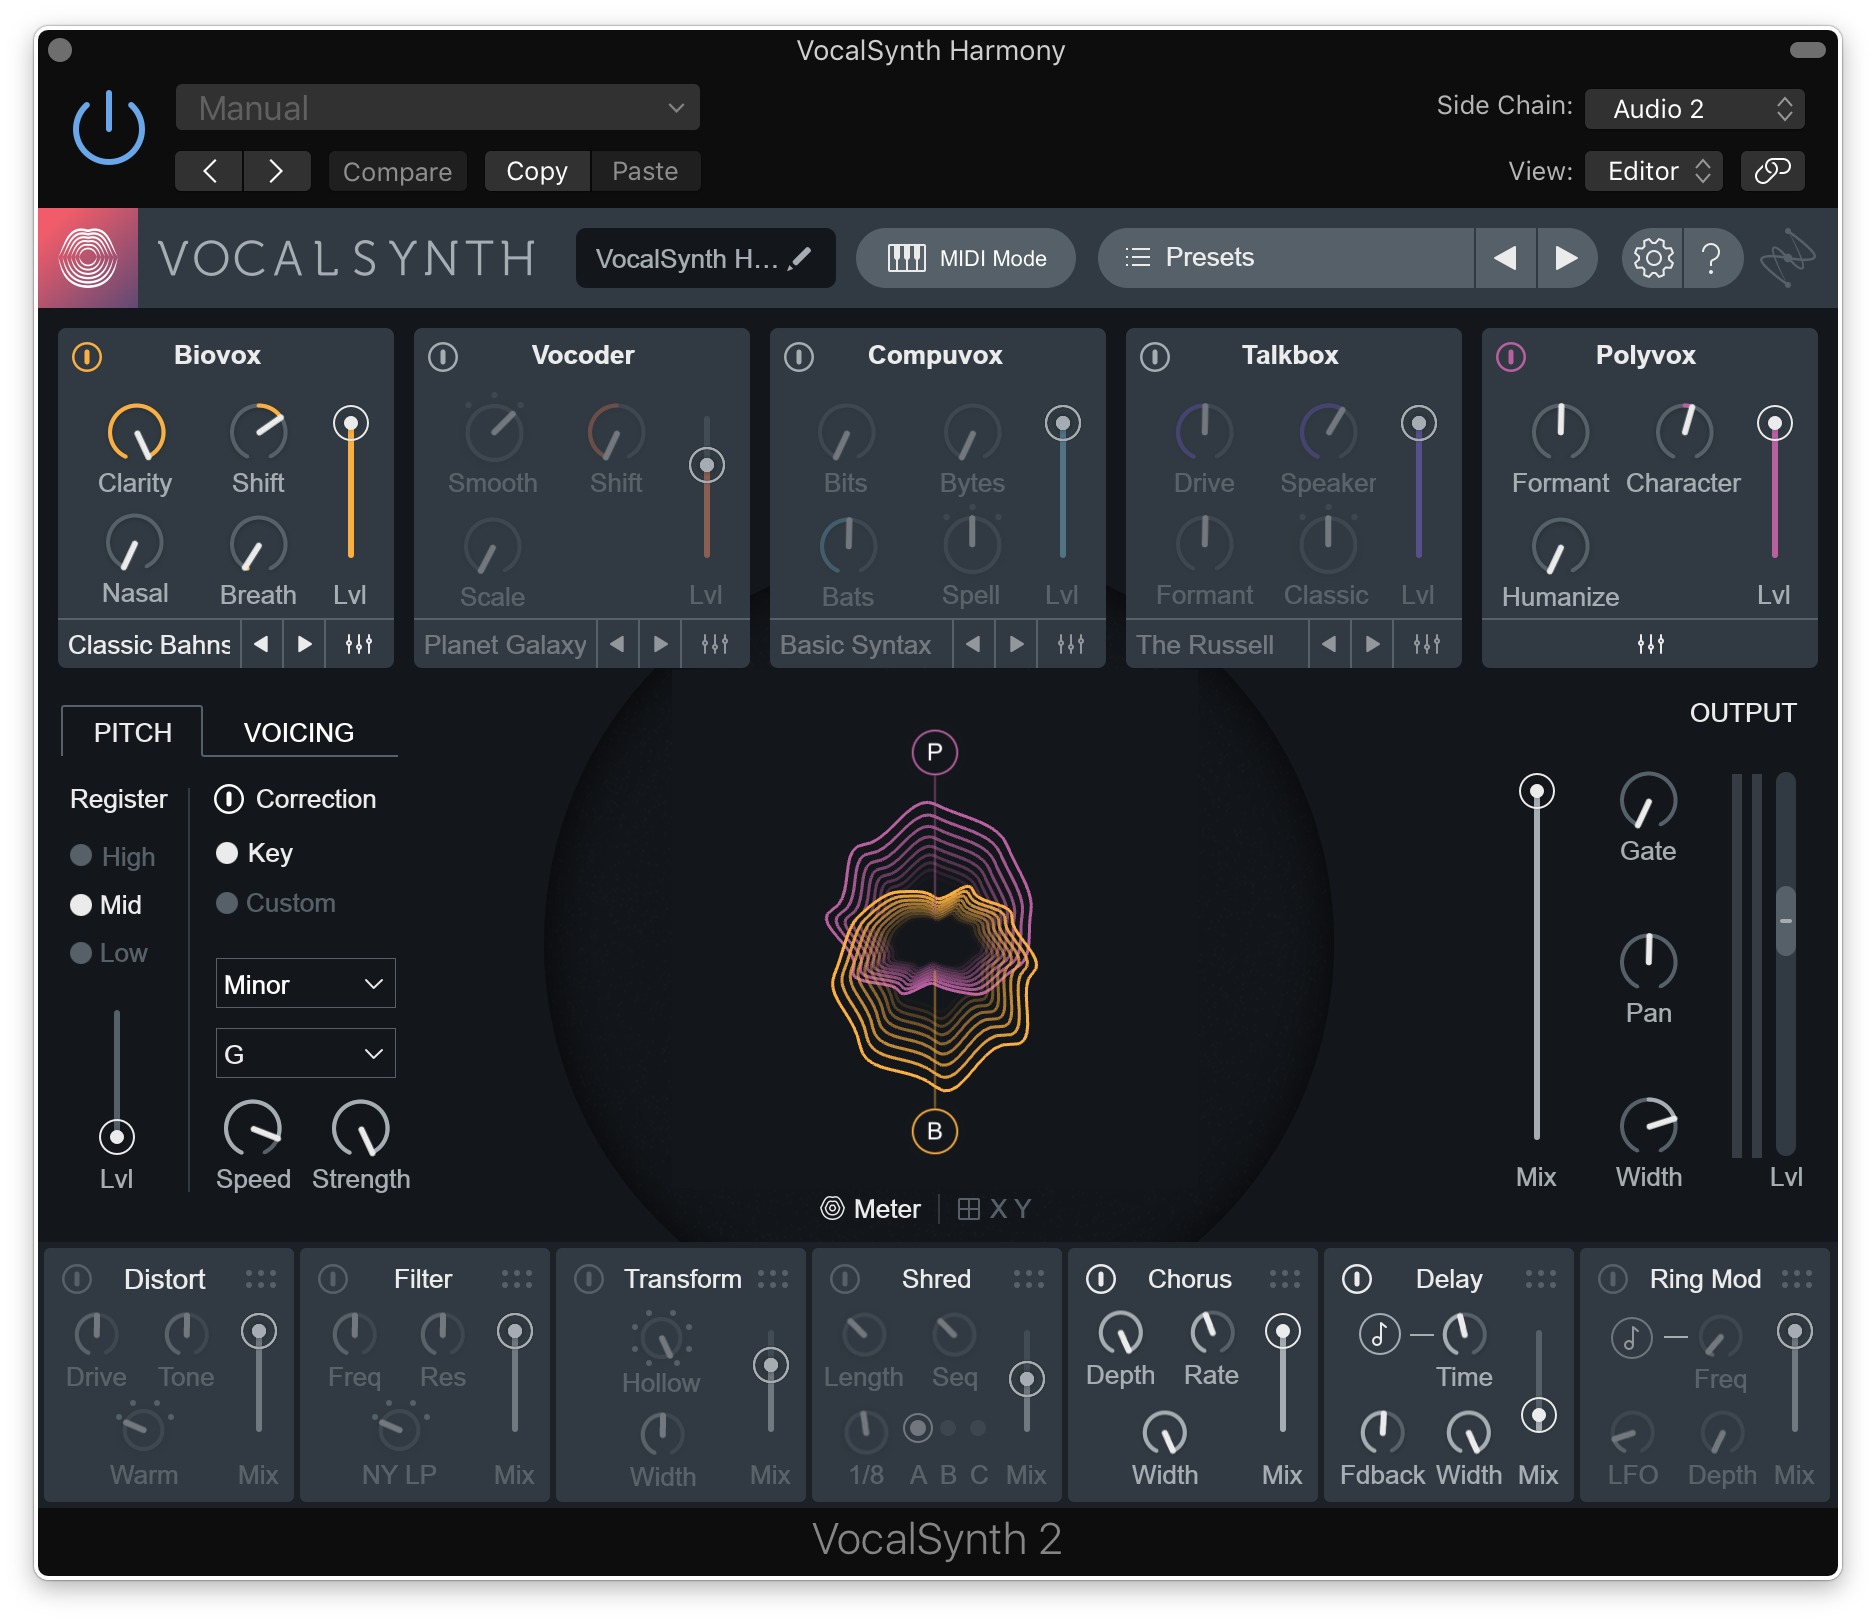
Lastly, design the perfect sound for your harmonies within VocalSynth 2 by creating a balance between the five synthesis modules (Biovox, Vocoder, Compuvox, Talkbox, and Polyvox) – each one has distinct characteristics and parameters that you can learn more about here. For this track, I’ve created a blend between Biovox and Polyvox, capitalizing on Biovox’s clarity and Polyvox’s lush timbre. I’ve also dialed in some Width to make the harmonies feel larger-than-life and to separate them from the lead vocals in the stereo image.
Here’s how VocalSynth 2 sounds once the harmonies have been mixed in with the lead vocal:
And that’s all there is to it – we’ve crafted a polished, exciting vocal harmony sound in just three simple steps. While you can play around with this sort of effect using native / free plugins (such as Logic Pro X’s EVOC 20 PS), they simply can’t achieve the same degree of quality or timbral flexibility that VocalSynth 2 brings to the table.
Now that we’ve topped off our vocal with some harmonies, we’re ready to mix it with the rest of the track – continue to the next tutorial to join us as we walk through how to mix vocals with the help of Nectar 3.
Explore industry-leading plugins, bundles, DAWs, and more:
January 7, 2019