.svg)
.svg)


In music spanning all sorts of styles and genres, vocals reside at the center of the mix and serve as a focal point for listeners to latch onto.
For this reason, it’s crucial that your mix provides clarity and space to your vocals. However, this can be tricky at times since vocal definition lies primarily in the mids, competitive sonic real estate shared by common instruments such as synths, guitars, pianos, strings, etc.
Some producers will find a ‘vocal chain’ that was effective in a particular session and then proceed to save and reload the same chain of plugins on other tracks. While a preset could potentially be used as a starting point, the issue with replicating exact chains is that every song is different, and therefore requires vocal processing that’s tailored to that specific production.
iZotope’s Nectar 3 not only takes a vocal processing chain and consolidates it into a single plugin, but also takes the need for track-to-track customization into account. In our previous article, we learned how to create compelling harmonies with iZotope’s VocalSynth 2. In this tutorial, let’s use iZotope’s Nectar 3 to mix our lead vocal within the same project:
Voice to verse—anywhere. With the addition of Splice Mic, you can instantly test and record ideas, explore genres, and unlock new creative possibilities, all from the Splice mobile app.
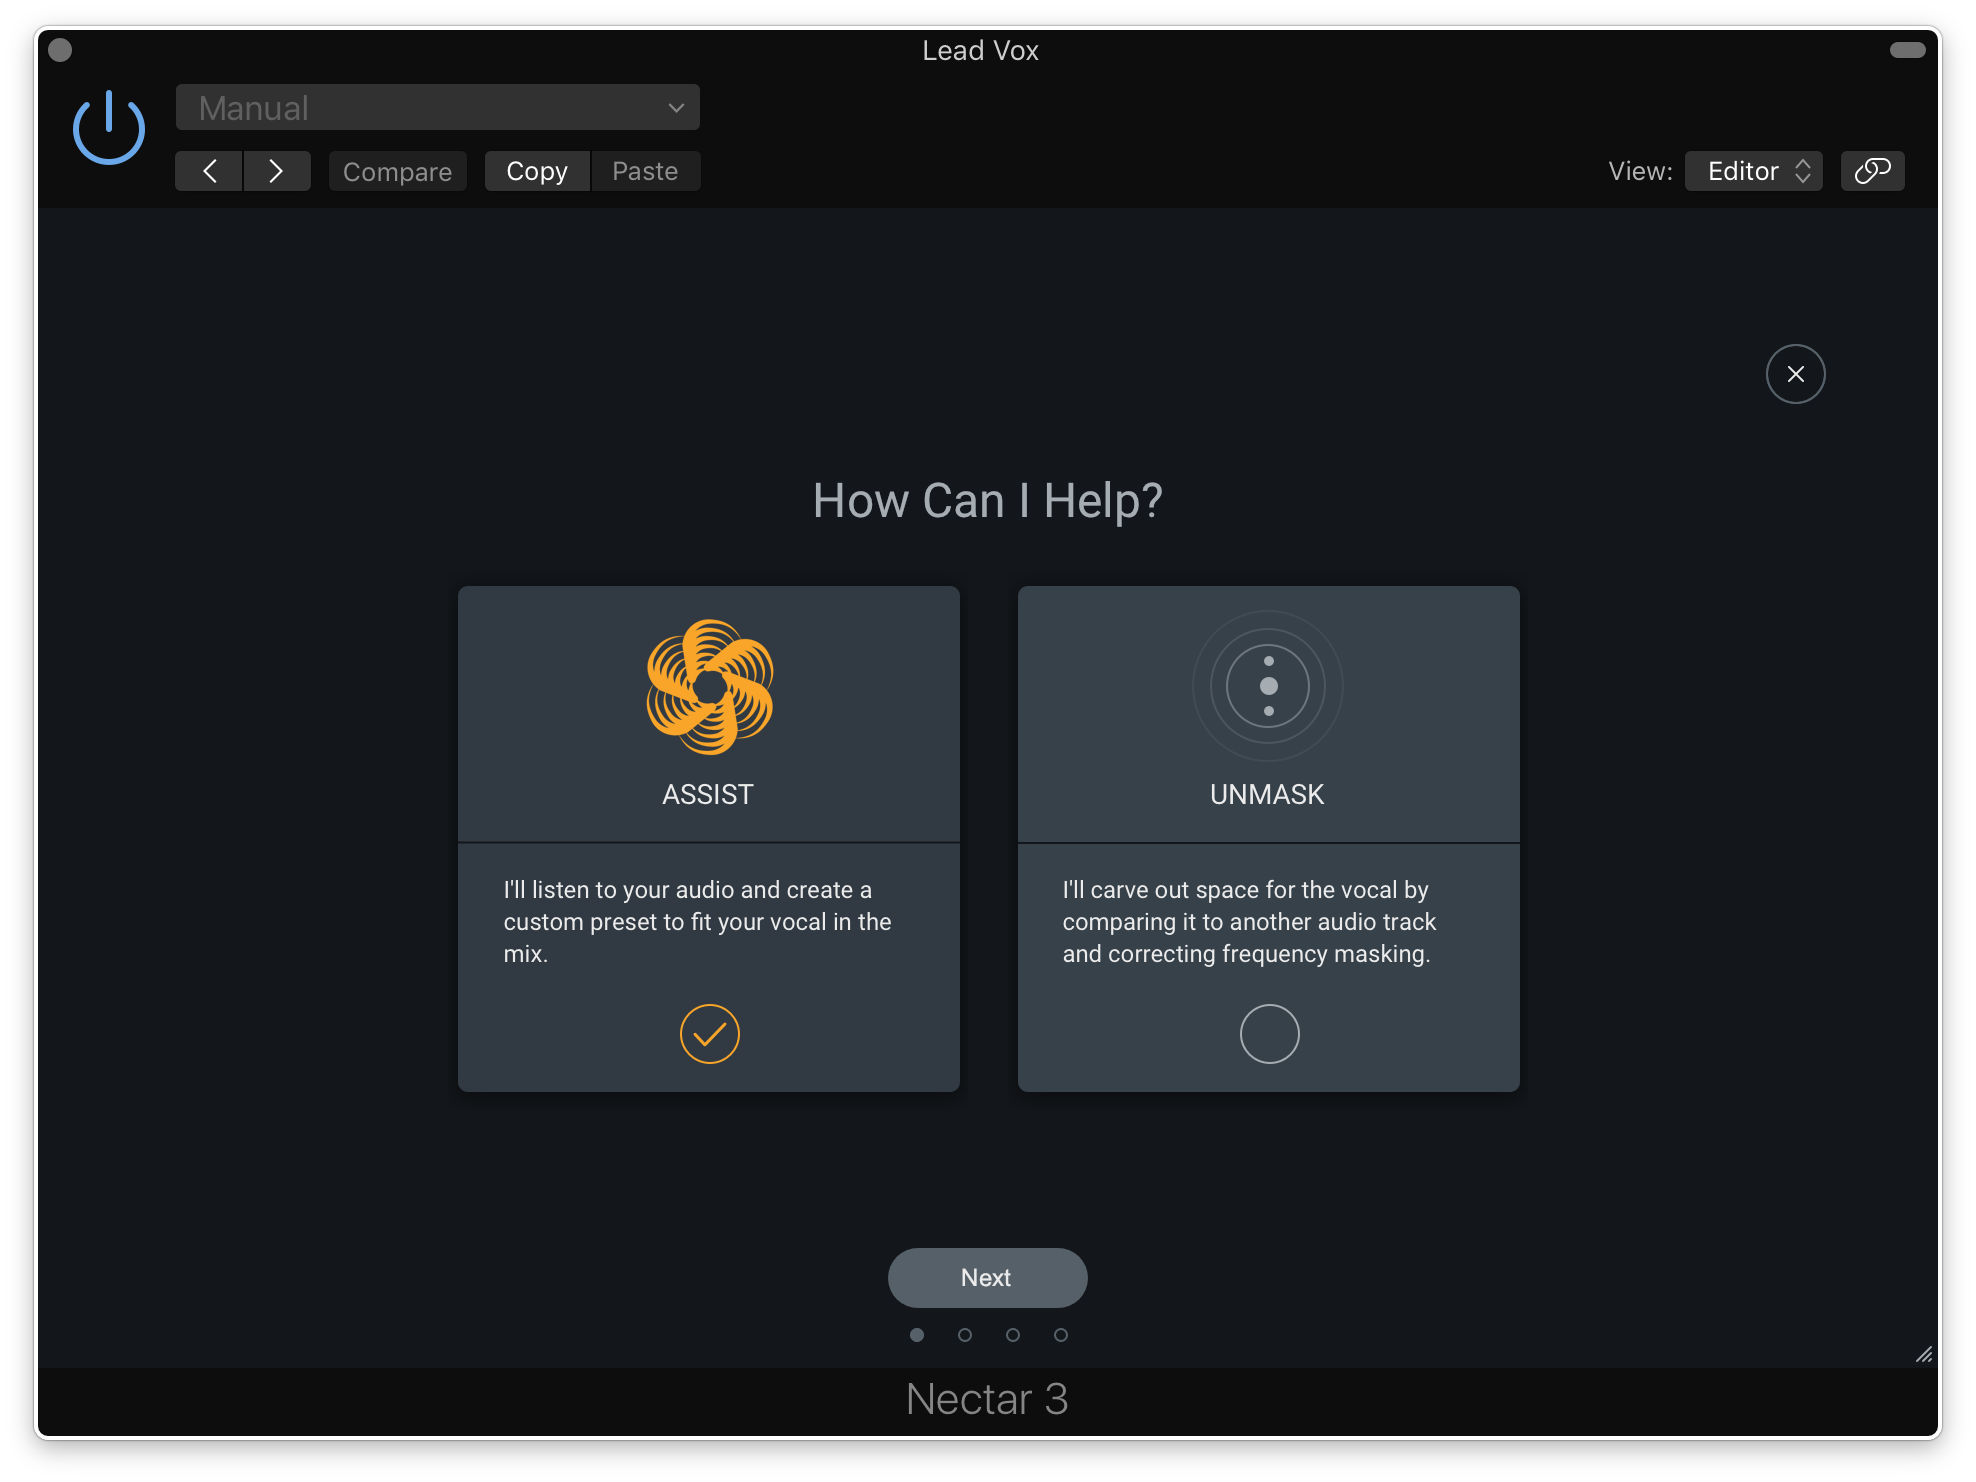
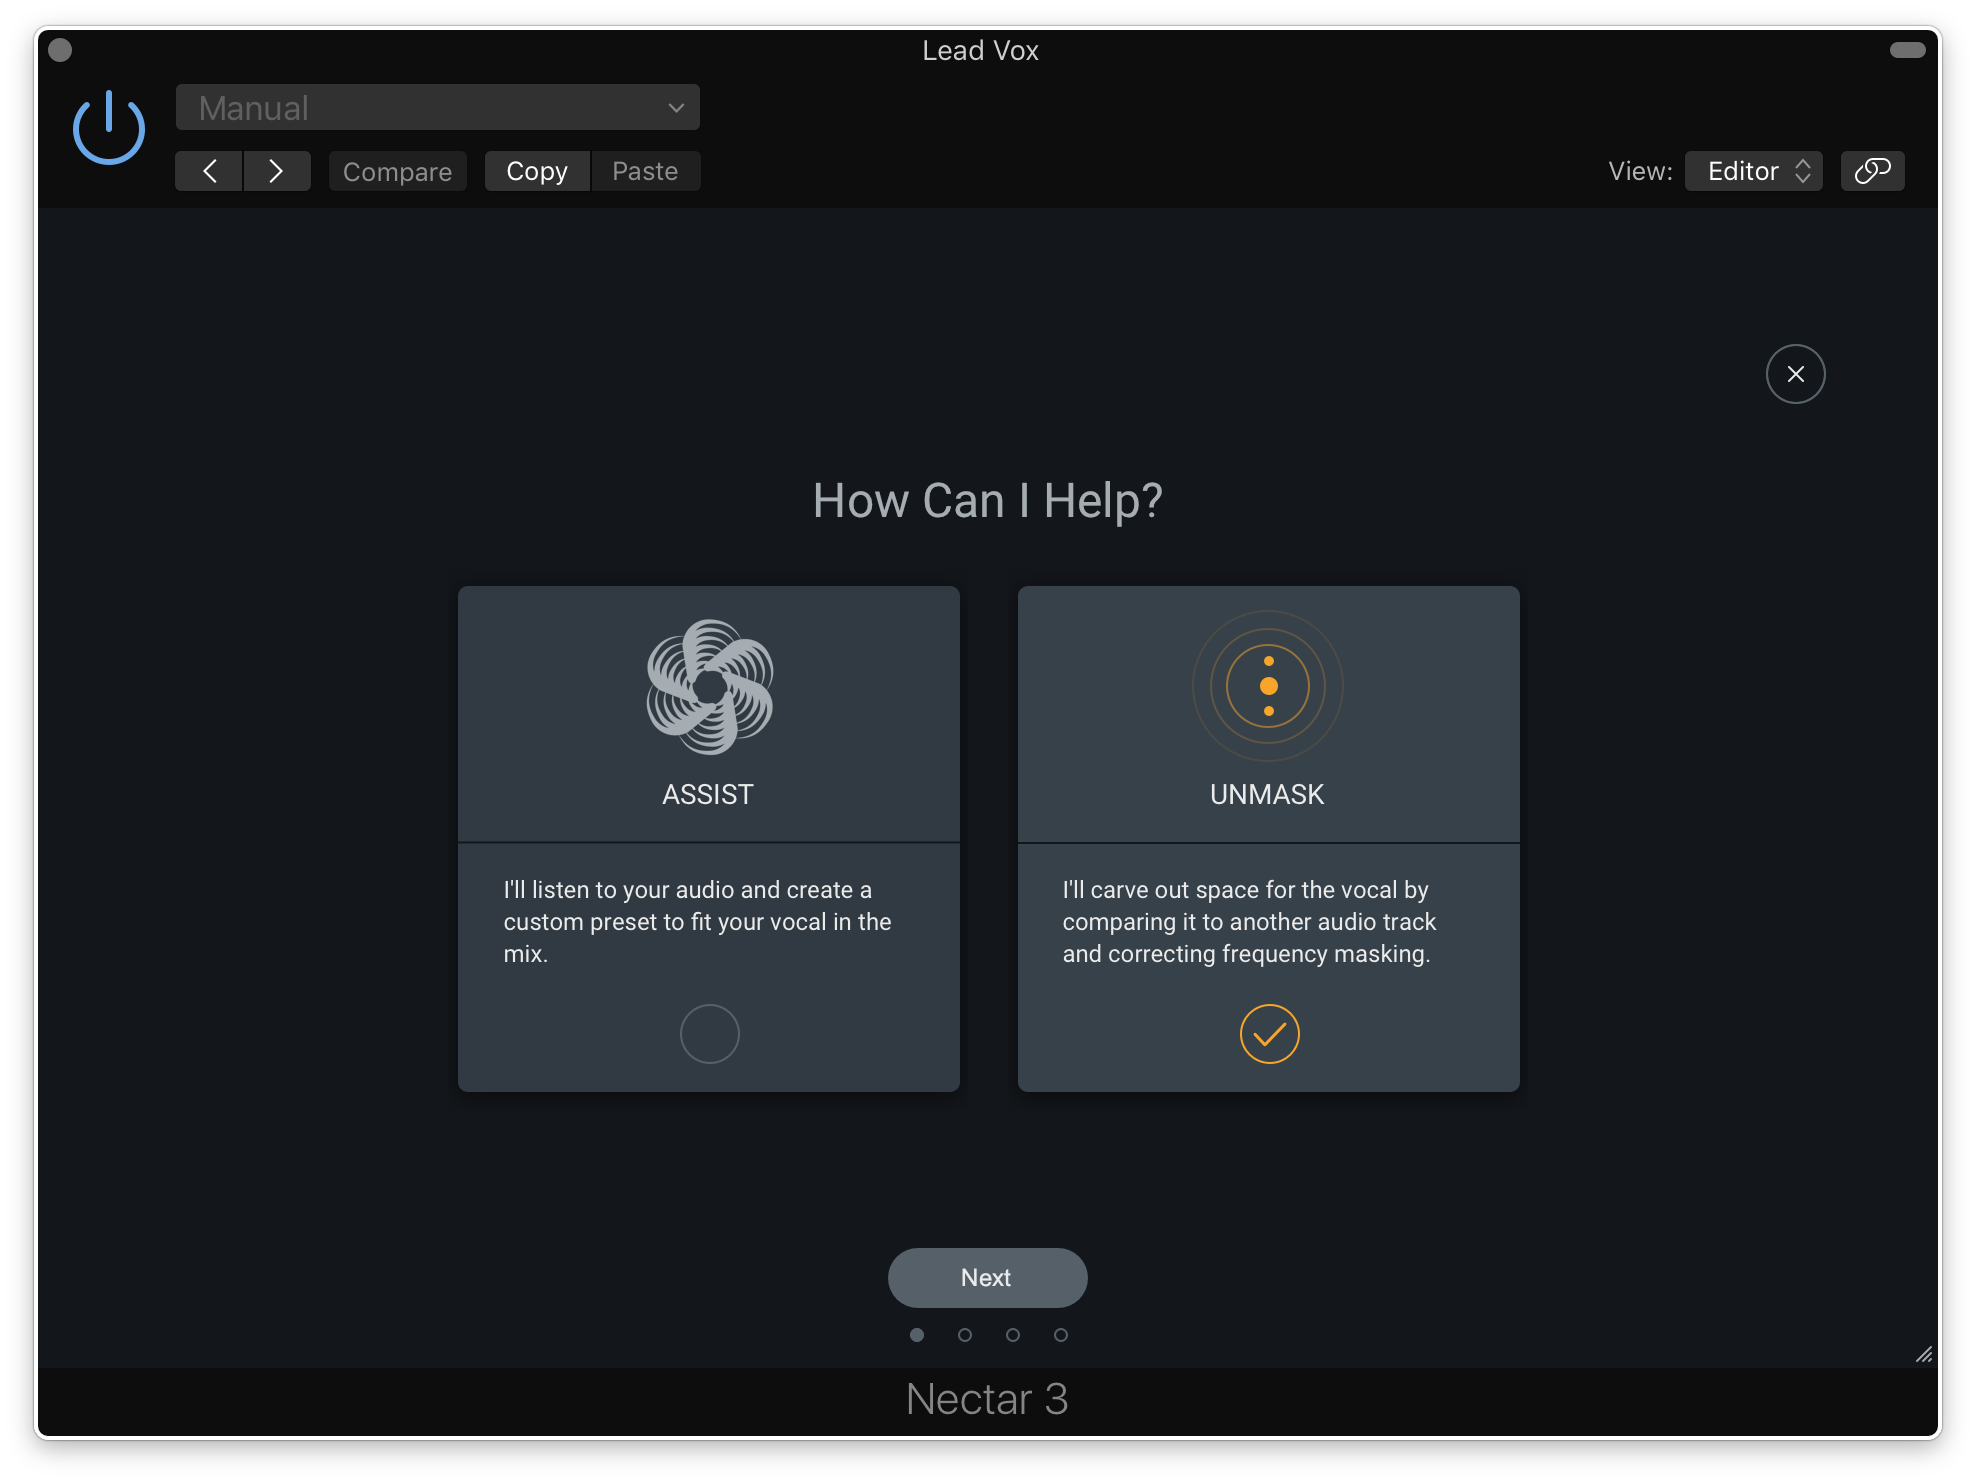
1. Get a solid starting point with Vocal Assistant
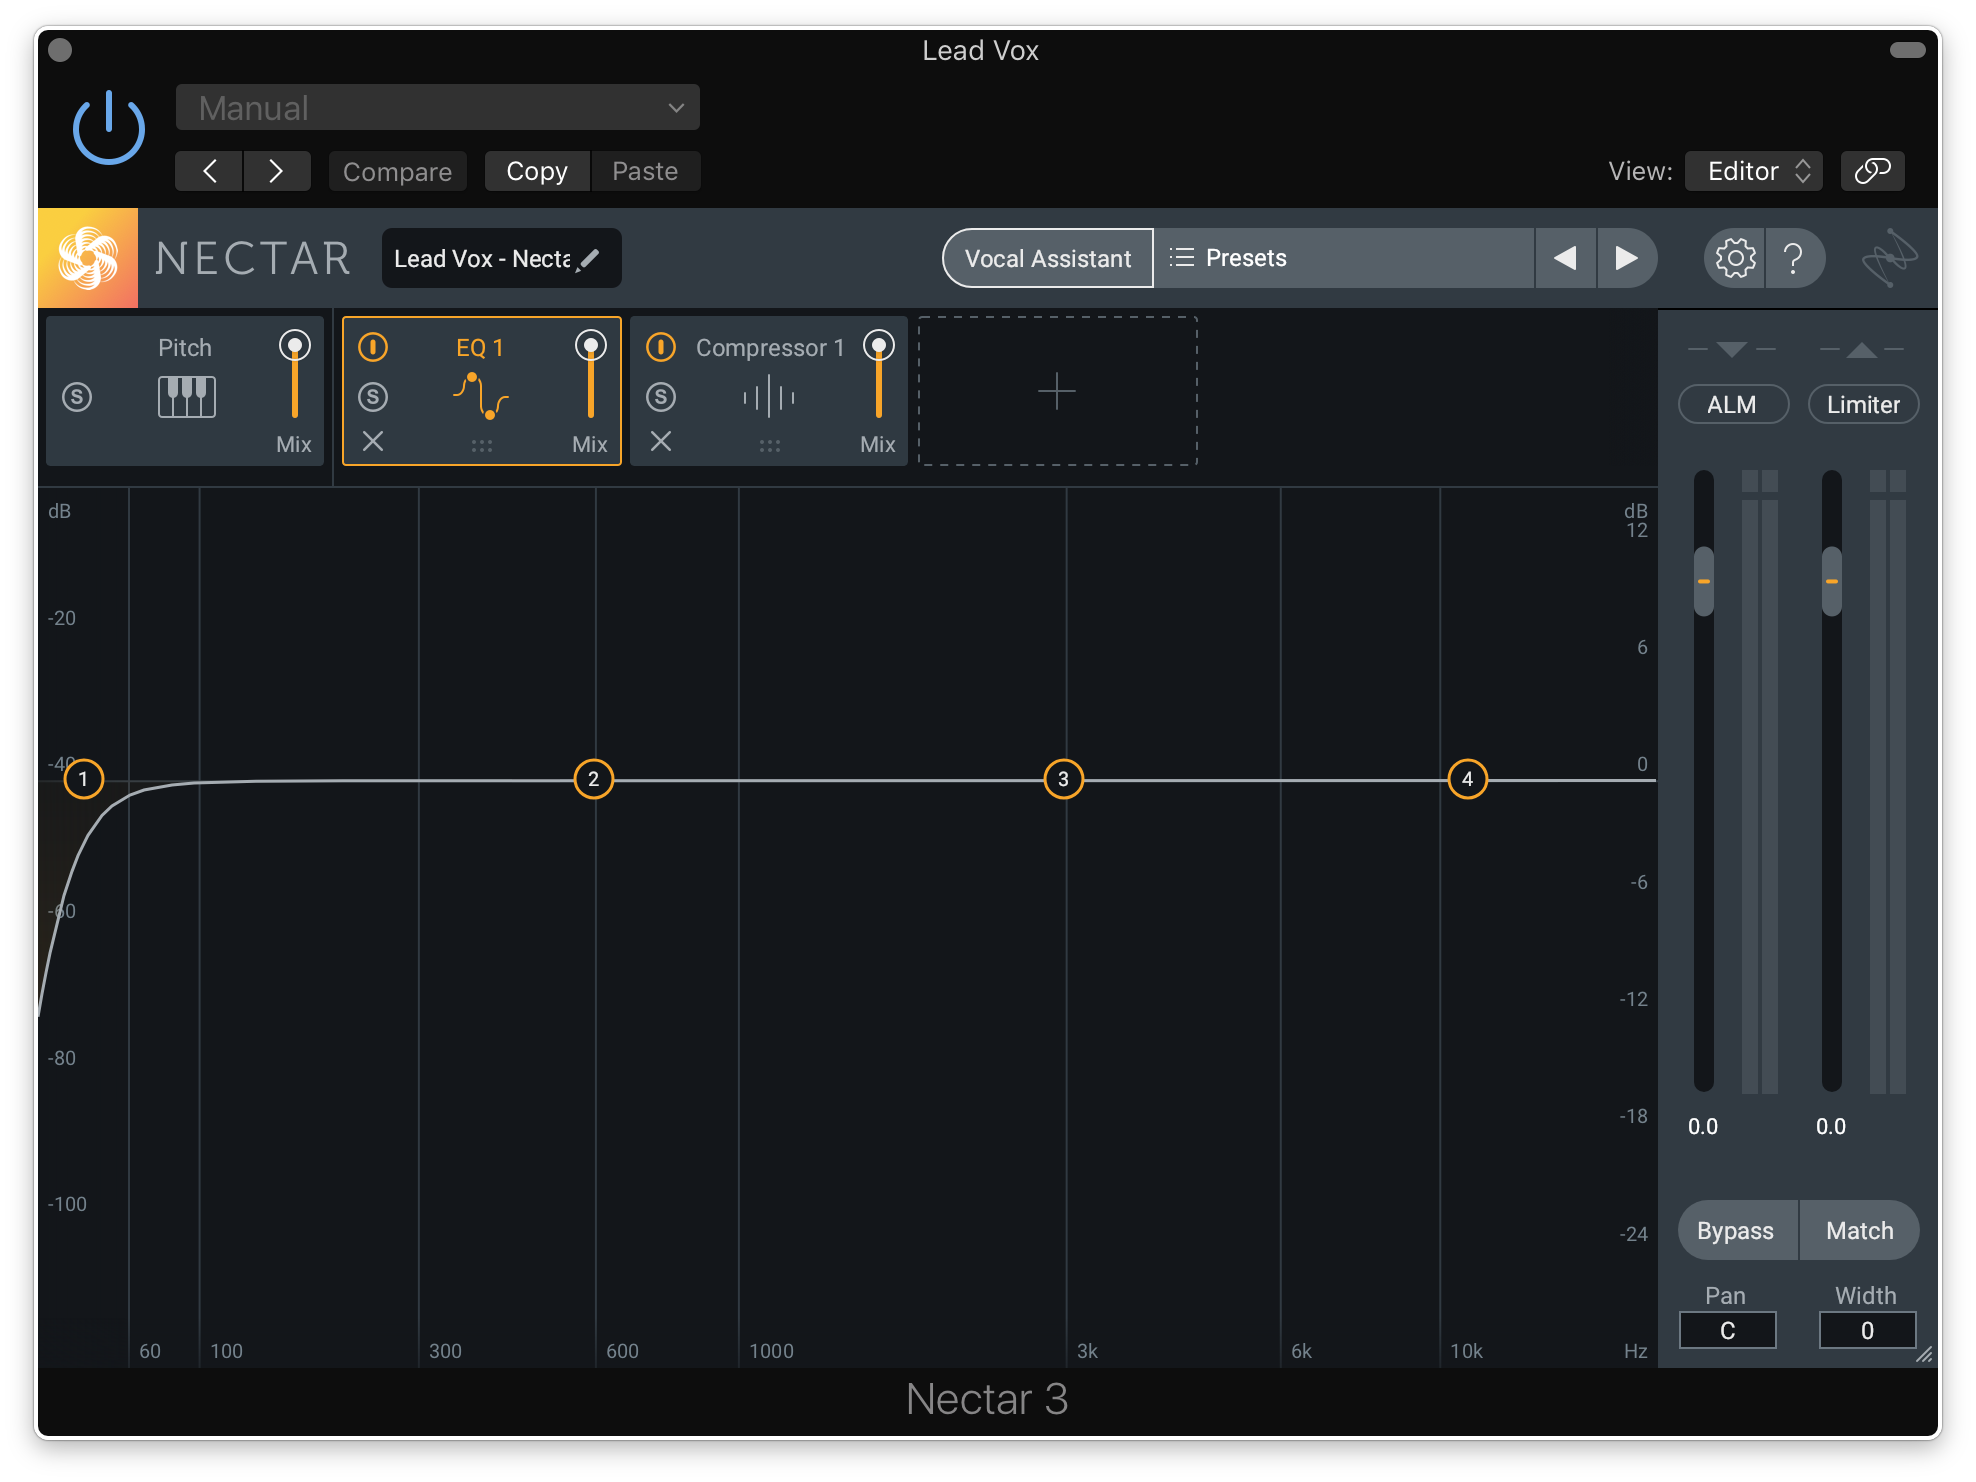
Start by loading an instance of Nectar 3 on your lead vocal track. When you open up the plugin, you’ll be greeted by a default setting that looks something like this:
By clicking the Vocal Assistant button on the top bar, you can access the Assist feature. After selecting one of three different Vibes (Vintage, Modern, or Dialogue) and an Intensity (Light, Moderate, or Aggressive), Nectar 3 will listen to your track and come up with a processing chain that’s tailored to your specific session. For this track, I’ve selected a Modern vibe and a Moderate intensity.

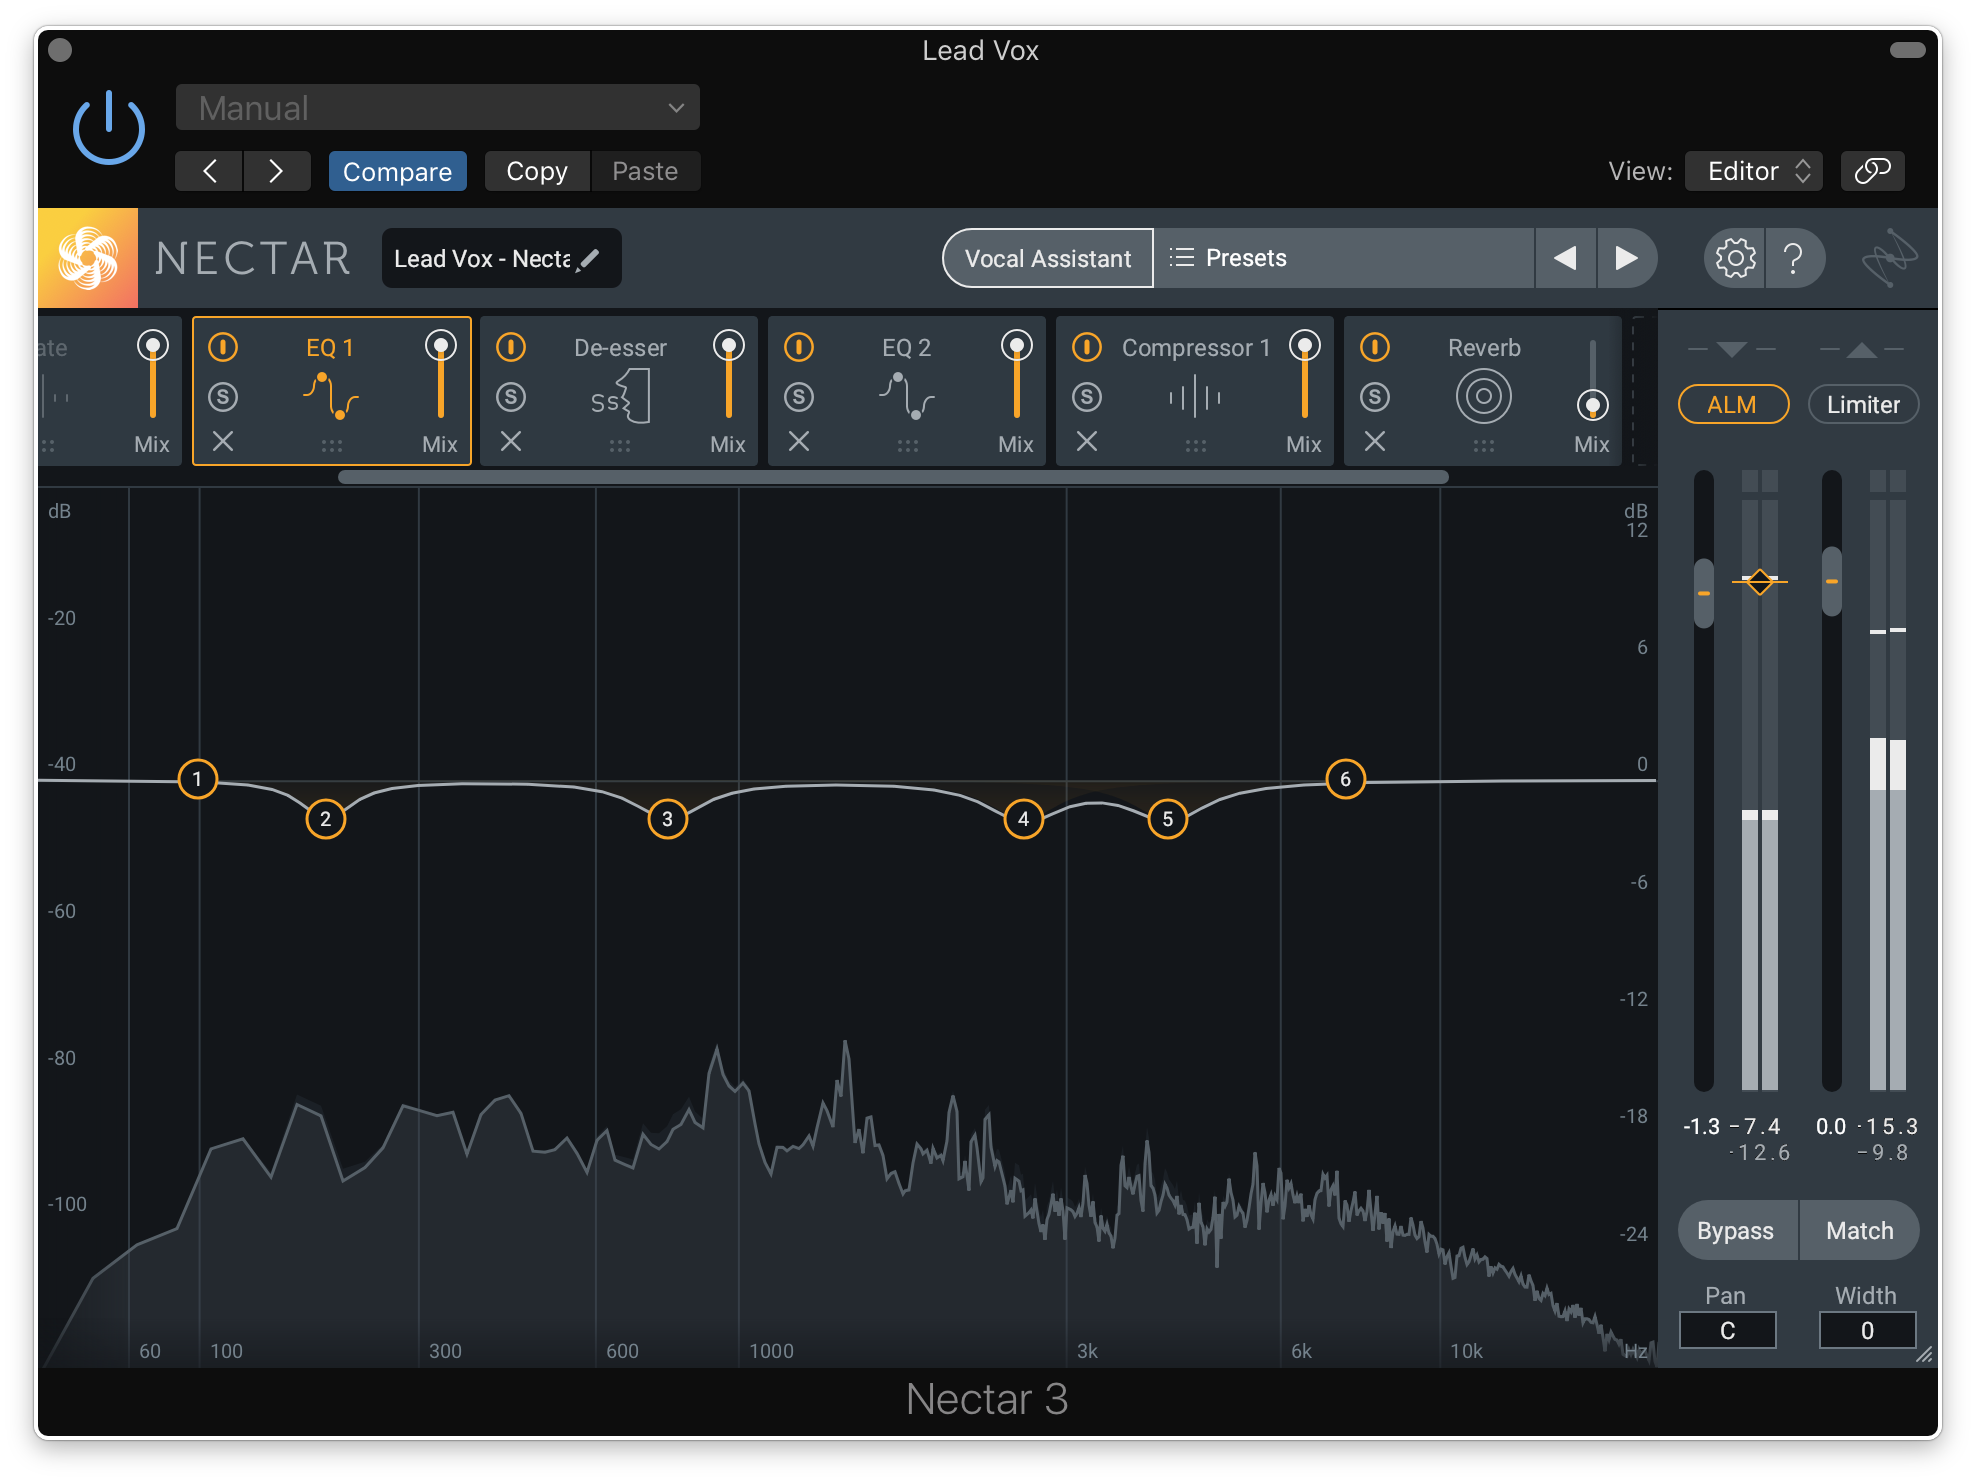
Vocal Assistant considers various factors such as input level, vocal register, and frequency content to craft a customized processing chain. For my lead vocals, it gave me a setting containing some adaptive EQs (EQ 1 and EQ 2), a De-esser, a Compressor, and Reverb:
2. Enhance the sound with your own creative decisions
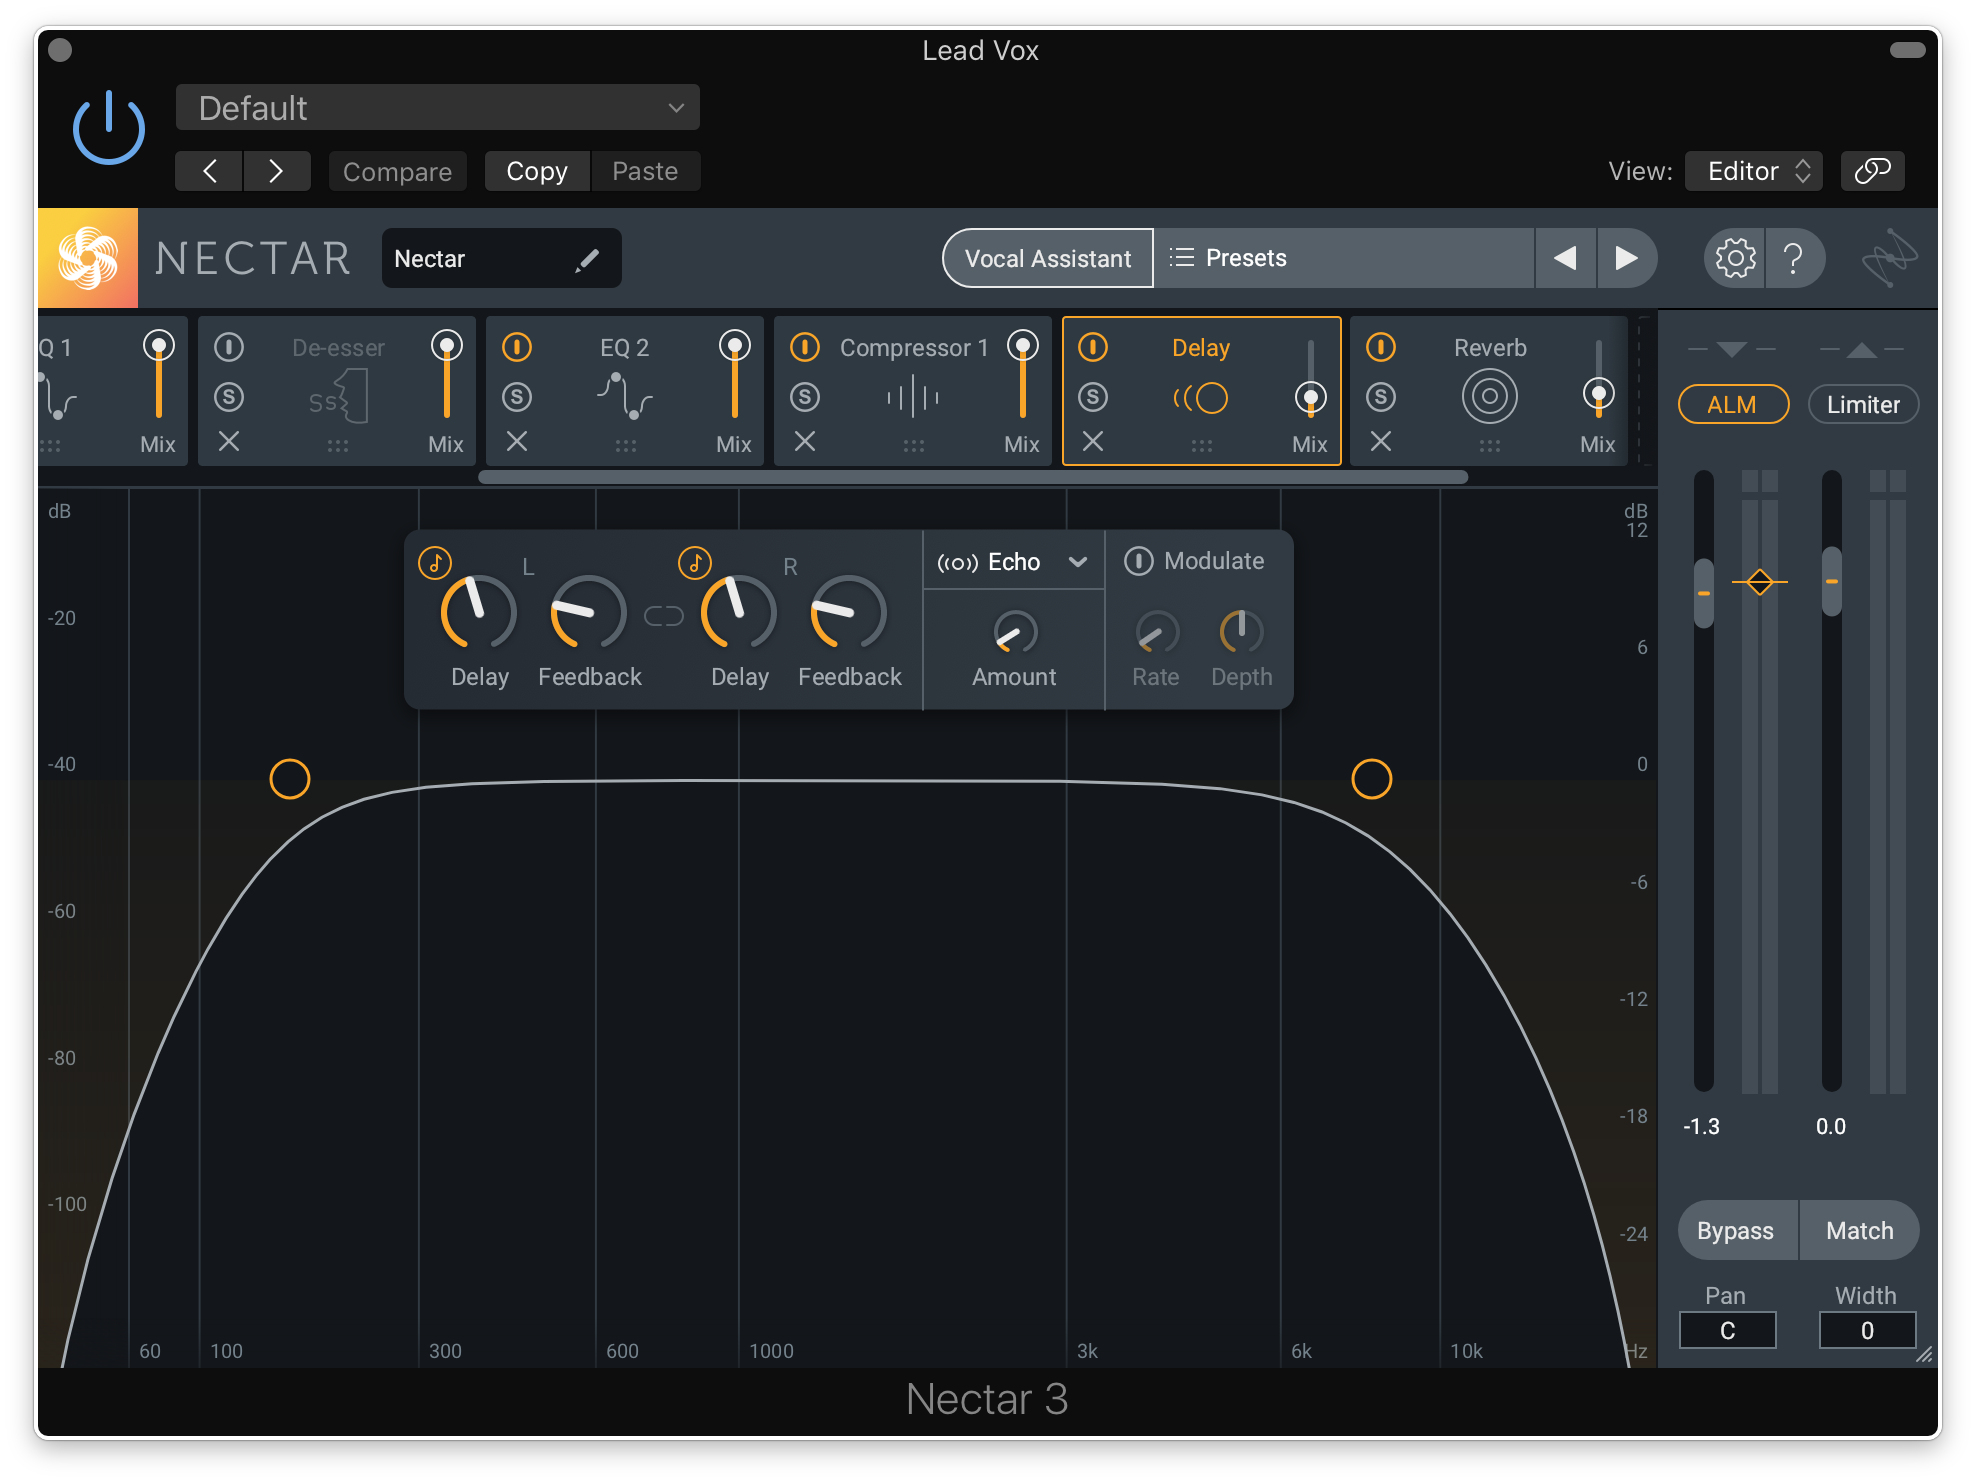
Now that we have an intelligent starting point that offers a lot of technical enhancements, we can take over and focus on making creative decisions as we see fit. For example, I was happy with the corrective EQ choices that Nectar 3 made, but didn’t feel like the de-essing was necessary. Therefore, I bypassed that module to avoid over-processing my vocals. I also increased the output of the reverb to add a little more spaciousness, and I added my own band passed delay to fill out some empty moments in the production without undermining intelligibility.
Let’s compare how the vocal sounds before and after Nectar 3 in isolation, and then more importantly, how it sounds in the context of the entire track.
The dry lead vocal:
The lead vocal after Nectar 3:
How the dry lead vocal sounds in the track before Nectar 3 has been applied:
How lead vocal sounds in the track after Nectar 3 has been applied:
3. Unmask your vocal to carve out space in the mix
Another subtle but incredible feature I took advantage of is Nectar 3’s Unmask feature. Unmask will compare the vocal against other tracks to apply static EQs in competing frequency ranges. This helps the vocal cut through the mix without significantly altering the sound of any other tracks.
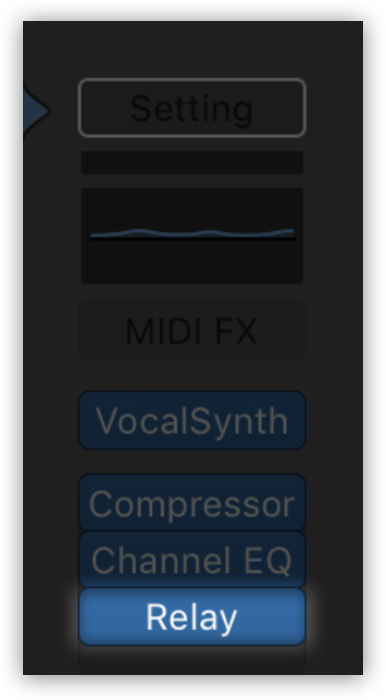
Before we get started, it’s important to note that the feature needs to identify sources aside from your vocal track to compare for unmasking—Nectar 3 is able to detect other elements in the mix if their processing chain includes an instance of Nectar 3 or its complimentary Relay plugin. The Relay plugin is preferable if unmasking your vocals is your primary objective, since it’s way less CPU-intensive in comparison to running tons of instances of Nectar 3.
For this track, I’ve placed the Relay plugin on my VocalSynth 2 harmonies and the lower octave backing vocal. Because these sources are always playing in sync with the lead vocal, I want to make sure that the lead has space in the mix to breathe.
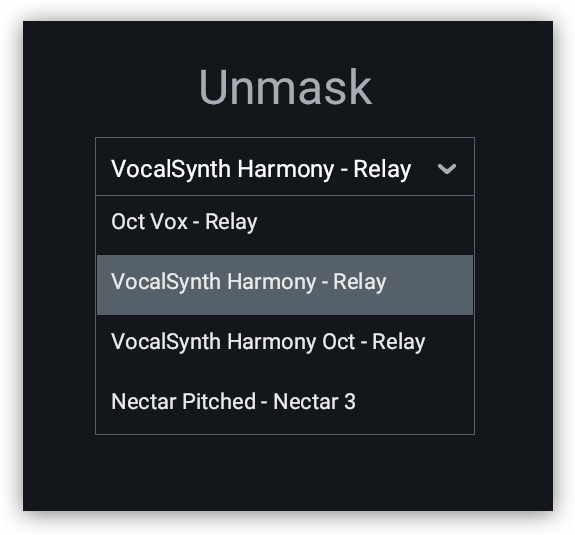
Once you’ve placed the Relay plugin on all the tracks you want to unmask, go back to your vocal track and hit the Unmask option in Vocal Assistant. You’ll now be able to view all the other sources you placed the Relay plugin on, right from within Nectar 3.
If masking is detected, the Relay plugins will unmask Nectar 3 and update their GUIs accordingly:
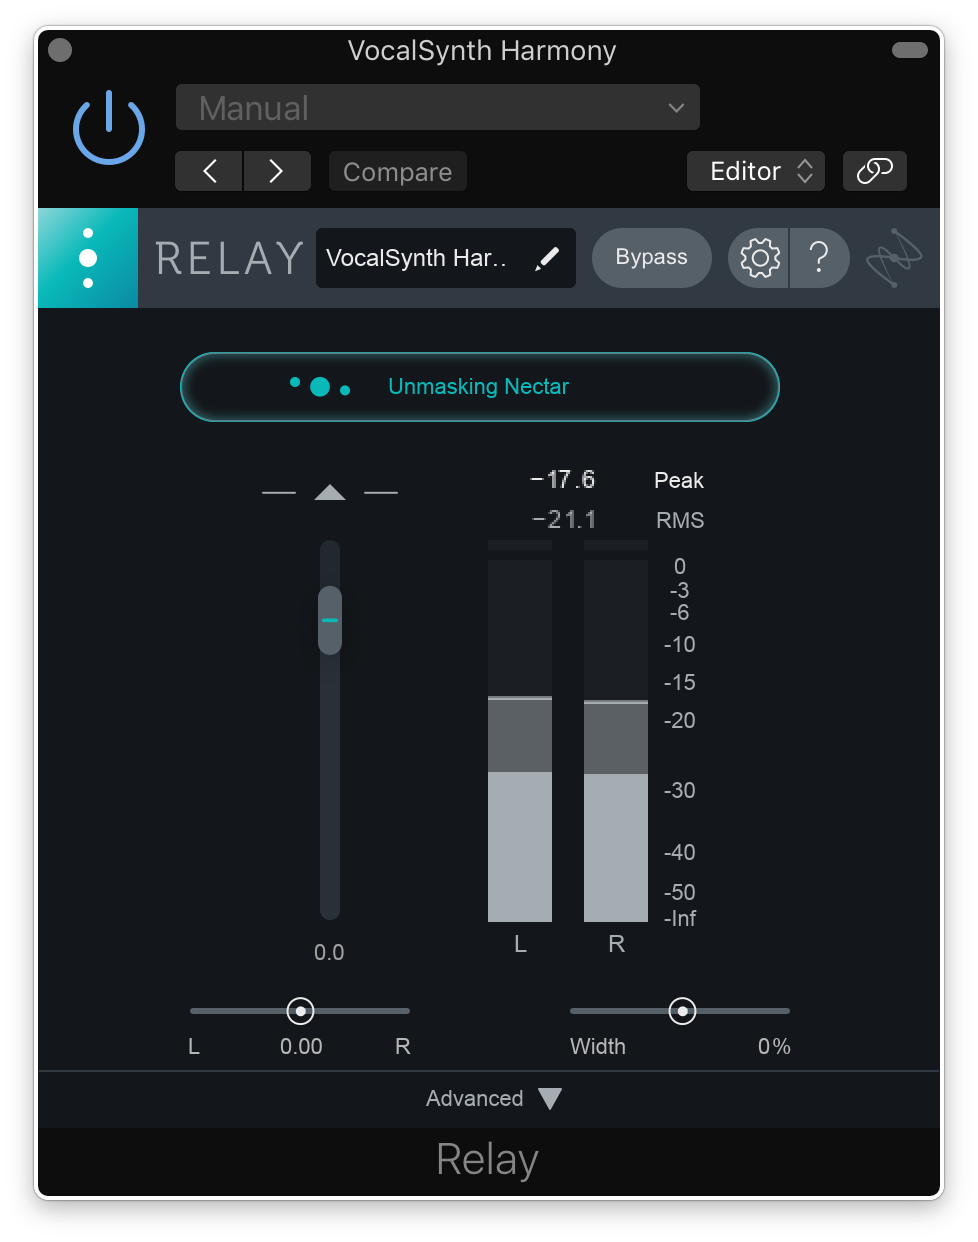
Again, the effect is fairly subtle, but that’s kind of the point. Drastic EQing can easily transform and compromise the timbre of your tracks. Unmask, on the other hand, carefully preserves the sound of each track by implementing small EQ adjustments you can get away with.
Now that we’ve mixed our vocal, it’s time to advance to the final step—continue to the next tutorial to join us as we walk through how to master your overall track with the help of Ozone 8 Advanced.
Explore industry-leading plugins, bundles, DAWs, and more:
January 7, 2019


