.svg)
.svg)


Illustration: Filip Fröhlich
There are few creative technologies more crucial to modern music creation than MIDI.
Short for Musical Instrument Digital Interface, this language completely digitizes notes played through hardware tools like keyboards or drum pads. The data can then be interpreted by any software instrument, morphing into anything from a wavetable synthesizer to a warbly piccolo or a sampled human voice. It also enables producers to freely sequence, correct, or adjust performances within the DAW.
For modern producers, understanding how to get the most out of MIDI, and do so efficiently, is crucial. It can be the difference between a hard drive full of demos and regularly releasing projects into the world. In this article, we go over our top MIDI editing tips for making this a reality. Feel free to use the table of contents below to easily navigate to a specific section:
What you’ll learn:
- What is MIDI editing?
- Key MIDI editing tips for better tracks
- The future of MIDI editing
- Explore firsthand with MIDI files on Splice
Let’s dive in!
What is MIDI editing?
Prior to MIDI’s invention in 1983, audio recording with microphones was the driving means for capturing and shaping sound. The take was the take. Outside of methods like tape splicing, which famously provided us some of David Gilmour’s most incredible solos pieced together from multiple takes, the producer’s job was to present the recorded audio in the best light, not fundamentally change it.
Crucially, MIDI is not captured sound, but rather data. MIDI editing is the process of going into that data and adjusting it. Where audio editing deals with waveforms and sounds that have already been captured, MIDI editing works entirely in the realm of instructions. The actual sound only happens when a virtual instrument or synthesizer interprets those instructions.
We might change the instructions to correct a single note played out of tune or a beat late, or develop an improvised idea into a core section of the song. We might adjust the sustain, attack, or release of a chord in a way that would sound stretched or artificial with an audio file. What about opting to not use a hardware device at all, and writing out an idea within the DAW? With MIDI editing, that’s as simple as typing words on a keyboard.
Key MIDI editing tips for better tracks
We’ve already started to explore some concrete MIDI editing tips and examples, but let’s look at it in terms of a couple categories. Here are the core terms you should understand and know when to lean on in your workflow.
1. Quantization and swing
Quantization was once a musical skill for musicians to perfect within and beyond their 10,000 hours. In this sense, quantizing is playing in time with the utmost precision and accuracy.
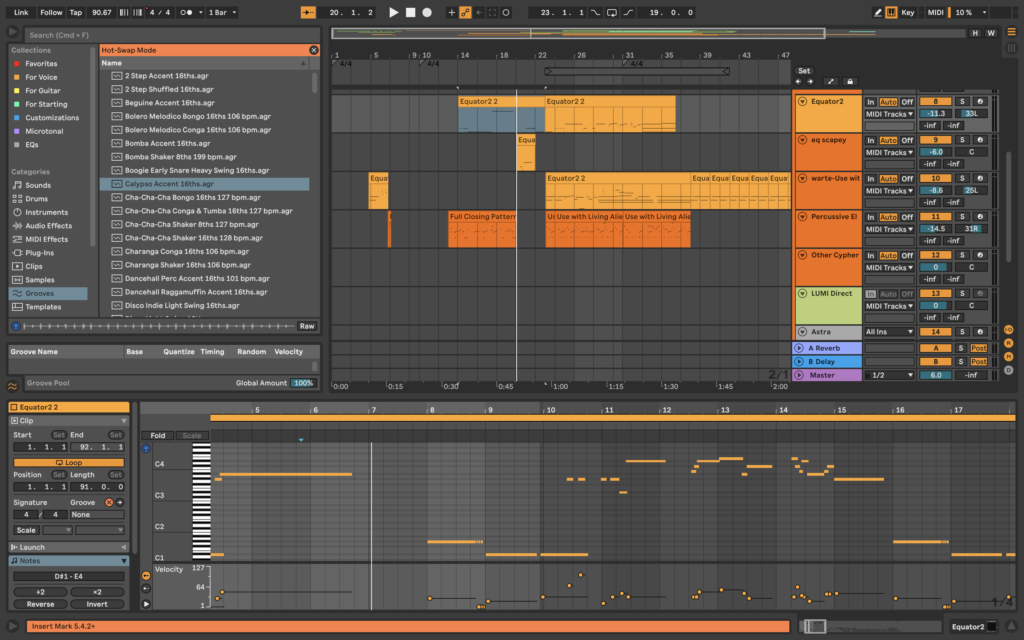
Within a DAW, quantization is an editing tool that snaps MIDI notes to a rhythmic grid. With this process, we can take any collection of notes and assign them to lock to the nearest beat division. We can set that subdivision to whatever we want, though most often producers will do something between a whole note and sixteenth note.
While quantization can be a swift way to perfect a rough idea, it can also be too perfect. Quantization as a MIDI editing tool comes with the risk of being so precisely in time that it sounds robotic, which doesn’t lend itself to every genre. With that in mind, there are a few ways to edit with quantization to allow for a bit more natural feeling to come through:
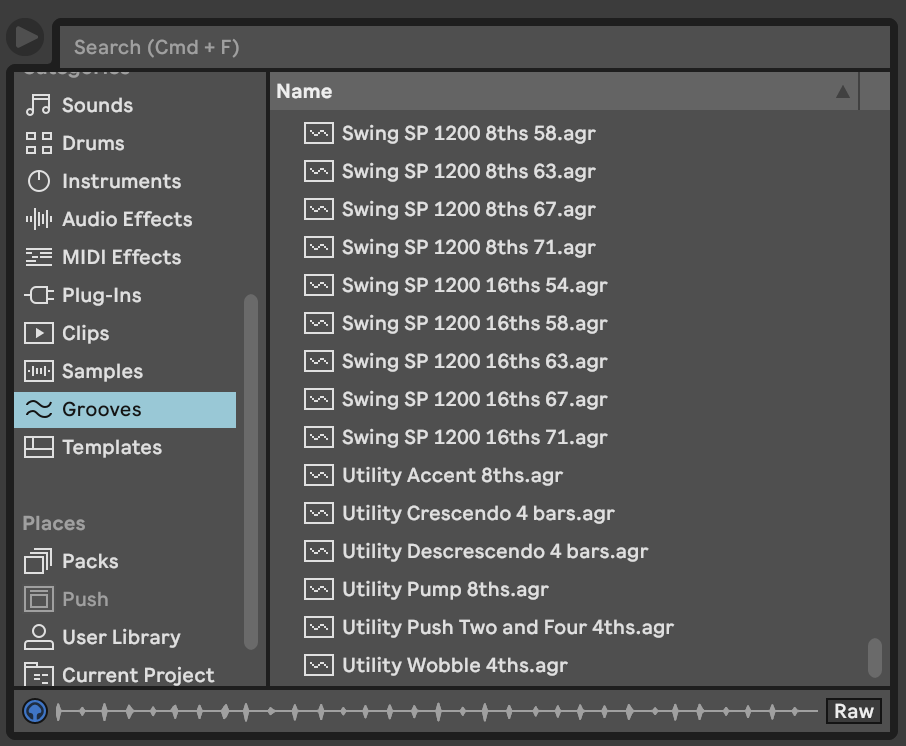
- Adjust the groove setting, of which there are endless templatized grooves, or you can design your own. Swing, for example, slightly delays the off-beat notes in a pattern. This method is particularly common in hop hop, lo-fi, jazz, and more, creating a push-and-pull feel that gives the song an addicting, memorable pulse.
- Whether for a specific groove or a basic quantization to a note size, consider setting your quantization percentage to a value less than 100. Somewhere between 65 – 85% will provide subtle variance while still largely snapping to the exact beat.
Think of these strategies as letting the notes breathe, just as singers and analog musicians do with slight variations in each performance of the same song.
2. Note length and velocity adjustments
Two of the most expressive parameters in MIDI editing are note length and velocity. Given the subtlety with which these can be used, they’re often underused or misunderstood.
Note length controls how long a note sustains before it’s released. Those who studied music theory will remember these phrases that refer to note lengths:
- Staccato refers to short, clipped notes. It’s one of the most important articulations for classical musicians and singers to learn, as it can provide percussiveness from instruments outside of traditional percussion. In modern music production, you might use stacattos for a punchy bassline or synth stabs that build tension.
- Legato refers to longer, smooth-feeling notes. This articulation could be used for only a few seconds while moving through a chord progression, or be used for a single, droning note throughout an ambient track. These notes tend to play much more on developing emotion rather than the harsher, immediate impact of staccato notes.
Velocity is a MIDI value that’s commonly associated with dynamics and loudness, or piano vs. forte in the context of classical music. It correlates to how hard a note is struck—the higher the velocity, the higher the intensity of note.

With each of these tools interplaying with each other, we can take any basic melody, bassline, or chord progression and make it memorable. After quantization makes the blanket adjustments, blending tweaks for velocity and note length acts as your fine-tooth comb as you move towards a final bounce.
All that said, intentionality is key, and it’s important to always trust your ears. Take this example below of where quantization can lead us wrong. Here’s a bassline (alone and with a few layers) recorded live on a basic MIDI keyboard. It isn’t fully precise, and has a few areas which could be tightened up:
However, have a listen to how many notes are lost when we quantize it to 1/4 notes. While an extreme example, this can help contextualize how much of the performance can be compromised by snapping to a grid that’s too large, set at 100% quantization:
3. Automation
Automation takes MIDI editing beyond note placement and static dynamics. Rather than setting a parameter and leaving it static across the entire track, automation gives us the ability to create movement within dynamics. Often physically drawn in on a highly visual DAW overlay, automation allows us to build in evolving parameters to further humanize MIDI data.
Here are some ways to automate MIDI:
- Using the modulation wheel on synths. This automation technique will up the expressiveness of your pads and leads, with the exact effect depending on the plugin or preset used.
- Pitch bending to draw in subtle tonal variance. When done right, it’ll add the organic element that we think of when a guitarist or horn player bends a note mid-solo.
- Leaning on filter cutoffs to shape your basslines and mids.
The future of MIDI editing
There are two final considerations worth noting here, each of which could take up their own dedicated article: your DAW-specific features and MPE (MIDI Polyphonic Expression).
It’s important to keep in mind that every DAW approaches the techniques we discussed above slightly differently, and will continue to do so as they attempt to differentiate from one another. While we largely focused on Ableton Live today, other DAWs like Pro Tools, Cubase, and Bitwig will come with a different look and feel, or different tools entirely. For example, Logic Pro has Scripter, which is their unique plugin that allows you to upload your own scripts to process or generate MIDI data in real time, while Cubase offers macro MIDI cleanup features that can be invaluable for composers and power users.
Then there’s MPE, a growing technology that attempts to evolve MIDI data into its own organic sound. Instruments touting these features offer up a responsiveness to touch beyond single note velocity. ROLI’s Seaboard, for example, will have a velocity setting for each of its “Five Dimensions of Touch” such as slide and press. The intention is to take MIDI data to an entirely new level of expressiveness, and as MIDI itself evolves, so will our editing tools.
Explore firsthand with MIDI files on Splice
We hope these MIDI editing tips were helpful—to recap, being able to swiftly edit MIDI data is a game-changer because we can:
- Reshape and tighten up takes after the fact, without sacrificing performance quality.
- Shift the timbre of a take instantly with virtual instruments.
- Further humanize and introduce movement with automation tools.
- Above all, use the DAW as a collaborative tool for developing ideas into songs, rather than a functional one to capture analog performances.
By practicing each of these, you’ll be able to finish your tracks faster and with more accuracy to your creative vision. You’ll also become a more effective studio producer, able to make adjustments on the fly as a song is coming together with the talent in the room. For further exploration, browse and download some MIDI files on Splice and begin to see how each of these tactics can evolve your ideas into music that’s uniquely your own.
Browse MIDI melodies, chord progressions, and grooves made by expert producers and composers on Splice:
June 23, 2026