.svg)
.svg)

For sample-based producers, the Slice to New MIDI Track feature in Ableton Live is king. The idea is simple: you can cut audio clips into multiple slices that are housed in a new MIDI track. Depending on the slicing preset you choose during the process, those individual slices will be organized in one of three ways:
- A Drum Rack with one Simpler instrument per slice
- A Drum Rack with one Sampler instrument per slice
- A Sampler with one slice per key
The slicing presets also contain macro mapping assignments meant to speed up your workflow. Maybe, in your current workflow, you always go straight for the attack, decay, sustain, and release of the volume envelope after slicing–there are already presets for that. Or maybe you prefer to massage the sample start and loop start/end points at first–Ableton has got you covered. I recommend trying out the different presets and figure out which setting you like.
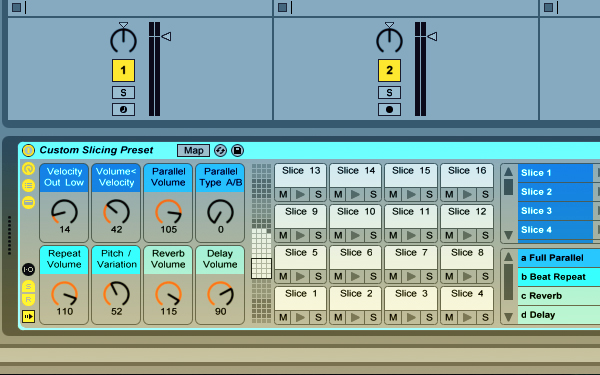
Eventually, you’ll want to create your own slicing presets, and this is very easy to do in Live. For this tutorial, we’ll create a preset that uses Drum Rack and Sampler together. The following Splice file contains a mini-tutorial, built into the Session View of Live, which will you step-by-step through the process leaving with a new slicing preset for you to use.
Step 1: Build your preset in Drum Rack
On a MIDI track, create an instance of Drum Rack and add an empty Sampler to one of the drum pads–you only need one chain for this job. If you’d like to add some MIDI and/or audio effects along with Sampler, feel free. Make any macro mapping assignment that you’d like at this time as well.
Remember: anything you do on this single chain, any devices and mappings that you use, will show up on all of the chains that are used after slicing the audio sample. So really think about what you’re doing and make some informed decisions.

Step 2: Save your preset in the User Library
Once your confident that you’ve created a preset that you’d actually use, it’s time to save it to your User Library. First, go to the Browser and find the Places section. There you will see an avatar icon which stands for the User Library–click on it. Open the Defaults folder, and then open the Slicing folder. Finally, drag and drop the preset you created into the Slicing folder. And that’s it! Very simple. Now try using it.

Step 3: Warp an audio clip and Slice to New MIDI Track
In order to slice an audio clip, it has to be warped first. To do so, click on a clip and the Clip View will pop up at the bottom of the screen. In the Sample Box, you will see the Warp button. If it isn’t already, click it and activate it. If you need to, spend some time warping the audio with warp markers so you get the desired results after you slice the clip.
You can now slice the clip. Right-click on the audio clip and select “Slice to New MIDI Track“. A pop-up window will appear and you’ll have to make some decisions. First, you’ll have to decide if you want slice the clip to be slice by some division of time, such as sixteenth notes (1/16), by the transients detected by Live, or by the Warp Makers that you place in the audio clip. You may not know what you should do, so try them all and see what results you get. When you’re ready, press OK.

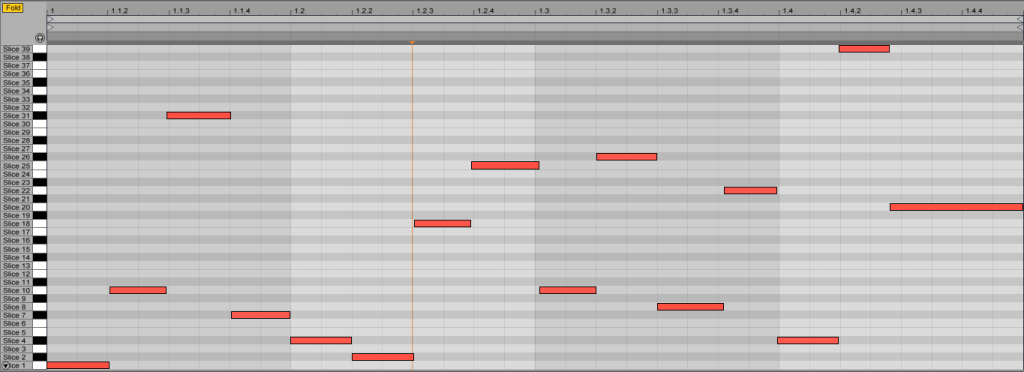
Step 4: Build a new beat in the new MIDI track
At this point, the interface should have changed a bit. You should see a new MIDI track which has been named after the audio clip that you sliced. It also contains a new MIDI clip. If you play it, it will sound identical to the original audio clip (it may be different in volume depending on your settings in Simpler or Sampler). Double-click in an empty clip slot to create a new MIDI clip. And now, go ahead and create a new drum beat or whatever you’d like.
Step 5: Shape the overall sound with the Macros, etc.
The last thing to do is a little sound design. You can go as minimal or as minimal as you’d like–as practical or as creative as you’d like to be. Use the macro mapping that you created in the first step, and feel free to change them. Here’s my end result from creating a Slice to MIDI Track preset: 1) the original sample, 2) a new drum beat, and 3) design the overall sound.
Browse, preview, and license Splice samples directly inside Ableton Live with our new in-DAW integration:
August 1, 2014


