.svg)
.svg)


We are excited to be able to have Ableton Certified Trainer, Alec Ness (producing as “su na“) to walk us through his production methods and philosophies on how to produce a Future Beats track. Su Na recently released Surface EP with coverage from The Fader and Thissongissick and much more. You can find out more about Su Na and listen to his music on his SoundCloud, and Facebook page.
Before reading, please check out Part 1: Pre Production and Part 2: Production & Composition, Part 3: Mixing of this blog series.
Part 4: Mastering
For this 4th and final segment there is no accompanying session. Try using this mastering chain as a starting point on your own production and making adjustments as you see fit.
1. Mastering
Mastering can be thought of as a final polishing stage that makes any given track sound the best it can on all playback systems. It also strives to make a group of tracks in a project sound cohesive. At this stage we’re working with a stereo mix down, making adjustments to a single audio file.
We’re going to walk through a very basic mastering chain in iZotope’s Ozone. It’s important to note that opinions vary widely on what an acceptable mastering process is. There are engineers whose sole career is mastering on tens of thousands of dollars of equipment in extensively treated rooms. On the other hand, there are websites and software that will master your music for you immediately. Consequently, a full overview of mastering is well outside the scope of this article. But we’ll walk through a basic and functional mastering chain, that will serve as a great starting point. For a complete breakdown of the mastering process, check out Splice’s Mastering 101 series here.
2. Setting Up a Mastering Session
- Start by exporting your mixdown from your writing/mixing session. It’s good to leave a little headroom so make sure your mix isn’t clipping or hitting a limiter on the master track.
- I like to master in a separate project so I’ll open a new Ableton Live session and drop the mixdown on an audio track.
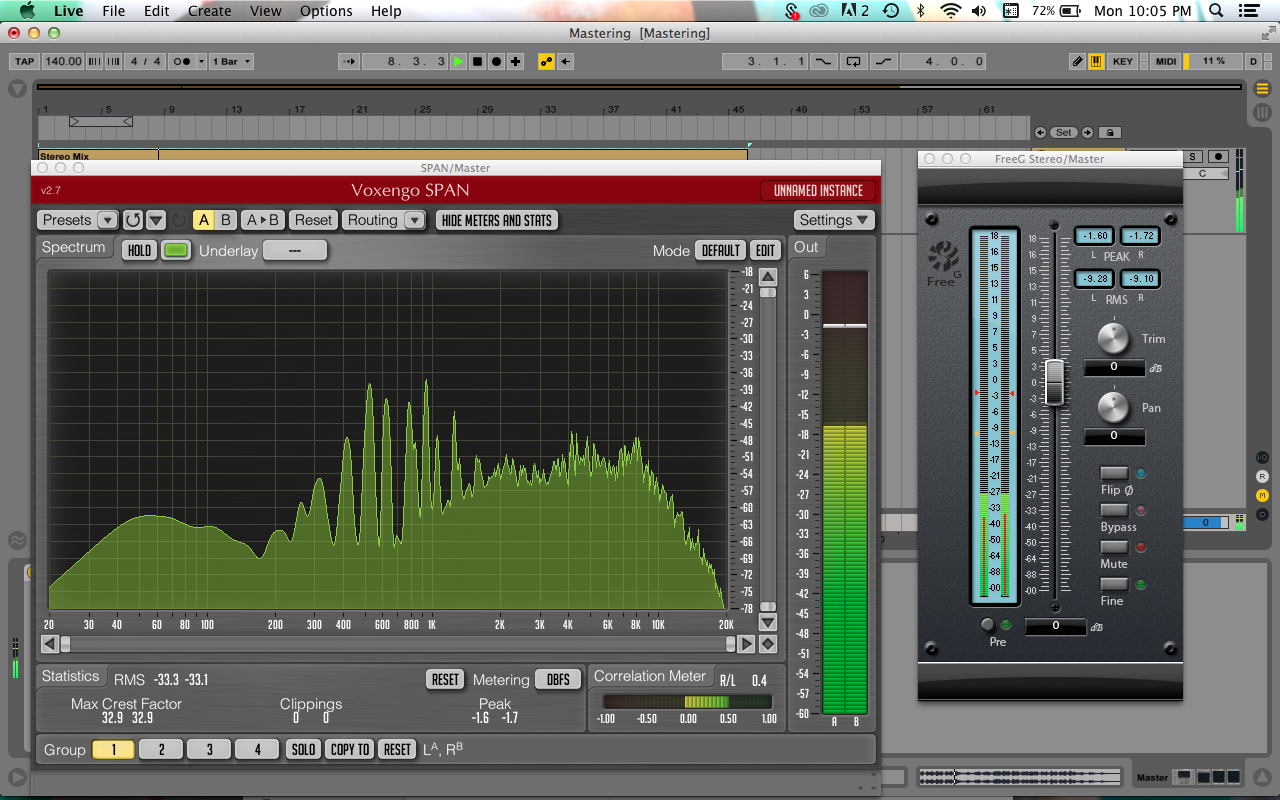
- After that I’ll setup some basic metering. We’ll put a Spectrum Analysis plugin (Voxengo Span) and a basic Peak/RMS meter (Sonalksis FreeG) on the master track. Both of these plugins are free.
- For those of you using iZotope’s Ozone, the meter inside of Ozone should effectively replace FreeG.
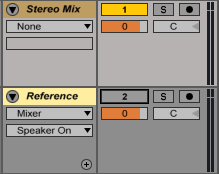
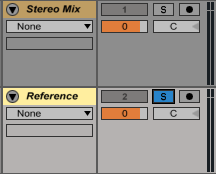
- It can be helpful when mastering to setup reference track. If you’d like, create an audio track below your stereo mix and drop in a similar style track to check against. You can turn the track activator off, then compare against your own mix with the solo button.
3. The Mastering Chain
- A very basic mastering chain could consist of a Buss Compressor, EQ, Multi-band Compressor and Limiter.
- We’ll detail each of these plugins. It’s important to note that you may not need all of them. One of the most common pieces of wrong advice I hear is to slap a compressor or multi-band compressor on your mix bus simply because it’s supposed to be there. These tools are meant to correct problems that may not exist in your mix!
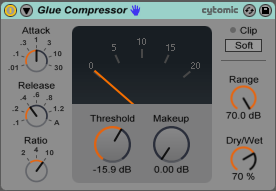
- Buss Compressor: A bus compressor can be used to reduce the total dynamic range of your mix. If a vocal or kick drum is peaking through too often, this can help tame it. Also a stereo-linked bus compressor can help “glue the mix together” by lightly compressing the entire mix when a peak crosses the threshold. This gives a sense of cohesiveness between all the elements.

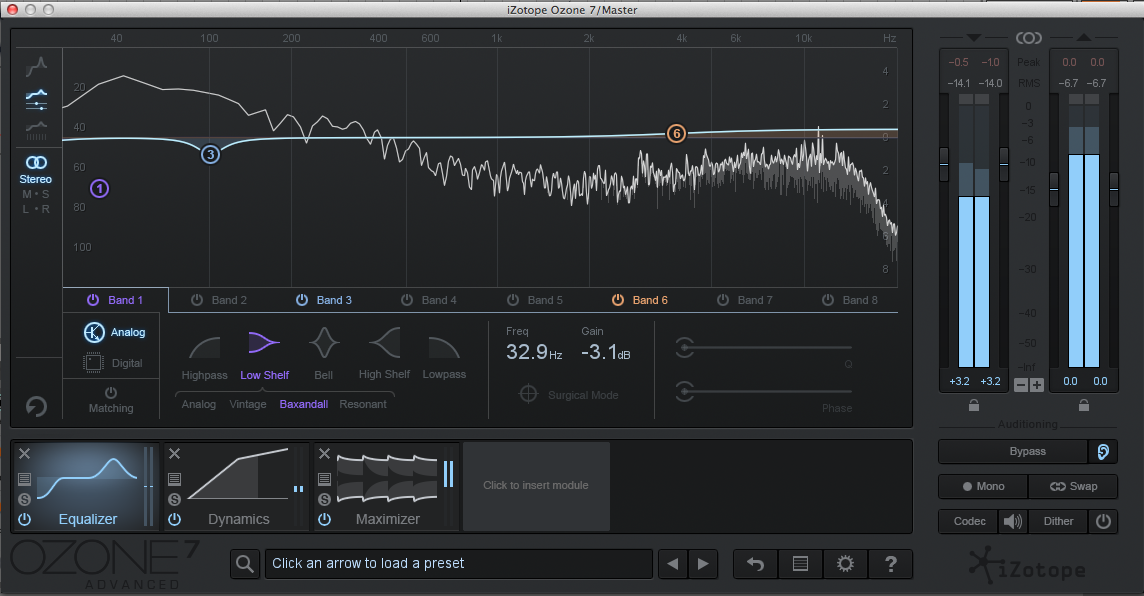
- EQ: Equalization at the mastering stage will likely be slight. Check our Voxengo Span plugin to identify any resonance peaks in our spectrum, you can listen to them by holding cmd/ctrl and clicking in the spectrum. You can notch out these peaks with an EQ. Additionally, you can use high/low shelving to balance the mix. The EQ below is adding some “air” with a high-shelf and cutting some resonance buildup from the kick and bass around 100HZ. Voxengo Span is your friend for helping to determine what to do with an EQ.
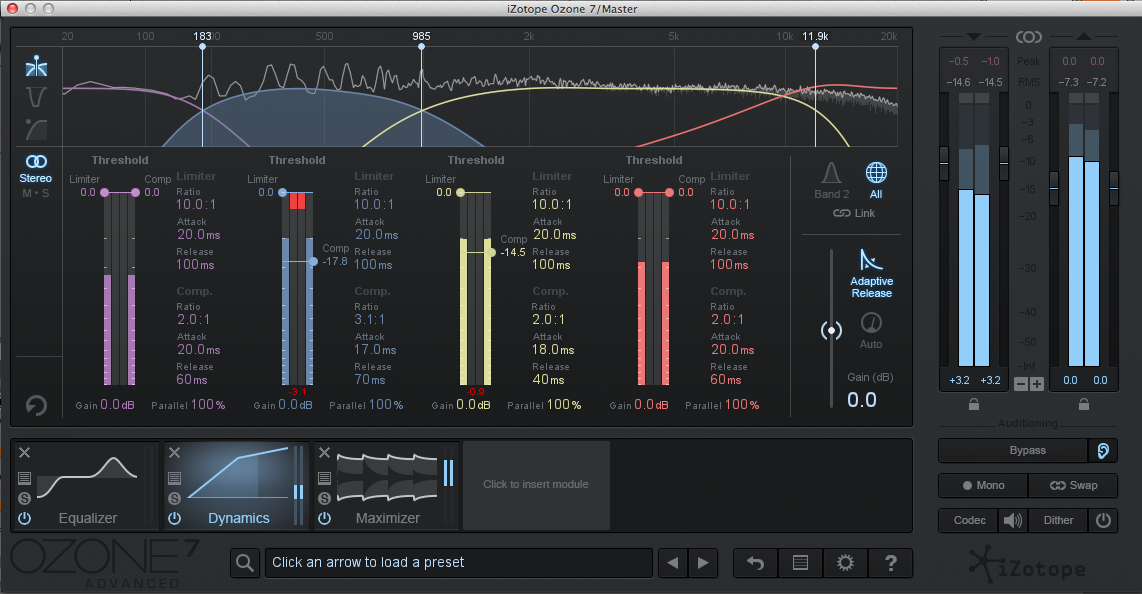
- Multi-band Compressor: A multi-band compressor separates the stereo mix into 3 or 4 separate frequency bands and lets you compress each individually. If you have an issue with uneven dynamics in a specific frequency range, this will be a better tool than a buss compressor. You can address the problematic range without compromising the dynamics of the entire mix. Below we are compressing the two middle bands due to a very prominent synth pad whose filter automation is causing a lot of dynamic variation in the mid range.
- Limiter: Lastly we can use a limiter to stop any peaks from clipping while raising to overall average volume of the mix. Here we’ll be checking our Sonalksis FreeG plugin to check our Peak and RMS levels while raising the gain (or lowering the threshold depending on the plugin) of our limiter. As you’re probably aware it’s common for people to try and make their tracks as loud as possible and this can get out of control very quickly. The more you raise the gain/lower the threshold the more you compress the loudest peaks of your mix, effectively decreasing the dynamic range (difference between loudest and softest parts of your mix). I hear a lot of people recommend using no more than 6db of gain reduction on the master limiter at the highest peaks and I think that’s sound advice. You may notice your tracks sound quieter than others, you can identify this difference by looking at the RMS (momentary average) levels of your mix vs. the reference on FreeG. This is less of a cause for concern now that most streaming platforms average the volumes of all content for the listener. However if you want to increase volume without pushing the limiter too hard, try revisiting your bus or multiband compressor to tame specific peaks before they hit the limiter. Set the level of the limiter to an amount that maintains dynamics but brings your song into a competitive range.
- Buss Compressor: A bus compressor can be used to reduce the total dynamic range of your mix. If a vocal or kick drum is peaking through too often, this can help tame it. Also a stereo-linked bus compressor can help “glue the mix together” by lightly compressing the entire mix when a peak crosses the threshold. This gives a sense of cohesiveness between all the elements.
- Once you are satisfied with the sound of your master you’re ready to export to a lossless file. Select the export range and choose export in Live’s settings. Enable dithering (noise shaping to account for error in changing bit-resolutions i.e. converting to MP3) in Ableton Live’s export settings and export the master track.
- There are many other devices used in mastering to solve a multitude of problems such as phasing, stereo imbalance, etc. If you’d like to learn more check out this comprehensive mastering guide from Splice.


That’s the end of this 4-part guide on producing future beats. Hopefully no matter your skill level, you’ve learned some helpful production techniques. You can find my music on Spotify and more educational content on YouTube – su na.
August 28, 2016


