Today’s technologies allow us to just open up a computer and start creating, without any prior formal experience with music theory.
I had the pleasure of creating another tutorial video for Splice, and this time I wanted to share some compositional techniques for people who don’t know much about music theory. See the full video above, and also read below for highlights from each of the three topic areas: chords, hooks, and drum beats.
Chords
In the video, I use Splice samples to create instruments, which I then converted to chords and a chord progression (here’s the Collection containing the specific sounds I used).
When using samples, it’s important to make sure they fit together with the scale or key of your song. Here’s how to make that happen:
- First, add the sample into Simpler (or another sampler of your choice)
- Add a Tuner after the instance of Simpler
- Play middle C using your keyboard or controller
- Transpose the sample within Simpler until the Tuner also displays ‘C’
With that step completed, we can start to create chords using the sample:
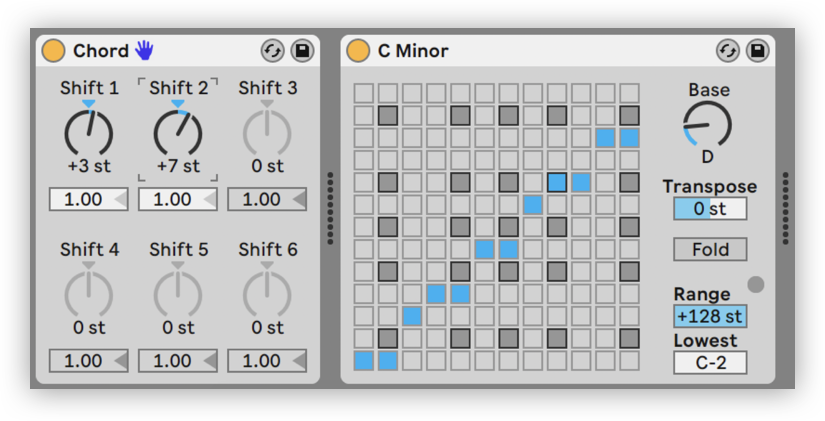
- Add a Chord MIDI effect
- Use the shift controls to create notes that will play together with your root note – stacking +3 and +7 will give you a minor triad, while +4 and +7 will give you a major triad
If you wish to venture outside of the C major or C minor scales, you can add a MIDI effect called Scale after the Chord effect. After selecting the C major or C minor preset, you can adjust the Base parameter to transpose to whatever key you want to work in. From there, simply create a MIDI clip, draw in some notes, and you have a chord progression!

Hooks
Melodies, or ‘hooks,’ can sometimes be difficult to create, especially if you don’t have an immediate feel for what would fit together with your other instruments. If you don’t know where to start, below are two techniques you can utilize to craft your own hooks (check out 5:16 of the video to hear them in action).
1. Manipulate your sample
Try copying a sample (or a previously-created chord) into an Audio Clip. From there, try adjusting different parameters – reverse it, change its speed, and transpose its pitch (ex. +12 semitones). Then, use the Warp markers to manipulate the overall structure – this always works like a charm!
2. Experiment with arpeggiation
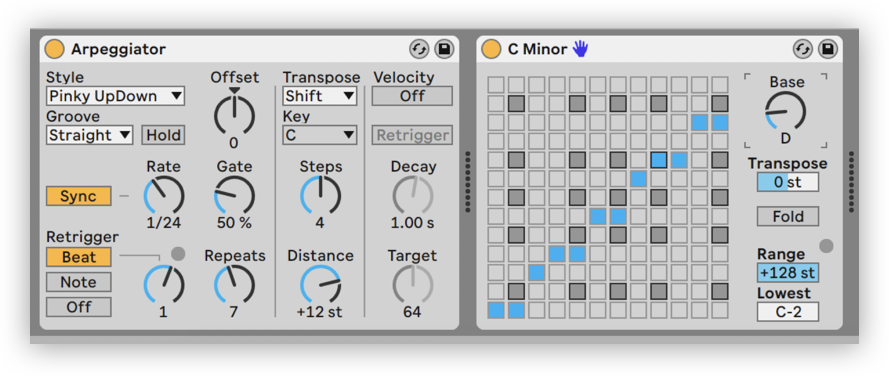
Alternatively, you can drop a sample you like into another instance of Simpler and crop it down to a brief segment. From there, add the Arpeggiator MIDI effect before Simpler, and play around with the controls such as Style, Rate, Steps, Distance, and Repeats until you arrive to something of your liking.

Drum beats
While I’m not a drummer myself, the technique below has been helpful in allowing me to generate rhythms, without going into a lot of detail in respect to music theory (check out 10:21 of the video to hear the process in action):
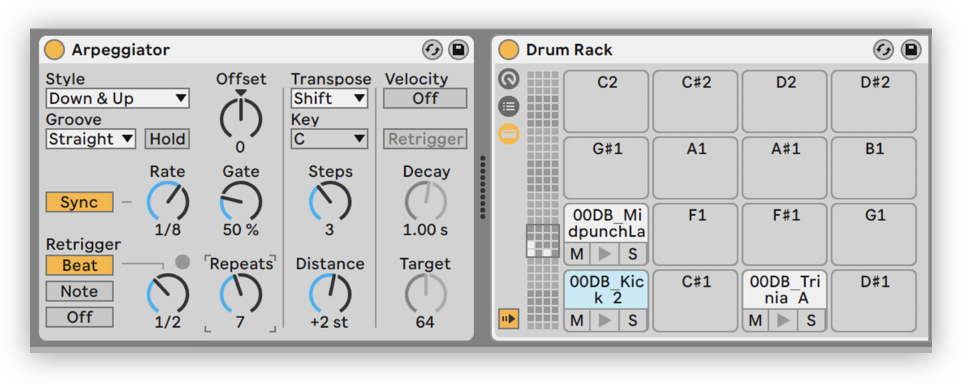
- Import at least 3 samples to a Drum Rack (assigned to the slots C1, D1, E1, etc.)
- Add an Arpeggiator before the Drum Rack
- Create a MIDI Clip for your track, draw just one MIDI note that corresponds with one of the aforementioned slots (ex. C1), and stretch it so that it spans the length of the whole sample
- Use the controls within Arpeggiator to create a beat – the Steps and Distance controls will be particularly crucial, since they’ll allow us to hear all of the samples included in the Drum Rack

I hope that these techniques helped you create some awesome tunes! Check out my YouTube channel for more Ableton Live and music production content, and let us know if you have any questions on any section of the video below.
Explore royalty-free sounds from leading artists, producers, and sound designers:
November 10, 2020


