.svg)
.svg)


This post originally appeared on Morgan Page Quick Tips.
Beginning:
Building a sample pack is something I’ve put on the back burner for nearly 15 years. It’s a ton of work and there are so many amazing sample packs it’s overwhelming: Vengeance, Cymatics, KSHMR, 7 Skies – I use all their packs in my productions. So why make my own? Splice asked me to create a hybrid pack. Part audio samples, part Serum presets.
I decided to make something that spoke to my strong suits: synths and vocals. There’s plenty of drum fills, huge kicks, risers, and 808s – so I wanted to make something fresh and unique to my sound. I didn’t want to repeat other sample packs. I needed to create a pack that was useful for producers beyond just EDM, so I recorded at two tempos: the familiar 128 bpm, but also 100 bpm – which I’ve been using a lot on my latest productions. The slower tempo allows so much more groove and chunkiness. There’s a lot to be said for making music close to the tempo of indifference (94 bpm) – it’s easier to play instruments and gauge timing better. For more on this, check out this radio lab episode.
Tracking:

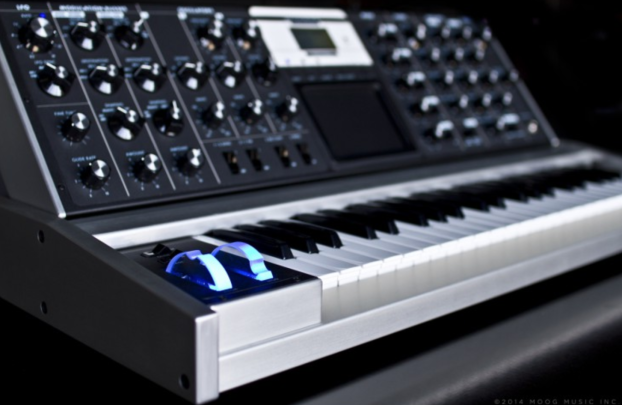
I started by firing up all my analog synths, pre-amps, and compressors including: Dave Smith OB6, Dave Smith Prophet 08, Moog Voyager, Buchla Easel, and Virus TI2. Once they were stabilized and calibrated/tuned, I started recording various 4-bar chord progressions I thought were compelling.
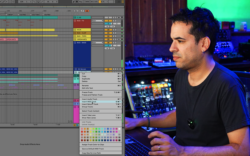
Synths were tracked at 32bit/44k into Ableton Live 9 through a BAE lunchbox with Neve 1073 clones, some newer Rupert Neve pres, a LaChapell tube pre, and my trusty Avalon U5s. Vocals were tracked with a Manley Ref C mic through an Avalon 737, Purple Audio 1176 clone, and LA2A limiter. Everything was recorded at around -6 to -12dB peaks to allow headroom. Even the drums included were made with synths. In the future, I will probably track more conservatively at -12dB.
Performance:
The overall goal was to capture unique sounds with depth and character, so I recorded quantized sequences with Ableton’s arpeggiator, basic chord stab progressions, melodies, drones, and various one-shots. While tracking them, I would often twist two controls to get a unique interaction – filters and feedback, feeding in the Voyager’s signal back into itself for fatness and saturation or LFO speed and pitch. This was the best way to wrangle the Buchla Easel’s controls for interesting rhythmic sequences since it’s such an unruly beast of a synth. For some sounds, I would overdrive the input and bring down the output to get a different character. I love the physical interaction with analog gear – fire up a chord progression or arpeggio, start twisting knobs and embrace some chaos while recording it on the fly.
Digital vs Analog:
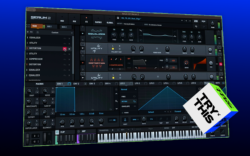
Many people think it’s a binary decision – choose analog synths or soft synths, but I say use both! It was fascinating to see the sonic differences between Serum and my modern analog synths. It’s hard to pick a clear winner, but Serum provided a punch and snap in the envelopes that I really enjoyed. There’s a certain cleanness to the sound, which you can easily tweak with distortion and multi-band compression. Complex wavetables provide an endless variety of sounds, while the wavetables in the analog keyboards had a focused appeal in keeping things simple. The Virus TI2 was the wildcard – very punchy and big sounds but could sound surprisingly warm for a digital hardware synth. Each synth offered something different. Quickly toggling through the sounds in the sample pack, you can easily see the differences and find the timbres you need.
Processing:
I kept the processing very simple – stock Ableton compressors, SPL Transient designer, and a UAD Precision multiband maximizer for enhancing and limiting, and some great UAD reverbs like the AKG BX20 and EMT140 for adding some depths, and some spring reverb by PSP and UAD – especially for the one-shots. That was a constant debate through the process – keep the sound boring and dry, or give them depth but risk painting yourself into a corner with reverb? In a lot of cases I just added a touch of reverb to add some width and sustain to the tail, without going overboard.
Workflow:

The really time-consuming part was bouncing sounds individually, naming them properly (Artist_Soundtype_Name_Tempo_Key.filetype), key labeling, cropping, and fading. I used Melodyne for tagging the keys, but Mixed In Key is often great for this and Ableton tuner. Ableton’s Spectrum is great but can be difficult to discern a G# from a G, especially with decaying drums that need to be labeled to the lowest resolved frequency. After tracking I realized a few of the OB6 samples were fairly out of tune – so I used Platinum Notes to scan and find the problem files. It showed that a handful of sounds were about 12 cents sharp, so instead of processing them with Platinum Notes, I manually detuned them in Ableton with complex warp mode engaged – Melodyne was way too harsh. For the Serum one-shots, I borrowed 7 Skies technique of sampling C0, E0, Gs0, C1 so the samples are never more than two semitones away from any note. This way you don’t have to record every note Detuning more then 2 semitones starts adding more artifacts and issues. Check out 7 Skies’ excellent Serum 808 pack.
Loudness is tricky and hard to get consistent with sounds recorded over several days, so I did my best to record them at similar levels, but they still vary in perceived loudness. I used consolidate in Ableton to see if peaks were chopped and then pulled back the clip gain to recover the clipped audio. Recording at 32bit is really helpful for providing this safety net, as some sounds were tracked a bit too hot

Splice recommends normalizing all samples to -1dB, so I used Izotope Rx6 to batch all the samples – normalize them, remove DC offset, and dither from 32bit to 24bit WAVs. It took only seconds to batch process hundreds of samples. You can also use the more modestly priced Twisted Wave to efficiently batch your audio.

For a while, I debated doing everything in Pro Tools because it’s better for exporting lots of files, but Ableton ended up being easier – so all crops and fades were done in Ableton. A variety of programs offer batch fades (see Twisted Waves) – but each sample really needs to be auditioned one at a time, and cropped properly to the zero threshold points on the heads and tails. I left long tails on all the sounds to capture the ambience of the effects. Later, I used Ableton’s consolidate command to check the normalization.
Presets:

Building the Serum presets was really gratifying because it’s such a versatile synth. Big clean powerful oscillators and a very visual drag and drop interface. To keep things simple I used only wavetables and noises included with the plugin, so you don’t have to install a bunch of new folders.
I found a few techniques really useful: Many people think you need crazy complex wavetables, tons of voicings, and elaborate LFO routings, but some of the best sounds came from simple single voice wavetables with aggressive filters and distortions, and the amazing OTT style multiband compression that makes everything sound huge.
I think you’ll enjoy the variety and utility of the sounds – the basses can be leads, the leads can be chords, and the FX can be drums. Almost all the Serum presets were bounced as audio so you can enjoy them without even having Serum. The one-shots work especially well as low-mid basses.
I went the extra mile and added macros for common controls like hi-pass filters, wet/dry FX balances, and most importantly – multi-knob controls to control the timbre of the sound. The macros are really useful for defining the range of the effect so it doesn’t fall apart, so you can freely tweak the integral guts of the sound without it turning into mush. I did my best to keep the sounds mono-coherent, while still having lots of wide side content – but it’s always a compromise and there will be some phase cancellation when summed to mono. I also made sure to adjust the main output so there was enough loudness, but presets wouldn’t be clipping the output, which just creates more work down the line with gain-staging. The output was adjusted to the preset type – so chord presets are set more conservatively than leads and basses. For proper gain staging, I recommend placing a trim plugin after Serum and dropping the level by -12dB, and possibly -18dB to hit the sweet spot with most plugins. This is especially true with Waves vintage emulations like the 1176 and LA2A clones.
Vox:

The vocals comprise a smaller section of the pack, but are deceptively useful. I recorded various phrases and vowels with my own voice, tuning them with AutoTune and adding texture with Sound Toys Decapitator. Try dropping them into your sampler and changing the sample start playback point to find something that inspires you. I’m always chopping vocals on the vowels for interesting effects. The other vocal chops included are from various drafts and projects over the years and are the only section of the sample pack that wasn’t recorded exclusively for the collection. I can’t give away full vocals from other singers, so that’s why I used my voice and tiny snippets of other voices that are pitched up/down. In the future, I might work with singers to create a special vocal pack.
I’m really excited for you to check out my first sample pack – make sure to grab it on Splice, let me know what you think, and go make something amazing!
November 28, 2017