.svg)
.svg)


Splice has partnered with iZotope to offer the mastering plugin Ozone 9 Elements (a $129 value) for free to all Splice users until June 5th, 2020.
At Splice, we understand that these are challenging times for many music creators, and are committed to getting through this together by providing resources and educational material to improve your music production skills. To get Ozone 9 Elements, all you need to do is log into your Splice account (you can create an account for free here) and simply download the plugin.
In our previous article in the Mastering basics with iZotope’s Ozone 9 Elements series, we discussed how to use the EQ in Ozone 9 Elements to make subtle but effective adjustments for a more tonally-balanced master.
For a refresher, here are the mixes before and after our EQ changes:
The mix before our EQ changes
The mix after our EQ changes
Mastering basics: Stereo imaging
Have you ever wondered how some mixes can be so wide that they feel like they’re practically coming from behind you? That’s the effect the aggressive manipulation of the stereo field can create.
While powerful when used with properly, messing with the stereo field can have serious implications that need to be considered. For example, a mix with a super-wide stereo field will sound vastly different in a mono environment (ex. some mobile phone speakers). Certain elements of the mix may be much softer or louder, and the overall balance of the mix wouldn’t stay the same.
Therefore, we should be careful with how we use the Imager in Ozone 9 Elements. Think about it as the icing on the cake – use too much, and it’ll be overly sweet. Have too little, and you’ll think that the cake could taste better.
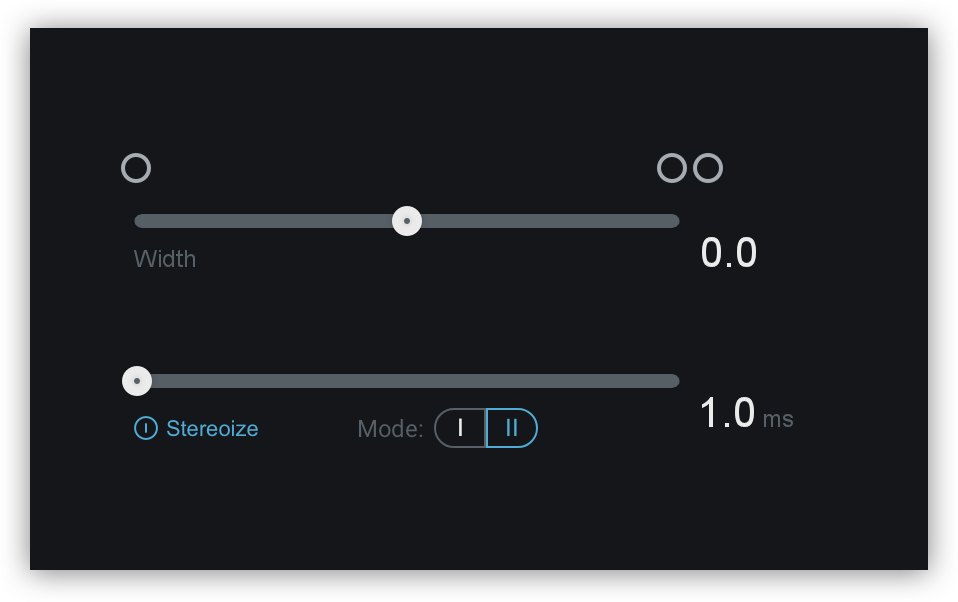
Ozone 9 Elements’ Imager module
There are two main parameters to the Imager module – let’s explore each in detail.
1. Width
Moving the Width slider to the right adds width to your mix, expanding the perceived stereo image, while moving it to the left decreases width and makes your mix sound closer to mono.
For our mix, let’s gently add some width to make it sound a little bigger and better. We’re going to accomplish this by moving the slider to around 29.0. As you move the slider, you should be able to hear elements like the reverb tail, guitars, and drum overheads reach further towards the left and right corners of your speakers / headphones.
Hear the difference:
How the mix sounds before the Width parameter is applied
How the mix sounds after the Width parameter is applied
2. Stereoize
The Stereoize slider can be used to add natural-sounding stereo width to narrow recordings and to control the general character of the stereo effect in conjunction with the width sliders.
I like to think of Stereoize as glitter; don’t add too much of it, but just a little can make your master shine. For this mix, I added 2.5 ms of Stereorize. The difference is subtle – take a listen:
How the mix sounds before the Stereoize parameter is applied
How the mix sounds after the Stereoize parameter is applied
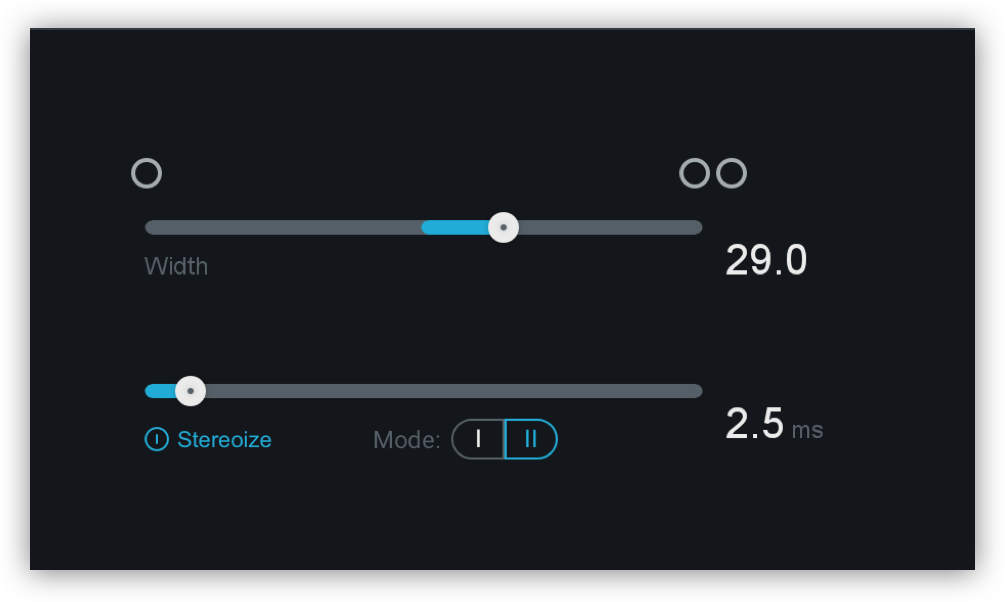
Our final settings for the Image module
Tonally balanced, wider mixes
Let’s take a listen to the progress we’ve made:
The mix before our changes
The mix after our changes
Up to this point, we’ve made some EQ tweaks and enhanced the stereo image. In the final entry to this series, we’ll get the mix up to commercial loudness using the Maxmizer module.
If you have any questions on how to use Ozone 9 Elements’ Imager when mastering, let us know in the comments below.
Download Ozone 9 Elements for free:
May 11, 2020


