.svg)
.svg)


Illustration: Jay Schaul
In this tutorial series, we walk through building some handy synth presets so you can hit the ground running with circle2 within minutes.
Start with an oscillator
Step 1
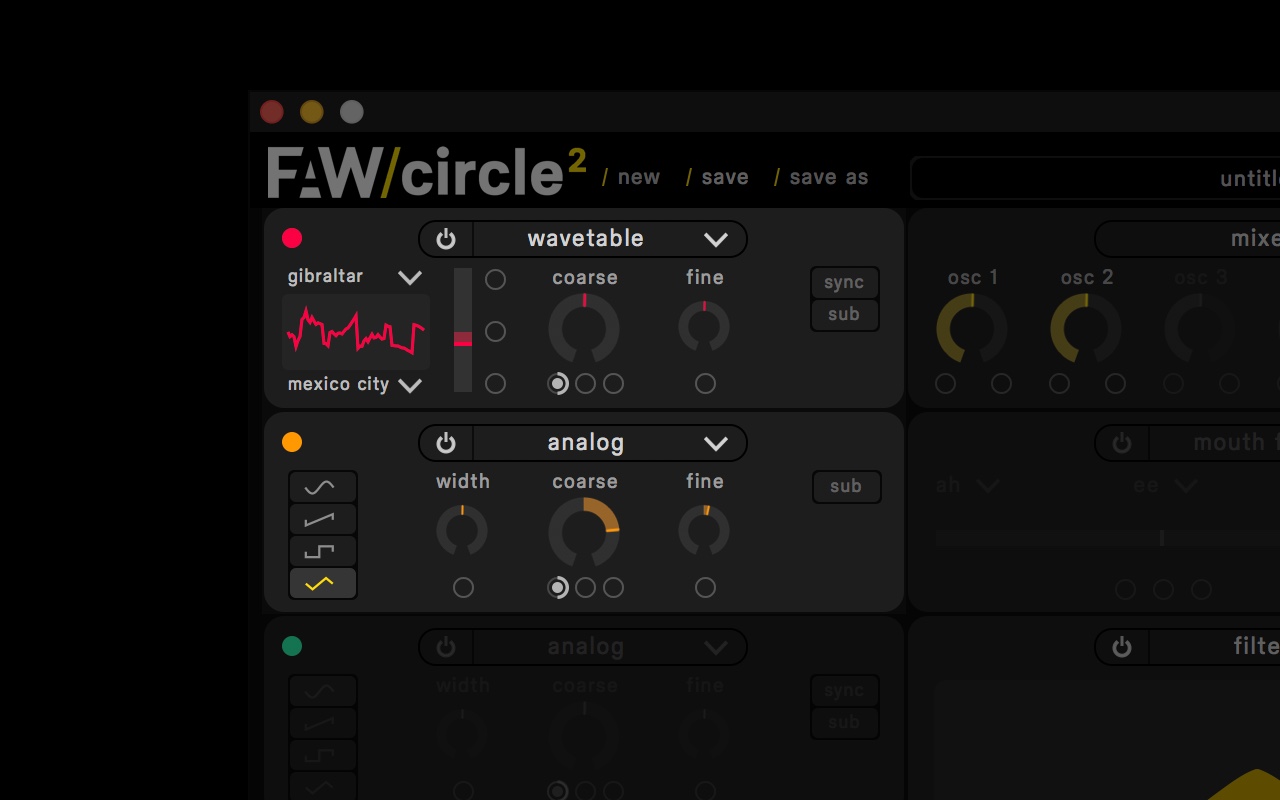
- Choose “Wavetable” for the first oscillator.
- Pick wavetable “53 Gibraltar” as the first wavetable
- Pick wavetable “78 Mexico City” as the second wavetable
- Bring the crossfade down to 0.4
Tip: At the end of designing the sound, go back and play with different wavetables to try out other sounds.
Step 2
- Choose “Analog” for the second oscillator and turn the oscillator on.
- Pick “square wave” as the wave shape
- Dial up the Coarse setting to 12 semitones
- Adjust the Fine Tune to 4
Sculpt the Source
Step 3
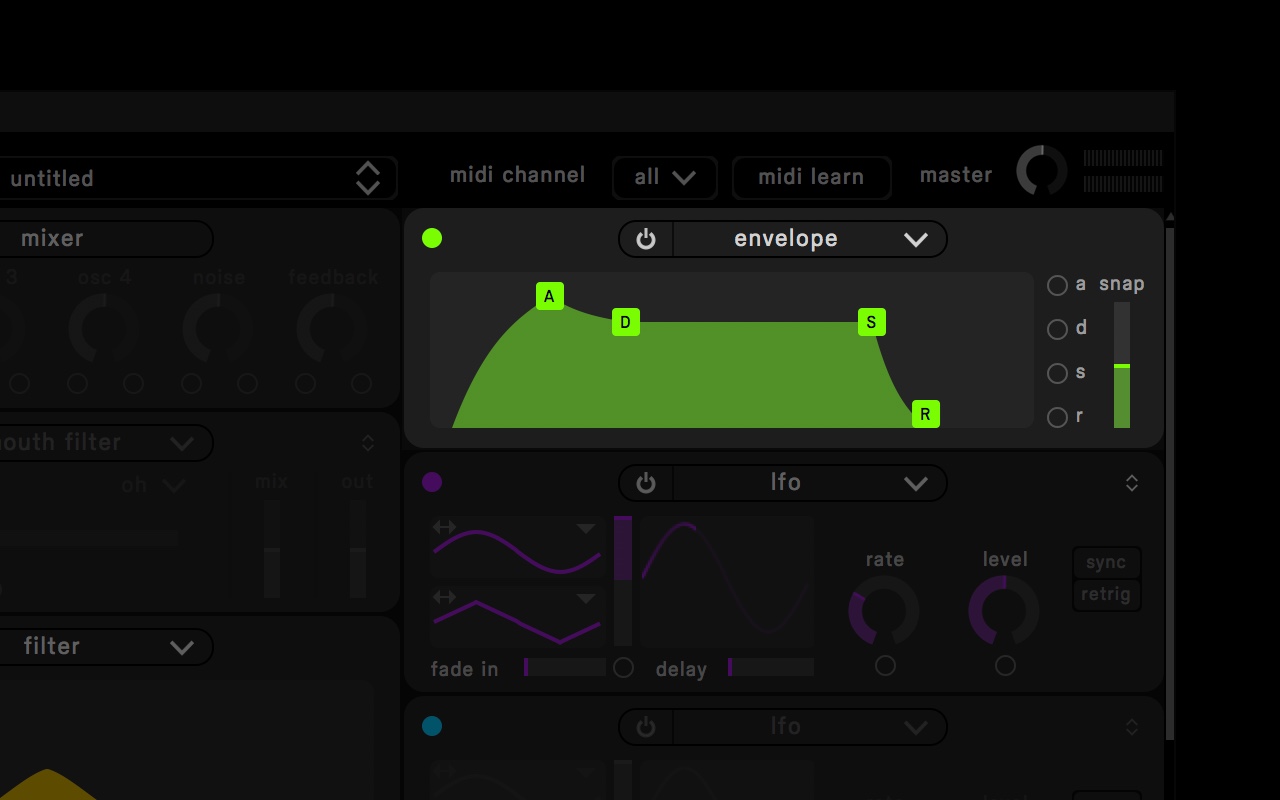
- Head over to the green envelope to the top right of the synth.
- Adjust the Attack to 0.555 seconds
- Adjust the Decay to 3 seconds
- Adjust the Release to 0.25 seconds
Note: The slightly longer attack time creates a smooth legato sound, this is important to create pad-like sounds.
Step 4

- Navigate to the “Filter” section in the middle.
- Switch the filter mode to bandpass
- Adjust the frequency to around 290hz
- Bring up the resonance to about 0.25
Dial in some effects
Step 5
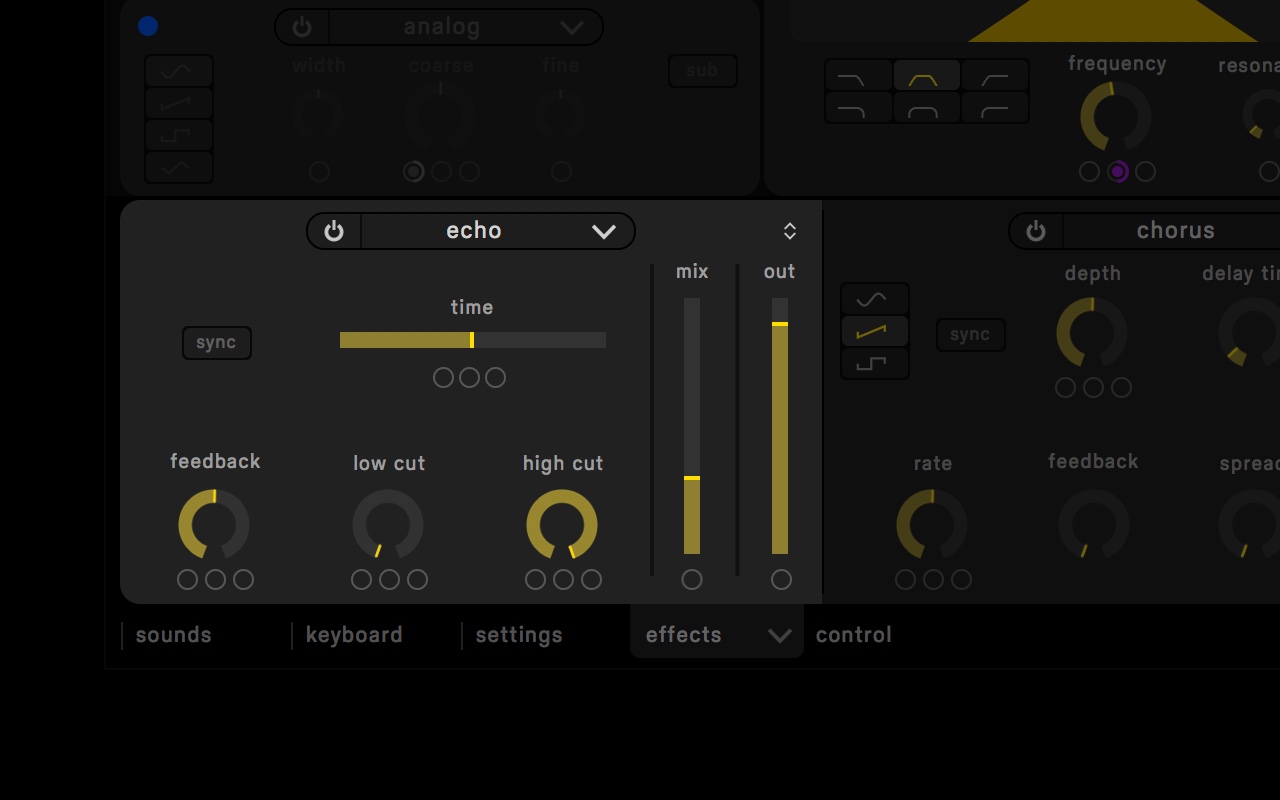
- Activate “Echo” from the bottom “Effects” tab
- Take the Mix slider down to about 30%
- Take Out slider up to about 90%
Tip: Try adjusting or even modulating the echo time parameter for more drastic effects.
Step 6
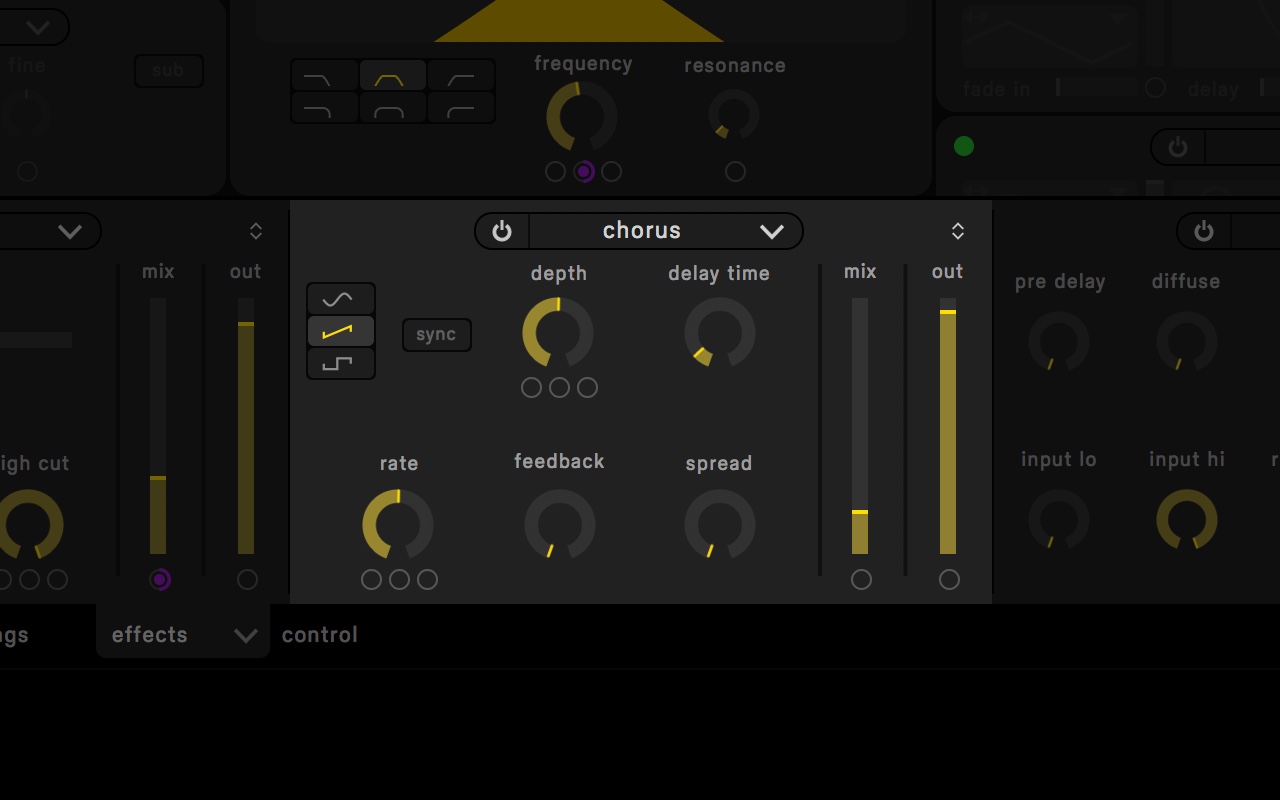
- Activate a “Chorus” effect from another effect generator.
- Take the Mix slider down to 20%
- Take the Out slider up to 97%
Step 7

- Activate a “Reverb” effect from the last effect generator.
- Take the Mix slider down to 42%
- Take the Out slider up to 100%
Modulate the synth
Step 8

- Activate the second modulator (purple) and switch it to “LFO.”
- Bring the rate down to 0.24hz.
Step 9
- Drag the purple modulator onto the Frequency parameter of the filter.
- Adjust the modulation amount (right click the purple dot) to 0.3
- Drag the purple modulator to the Mix parameter of the echo effects.
- Adjust the modulation amount (right click the purple dot) to -0.97
Note: By modulating the frequency of the filter opposite in a positive range of the echo mix amount in a negative range, the preset gets a seesaw effect where the filter moving up trades off with the echo. It’s very effective to modulate to strong parameters in an inverted fashion.
You’re now one step closer to mastering circle2. Keep building your skill set with our other Circle2 tutorials.
November 30, 2017