.svg)
.svg)


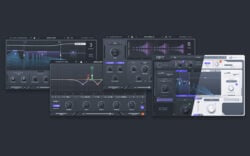
Sigmund is a multi-tap delay unit by D16 Audio Group. It features four discrete delay lines with a routing matrix that will allow you to create unique and creative sounds. As this is a feature-packed delay unit, I will break this tutorial into three parts to show what each component in this delay unit does and how it can spice up and bring life to various sounds. It’s worth nothing that Sigmund can do stuff beyond just delay effects as you’ll see below. In this first part, we will be looking at the filter, overdrive and time component of Sigmund using a simple saw synth and drum loop. Follow along by splicing the project to see and hear what I’m doing with Sigmund.
1. Filter Component
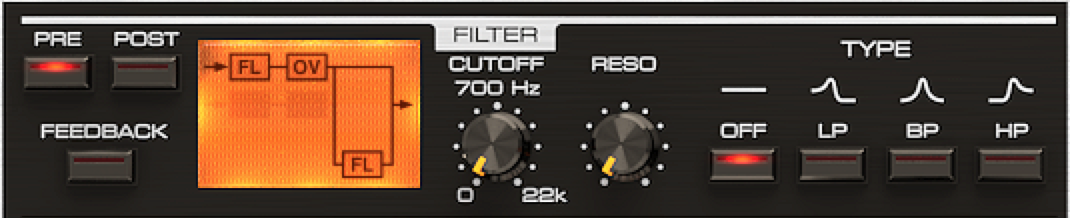
Info: The filter section is a rather standard feature that you’ll find in many delays. It features three kinds of filters: Low Pass, Band Pass and High Pass. However, unlike most delay units, Sigmund offers a resonance knob that you’ll find in many synthesizer plugins to push your creative boundaries.
Application: The first few seconds of the project showcases a lowpass filter sweeping across a standard saw synth patch. Resonance is added to give the synth a little bit more character. In a later part of this tutorial, we will look at how you can get creative by using Sigmund’s modulator to modulate the cutoff frequency of the filter section. As you can hear, using a filter can help shape and alter the sound quality and tonality of your patch.
2. Overdrive Component
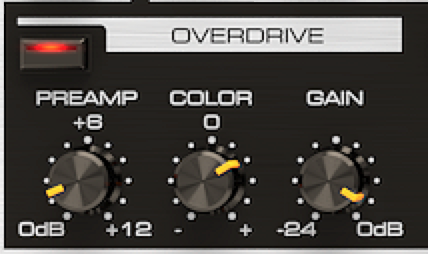 Info: The overdrive section allows you to distort, saturate and color your sound right at the input stage of the Sigmund. The greater you push the preamp, the more distorted the sound gets. The color knob controls the distortion type. Just by playing around with it, I found that the low and mid frequencies get affected more when the color value is on the negative side, while on the positive side, high mid and high frequencies get affected.
Application: You probably wouldn’t want to further distort a saw synth patch as things would sound really harsh. In the project, I decided to apply both the filter and overdrive to the drum loop to make it sound bigger and translate better on small laptop speakers. Using the first out of the four available delay lines, I decided to overdrive the loop to give it more edge and punch and to make it brighter as well. Moving on to the second delay line, I used a LowPass filter at 60Hz to just get the subs of the drum loop and mixed it back with the distorted drum loop. Now I have a punchy and more aggressive drum loop just by using these two components!
3. Time Component

Info: Here is where all the delay stuff comes in. On the extreme left, we see two modes “delay” and “pre”. In Delay mode, the time settings control the signal delay in the feedback loop, before it returns to the loop’s beginning. In Pre mode, the time settings control the time interval before the signal is passed to the feedback loop. Delay times can be either tempo synced or adjusted manually from 0.1ms to 1000ms and each left and right channel can be delayed independently. To link both delay times, just hit “join channels”.
Application: Up to now, we have a standard saw synth patch as well as our newly distorted punchy drum loop. Let’s try to use delay to make the saw synth sound wider and a little more interesting. First up, I used the filter component on delay line 2 and applied a high pass filter of about 175hz and a resonance of about 35% to make the synth sound darker. Next, using the time component, I delayed the right channel by 12ms to spread the dark synth sound. I then blended it back to the original saw synth patch to get a synth sound which sounds thicker and a little layered. To spice things up a little more, using the third delay line, I applied a HPF to the saw synth at about 1300Hz to thin the sound out. I then added a dotted quarter note delay to the left channel and a triplet quarter note delay to the right channel to give that classic delay effect to the synth. For the drums, I decided to use the same approach as the synth but used a HPF at a much higher frequency of 5000Hz instead and then added a 1/16 note delay on both the left and right channels to give the drums a little bit more movement in the stereo field.
Conclusion:
Sigmund’s D16 is a highly flexible delay unit and as you can see, there are endless possibilities with this single plugin. The key method here that I’ve been using is blending. Taking advantage of the multiple delay lines Sigmund has, I am able to alter and manipulate the original synth and drum sound and then blend that sound back into the track. Blending is also known as parallel processing and can be applied not just to effects, but to dynamic processing such as parallel compression.
Stay tuned to the second part of this tutorial where I talk about the Modulation and Routing component of D16’s Sigmund.
December 7, 2015