.svg)
.svg)


With foundations rooted in the music of the 80s, Synthwave is an emerging new genre that combines the sounds of Electro House and classic 80’s New Wave. To explore this new style, we’re going to walk you through creating your own Synthwave pad in 6 easy steps.
Step 1. OSC Wavetables
Click File and create a new sound in Massive. Turn on OSC1 and OSC2 and change the wavetable to pulse-saw PWM on both. Detune OSC1 Pitch to 0.10 and OSC2 to -6.90 which will help thicken the sound.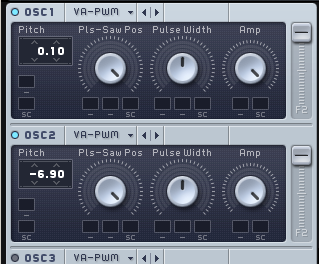
Step 2. Voicing
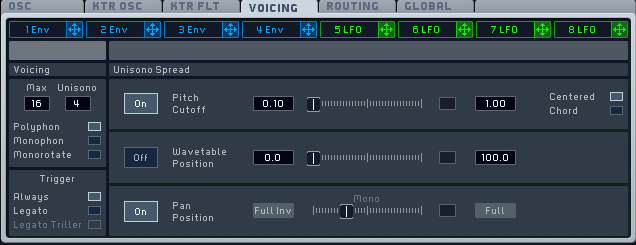
Click on the Voicing tab, change the Unisono value to 4 (to avoid clipping massive’s output, turn down the master knob to around 9 ’o’clock).
In the Unisono Spread section, turn on Pitch Cutoff and increase the number in the left-hand box to 0.10 by clicking and dragging upwards. Now turn on Pan Position and drag the slider toward mono as this gives the sound a bit more of a vintage vibe.
Step 3. Filter Section
In the filter section, turn on Filter 1 and change the filter type to Daft. We’re choosing the Daft filter as it adds a thicker analog sounding presence compared to the regular Lowpass 2 filter with this particular sound. Now drag the Mix slider upward to the Mix 1 position. Set the Cutoff to around 1 ‘o’clock and the Resonance to around 9’o’clock.

Step 4. Envelopes
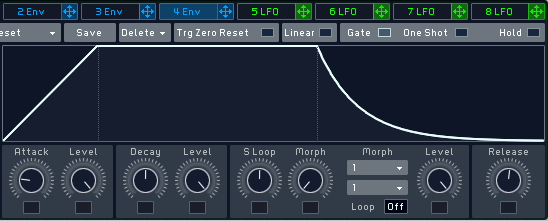
Click on the 4th envelope 4 Env, which is the default amp envelope in Massive. Lets soften up the attack, set the Attack knob to about 9’o’clock. Now lets adjust the length of the release, set the Release knob to around 12 ‘o’clock.
Step 5. Effects
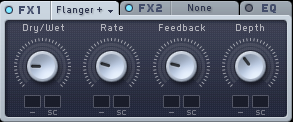
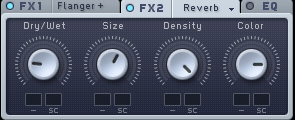
At this stage the patch sounds a bit dull so lets add some dynamics by use of effects. Turn on FX 1 and select Flanger Positive from the pull down menu by clicking on the tiny downward arrow. For this patch we chose a slower rate with a small amount of feedback but you can adjust to taste.
Next we’ll add some reverb to the sound. Turn on FX 2 and choose Reverb from the pull-down menu. Adjust settings to taste. Here we set the Density at maximum value and adjusted the Color to a very bright setting for this particular sound.
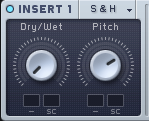
Next add some complimentary noise using S&H on Insert 1. We’re using S&H instead of the regular Noise OSC because the S&H gives the pad a more sparkly top end. Set the Pitch knob around 2 ‘o’clock and adjust Dry/Wet to taste.
Step 6. LFO Modulation
Lastly lets add LFO modulation to the panning which adds subtle movement within the stereo field. Click and drag 5 LFO‘s crosshair on to the first empty modulation slot under the pan knob. Click and drag the number down to apply the modulation amount which in this case we chose 4.

Turn on Sync on 5 LFO and set a slower rate of 3/16. Drag the XFade Curve upward toward the sine wave and then reduce the modulation depth using the Amp knob inside the 5 LFO section to around 1’o’clock.
Our patch is now ready !
Download this preset here: Retro Synthwave Pad
Check out more Massive presets in the styles of Chillout, Synth Pop, Tropical House & Future RnB from Gogoi on Splice Sounds.
https://splice.com/sounds/gogoi
January 14, 2016

