.svg)
.svg)

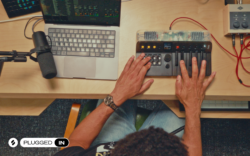
MPC Live III is Akai Professional’s powerful production workstation that combines sampling, sequencing, and hands-on beatmaking in one portable unit.
In the tutorial video above, Splice’s in-house expert Nick Chen goes step-by-step through the setup, interface, workflow, and core features of the MPC Live III, so you can feel confident using it whether you’re totally new to MPCs or upgrading from an older model. Watch along to hear the hardware in action, and read highlights below—feel free to use the table of contents to navigate to a specific section.
What you’ll learn:
- MPC Live III setup
- Sample selection and the Splice integration
- Editing and chopping samples
- The MPC Live III step sequencer
- The MPC Live III mixer
MPC Live III setup
When you start up the MPC Live III, you’ll get a splash screen where you can load existing project templates or demos. Starting from a blank project, the default kit is a trap kit that shows off the MPC’s new expressive pads.
Each pad triggers different samples from different quadrants—some of the pads feature the same sample manipulated in different ways, with chords positioned towards the top. The touch strip automatically configures into a band-pass filter by default.
Sample selection and the Splice integration
To switch sounds, hit the SOUNDS button below the screen, and then select Factory Expansions, which comes loaded with a range of kits.
MPC Live III also features Splice integration—you can connect your Splice Sounds library to the workstation via Wi-Fi, and then navigate through its packs and load sounds onto the pads directly from the browser.
Editing and chopping samples
Hit the EDIT button and then go to SAMPLES on the UI to further manipulate your samples. This window is the core of sound design on the MPC Live III—this is where you can adjust the ADSR envelopes, add audio effects, create mute groups, and more.
You can easily chop up your samples using the waveform preview, and with the SEMI parameter in the SAMPLES tab, you can also transpose a sample in semitones to reach your target key. Warping is available and can be toggled on with a specific BPM and algorithm selected.
The MPC Live III step sequencer
The step sequencer is one of the MPC Live III’s most powerful new features. You’ll see the physical buttons for sixteen steps across the top of the hardware, and hitting the small SET button to the left of them gives you access to its different modes.
The default mode is for sequencing drums, and allows you to select sounds like kicks, snares, hats, etc., and you can simply punch in where you want each one-shot to trigger within the sequence with the buttons. You can also use the OVER DUB button to play in the part yourself as the sequence loops, and it’ll quantize to the nearest step. And if your beat sounds too straight, you can also go to the TC (Time Correction) setting at the top of the UI and apply swing to your liking.
You can also use the GRID view to see what you’ve sequenced in a MIDI-like grid, and make further edits there. You can also load MPC Live III’s built-in software instruments to track melodic parts like basslines.
The MPC Live III mixer
If you want to adjust the balance between your different sounds, you can go to the MIXER view to adjust each sample’s level. You can also add various EQ types to carve out frequencies, as well as add creative sound design effects like bitcrush, resampling, and more. The step sequencer buttons on the top of the MPC can also be used to trigger certain effects as you’re performing using the LEARN feature.
Conclusion
And there you have it! Hopefully this guide gave you a solid foundation on the MPC Live III that gets you quickly up-and-running if you already have one, or gives you an idea of whether it can be a valuable addition to your production toolkit if you’re still browsing.
While we covered a range of core features, note that this is by no means an exhaustive look—from touch strip functionalities to mic features and more, the full list of creative possibilities with the MPC Live III is near endless.
With that said, what was your favorite moment from the tutorial video? What gear would you like to see us explore next? Let us know in the comments section of the video, and subscribe to the Splice YouTube channel for more.
Explore royalty-free one-shots, loops, FX, MIDI, and presets from leading artists, producers, and sound designers:
August 27, 2026