.svg)
.svg)

Using reverse techniques in your music is a great way to add detail, intricacy, energy and movement, or even just a splash of creativity to your track.
Personally, I am a HUGE fan of using reverse sounds in my music. I see it as a cool way to put a personal spin on a melody, and on top of that, reverses are still current and used in pretty much all genre’s of dance music.
[social_warfare]
#1 – Creating Reverse Melodies

Here is a cool and creative way to create reverse melodies in Logic
Steps:
- Duplicate your melody so we aren’t editing the original.
- Go to your piano roll, select your midi, go to functions, select midi transform, and select reverse position.
- Extend your region or tweak the reverse position export settings.
- Drag new midi in place of original melody.
- Bounce new midi in place, or export to audio
- Reverse the bounced or printed audio (this give your your original melody played in reverse)
Creative Options on what you can do with the reversed melodies:
- Just play it as is.
Depending upon your sound design or sound choice, this could be pretty cool on its own. Sometimes less is more. - Play both your original melody and reverse melody at the same time.
This can get super cluttered easily – just be careful as this technique usually only works with simplistic, minimal and subtle melodies. - Cut up the reverse melody.
The answer to the previous question of cluttering your melody is to cut up your reverses. If you select tasteful, fewer instances of the reverse, the reverse melody paired with the original might sound really special. - Use an auto-panner
Sometimes I like to trigger an auto-panner to move with the reverse melody cuts, that way, each reverse transient is playing in a different part of the stereo spectrum – and that is beyond cool.
#2 – Reverse Reverb with Logic’s Space Designer

So this technique is going to be super simple and straight forward.
Instead of manually printing your reverb tails and reversing them, sometimes the reverse button in Logic’s Space Designer is a cool way to spark some creative atmospheres and cool tonal differences in your melody.
Again, this is a very easy trick, but something that is both powerful and subtle at the same time.
#3 – Mapping Reverses to Sampler

Mapping audio to a sampler allows you to manipulate ANY sample you have on your computer as if it was a synth.
We’re going to do that with reverse sounds using a sample downloaded off Splice, from the Bright Lights vocal pack.
Steps:
- Import the Bright Lights sample to Logic.
- Right click on sample and select Convert to Sampler Track.
- Select the note of the sample to stay in key.
- Hit edit.
- Select reverse on the right hand side of the editor
- Increase your high and low key range.
Try to stay within an octave of the original sound, as the further you go from the original, the more degraded the audio gets, and you also start running into timing issues.
Beyond that though – if you want to play a sound with both normal forward samples and reverse samples, I would just suggest creating two sampler instruments – but if you have to keep it all in one track, reference the video from this post and you can map the editor differently which gives you this control of each individual note.
#4 – Reverse Reverb with Stereo Movement
Most producers are familiar with the reverse reverb trick. It’s a great way to introduce an important lead or prominent sound to the mix.
Commonly, it’s done with vocals, but it can also be done with lead synths, piano chords, big bass sounds – really anything that you want to introduce via a long reversed reverb tail.
This is the same reverse reverb trick with a bit of swagger.
Steps:
- Put a reverb at the beginning of any audio
- Increase the decay time to around 8-15 seconds
- Bounce in place or export the audio
- Reverse the printed audio
- Clean up any pops or abrupt tails
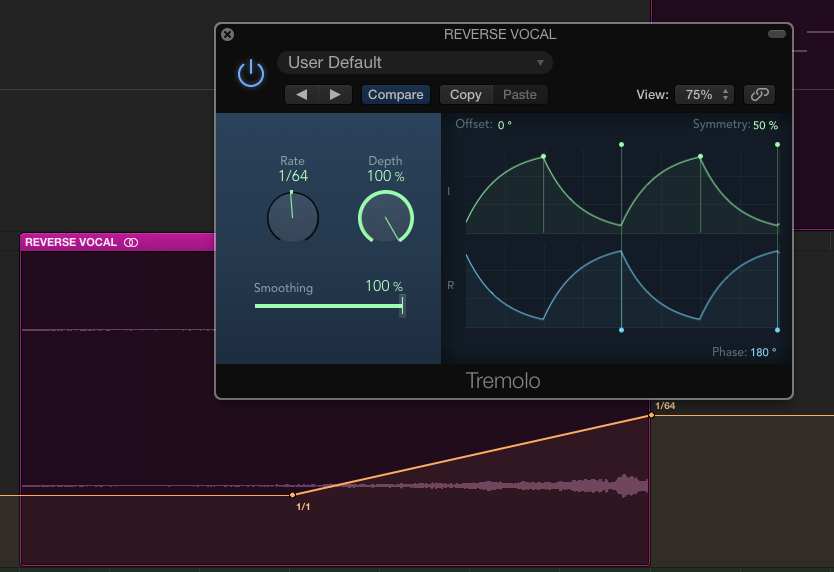
- Place a tremolo plugin on the reverse channel
- Automate the rate to slowly increase over the life of the reverse reverb
- This means that, depending on the depth, this rate moves left and right across the stereo spectrum – and by automating the rate – the reverse audio will start off slowly moving across the stereo spectrum, and automate to move faster and faster.
Again, just a really simple but cool trick to get out of doing things the same old way all the time.
#5 – Adding Groove & Energy with Reverses
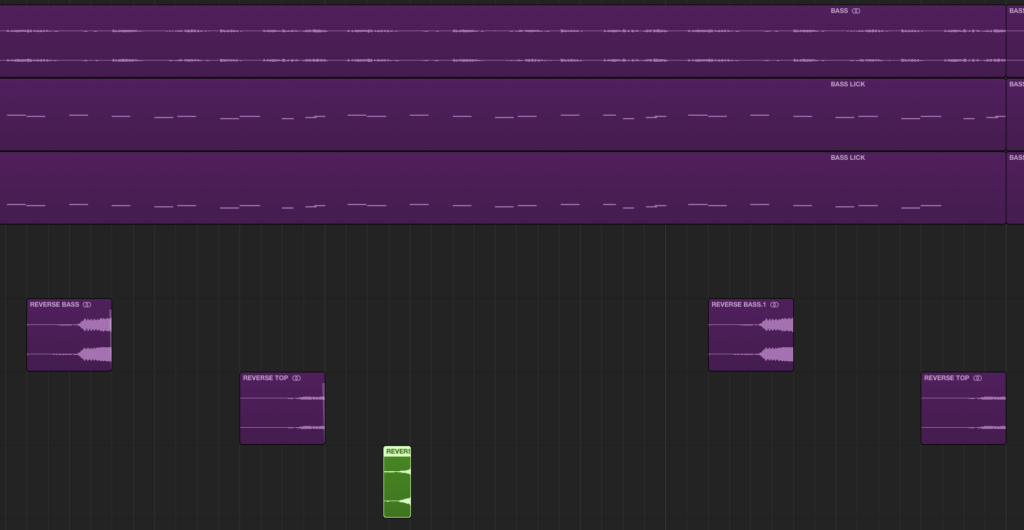
How can we make what we write digitally on a computer sound more human, more real, and less perfect.
Now there are tons of things we can do to accomplish that – but one little thing I’ve noticed?
Use reverses.
You’re left with a melody that feels like it spits itself out towards the listener – it’s got movement. It’s more dynamic, and sounds more alive.
Make sure to reference the video for more examples of this technique.
Stay tune for more tips and tricks, next month.
Learn more about the Hyperbits Masterclass
Past the composition phase? Need help finishing? This might help:

December 15, 2016


