In case you missed them, on Facebook or Twitter we’re offering a roundup of some of our latest Splice tips using Ableton Live for music production. These tips are aimed to inspire creativity and get you up and running quickly with simple techniques using a variety of Ableton Live devices.
01 Cut an Acapella into Phrases Using “Slice Audio to MIDI”

This is a simple technique for processing and “playing” acapellas or recorded vocals.
- Load your vocal sample and set warp markers at the beginning of each phrase that you’d like to chop and separate into slices.
- Next, right click on the audio file and click ‘Slice to New MIDI track’. Finally select the “Warp Marker” option and press “OK”.
- Now you’ll have a drum rack with perfectly sliced phrases.
02 Re-Pitch Vocals with Grain Delay

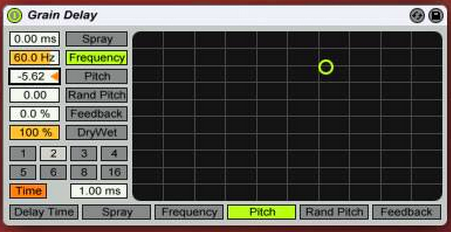
Grain Delay in Ableton Live can be used in interesting ways as a creative effect such as changing the pitch of vocals.
- Insert a Grain Delay device onto the channel you’d like to pitch bend.
- Next set the delay to time based mode (click ‘sync’ button’), and bring the decay value all the way down to 1.00ms.
- Finally, adjust the pitch value to get the desired sound.
- Try experimenting with the parameters to find cool sounding pitch bend effects.
03 Frozen Reverb Tail Effects

This is a quick and interesting method for creating ambient textural sounds for your mix using frozen reverb tails in Ableton Live.
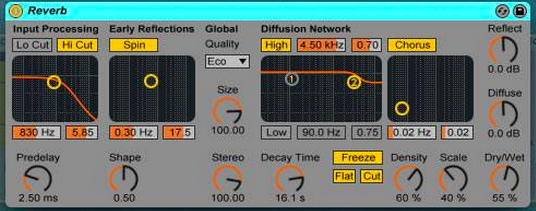
- First, take any sound and apply a reverb with a long decay time.
- After the sound plays once and you hear how the reverb tail sounds, press the freeze button on the reverb device. This freezes the reverb tail sound in time.
- Finally you can capture or resample this reverb tail to create different kinds of effects such as risers, pads, and textures.
04 Simulate a Microphone Recording a Speaker with Cabinet
The Cabinet device is very useful for emulating the sound of a speaker recorded with a microphone. This techniques sounds great with live instruments (like guitars and vocals). It can also add new life to synths and other sounds.
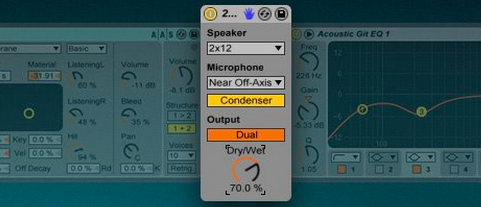
- Pick a sound you like, then drop a Cabinet device onto the track.
- In the Cabinet device set the Speaker to ‘2×12’, and the Microphone to ‘Near Off-Axis’
- Select the Condenser option under Microphone.
- Set the Output to ‘Dual Processing’ and set the Dry/Wet Amount to about 50-70% Wet.
05 Build Sweeps and Swells from Scratch

Interesting and impactful sweeps and swells can be built in Live with a single MIDI note and the built in devices.
- Create a MIDI track and add and instrument with ADSR volume envelope, such as Analog.
- Make a new MIDI clip with a single MIDI note at C3 lasting 4,8, or 16 bars.
- Launch the clip and design the sound to last as long as possible with the instrument and effects.
- Resample the audio and build the sweep/swell in the Arrangement View with track automation.
August 22, 2014


