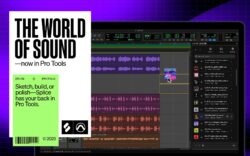
Like any other DAW, Pro Tools is a complex piece of software that can take years to fully master.
That said, sometimes that process can be greatly accelerated when you discover a powerful template, tip, or technique that you weren’t previously aware of. In the tutorial video above, veteran audio engineer Cato Zane shares 32 of her most essential Pro Tools tips that will revolutionize your workflow.
From speeding up automation curve creation to optimizing your experience working with its stock plugins and more, each tip is incredibly versatile and relevant across various genres and styles. Watch along above to see each tip and action and read the highlights below.
Plugin tips
- Bypass Plugins Quickly: Hold Command and click on a plugin to bypass it.
- Add Plugins to Top of List: Hold Command before selecting a plugin to add it to the top of your list.
- Copy Plugin Settings: Hold Option and drag a plugin to another track to copy its settings.
- Bypass All Plugins: Use Shift + A to bypass all plugins on a track at once.
- Keep Multiple Plugins Open: Hold Shift and click a plugin to keep it open while adding others.
Track management tips
- Create Markers Quickly: Press Enter on the numeric keypad to create markers in your session.
- Jump to Markers: Use the period (.) key followed by the marker number to jump to a specific marker.
- Create New Tracks: Use Command + Shift + N to quickly create a new track.
- Zoom in/out: Use R and T for zooming or Command + brackets for more detailed zoom.
- Use Track Templates: Utilize session templates to save time in future projects.
Smart tool tips
- Activate Smart Tool: Click on the Smart Tool icon to enable the combination of Trimmer, Selector, and Grabber tools.
- Trim Clips: Hover over the edge of a clip to activate the Trimmer tool and adjust its length.
- Select Clips: Hover over the top half of a track to use the Selector tool for highlighting clips.
- Grab Clips: Hover over the bottom half of a clip to activate the Grabber tool and move clips around.
- Duplicate Clips: Highlight a clip and press Command + D to duplicate it across your session.
- Mute Clips: Hover over the bottom half of a clip and press Command + M to mute it.
- Suspend Grid Mode Temporarily: Hold Command to disable grid snapping while moving clips.
- Use Tab Function: Press Tab to jump to the next breakpoint in your session, including fades.
- Highlight Audio Sections: Hold Shift + Tab to highlight sections of your audio for easier edits.
- Use Keyboard Shortcuts for Navigation: Utilize Option + Tab to quickly jump to the end of your audio track for efficient edits.
Fade tips
- Create Fades: Hover over the top corners of a clip and drag to create a fade-in or fade-out.
- Adjust Fade Shapes: Click and drag the fade icon to modify its shape in the Smart Tool.
- Crossfades Between Clips: Hover at the intersection of two clips to create a crossfade.
- Smooth Crossfades: Hold Command to make smoother transitions when creating crossfades.
- Delete Fades: Use the Grabber tool to hover over the fade and press Delete without affecting the underlying audio.
- Batch Apply Fades: Select multiple clips and use Command + F to apply fades across the selected clips.
- Customize Fade Length: Adjust the fade length for subtle or dramatic transitions between clips.
- Use the Fade Dialog: Use Shift + Enter to open the Fade Dialog and customize fades for the entire track.
- Adjust Fade Duration: Modify fade durations for smoother transitions or to avoid speaker pops.
- Automatic Crossfades: Use Shift + Enter to apply automatic crossfades where clips meet.
Loop playback tips
- Enable Loop Playback: Go to the Options menu and check Loop Playback to automatically loop a highlighted section.
- Loop a Section: Highlight a section and press Play to have it loop seamlessly back to the start of the section.
Get a free Pro Tools template
If you’d like to use one of Cato Zane’s favorite Pro Tools templates in your own production sessions, you can download it for absolutely free here.
“This template has everything you need in order to get your next session up and running quickly,” she tells us. “I hope you find it useful alongside my tips and techniques.”
Unlock your creativity with the Splice x Pro Tools integration
Last but not least, if you’re looking to take your music production experience in Pro Tools to the next level beyond these tips and templates, we’re excited to share that Splice is now seamlessly integrated into the DAW. This brings millions of royalty-free sounds, loops, and one-shots right into your Pro Tools workflow—learn more about the integration and how it works here:
And there you have it! Do you have a favorite Pro Tools workflow tip that wasn’t covered in the tutorial? What other DAWs would you like to see us dive into next? Let us know in the comments section of the video, and subscribe to the Splice YouTube channel for more tips, tutorials, and insights.
Discover, build, and create with Splice—right inside Pro Tools:
June 25, 2025

.svg)
.svg)


