.svg)
.svg)


In mastering, a good EQ can do wonders.
This post is the third article in our introductory guide to mastering. If you’ve missed an entry, click on any topic below to catch up:
In this entry, let’s take a look at the basics of EQ.
Getting started with EQ
EQs are used to balance out the frequency spectrum of a mix, fix harsh tones, and make things sound clearer and more detailed. That said, it’s preferable to use a mastering-grade EQ to work on your masters, if possible. iZotope’s Ozone 9 Advanced can be rented for $19.99/mo and includes a top-grade EQ that’s great for mastering; it can even do things like match the sonic fingerprint of a reference. FabFilter’s Pro-Q and DMG Audio’s Equilibrium are two other solid options.
Before we dig deeper into EQs, here are two pro tips for you to keep in mind:
1. Don’t cut or boost over 3 dB
If you have to cut or boost a frequency band over 3 dB, it means there’s most likely a problem with the mix. The best way around that is to speak to the mixing engineer (if you have access to them) and talk about the frequency spectrum in question to see if they could fix it in the mix.
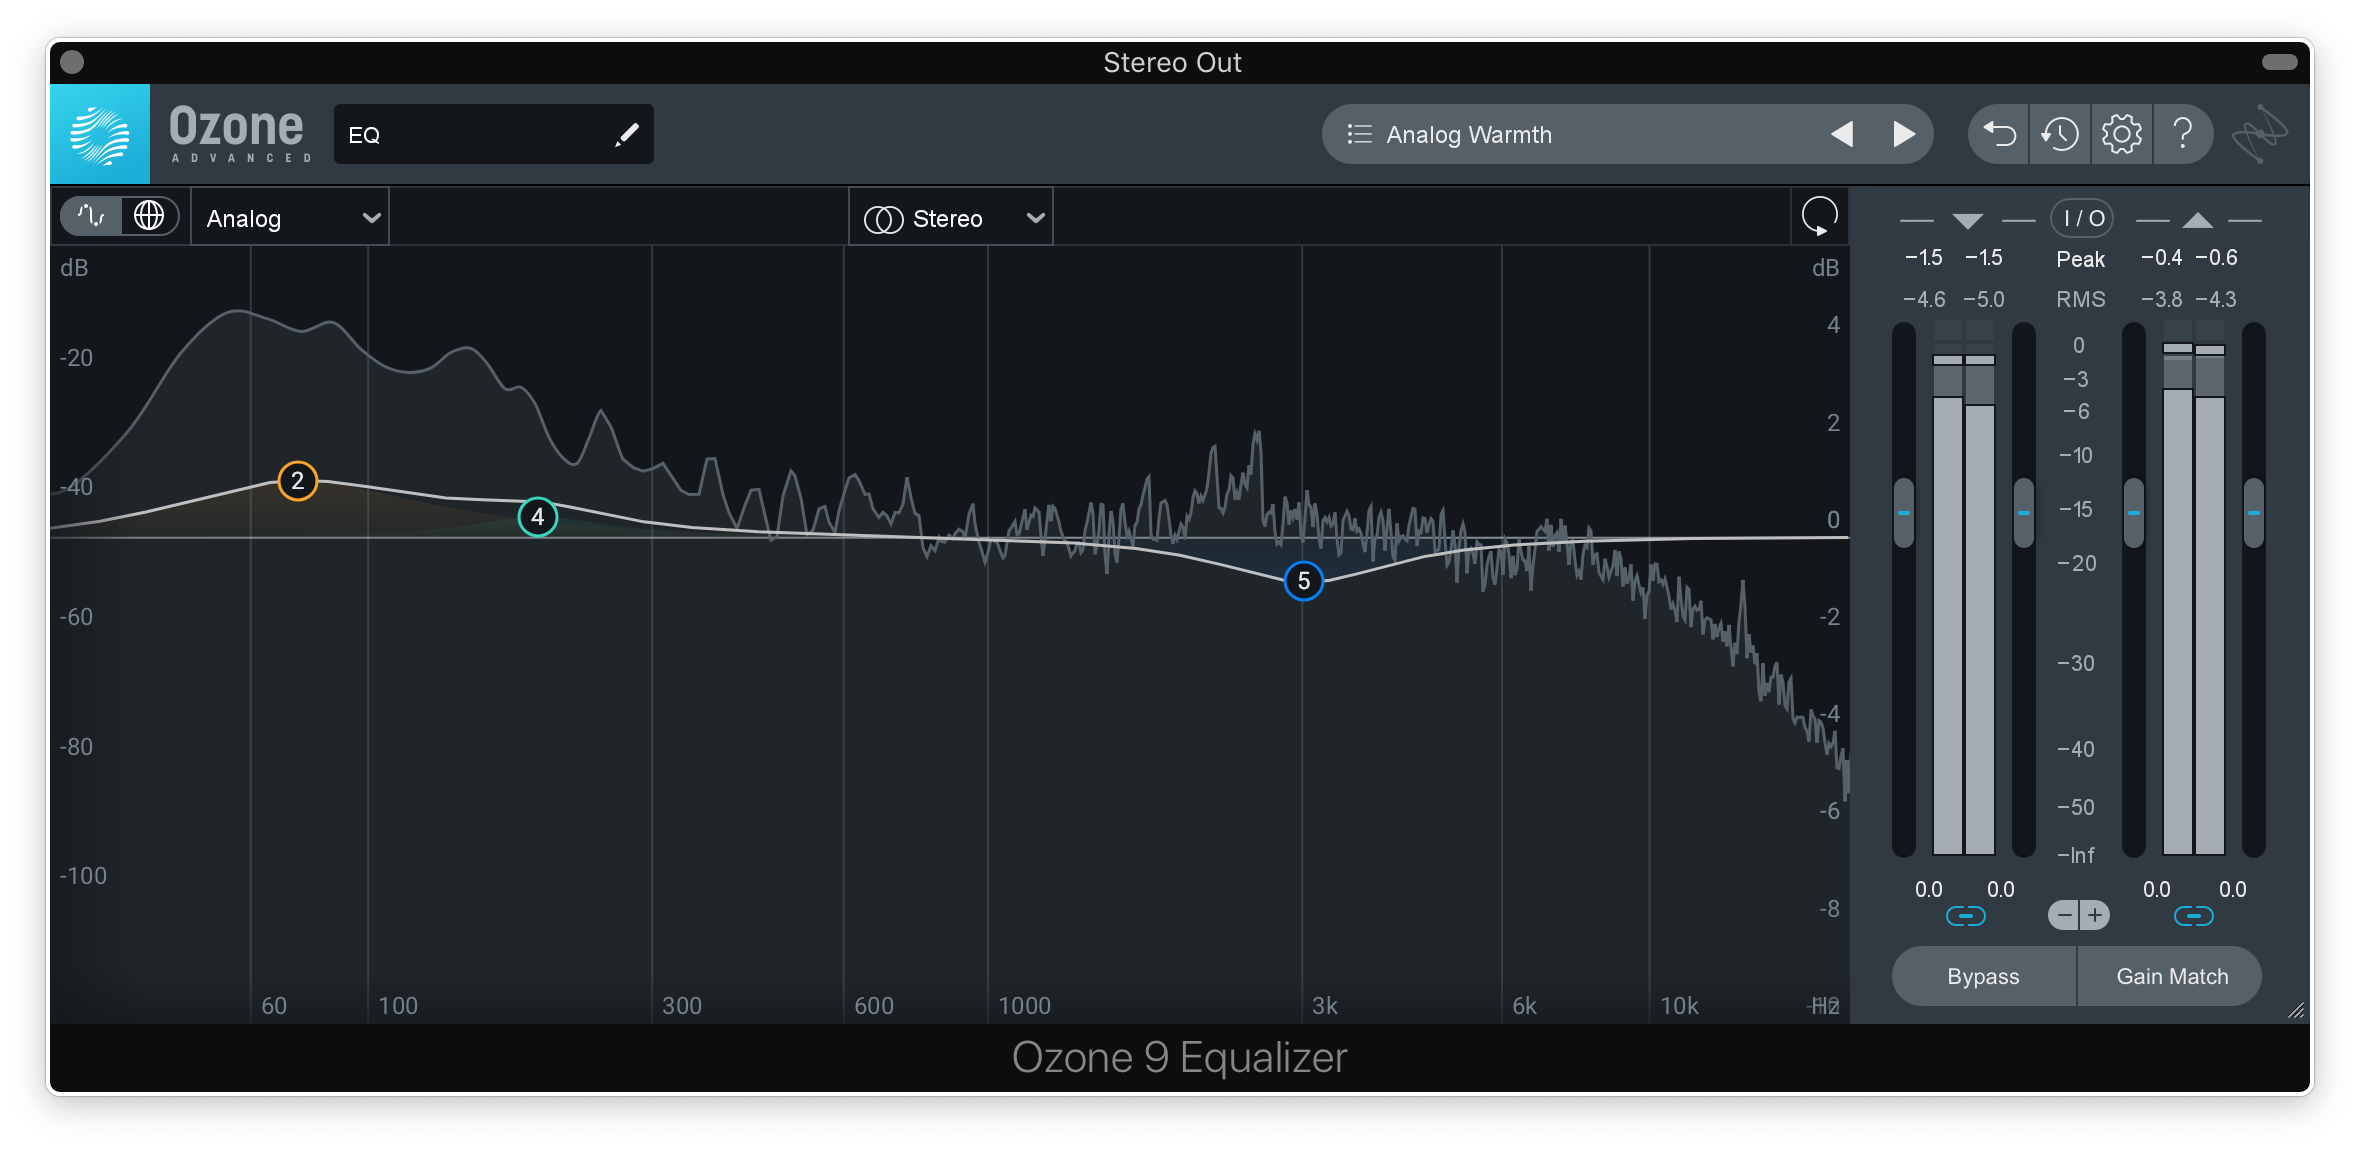
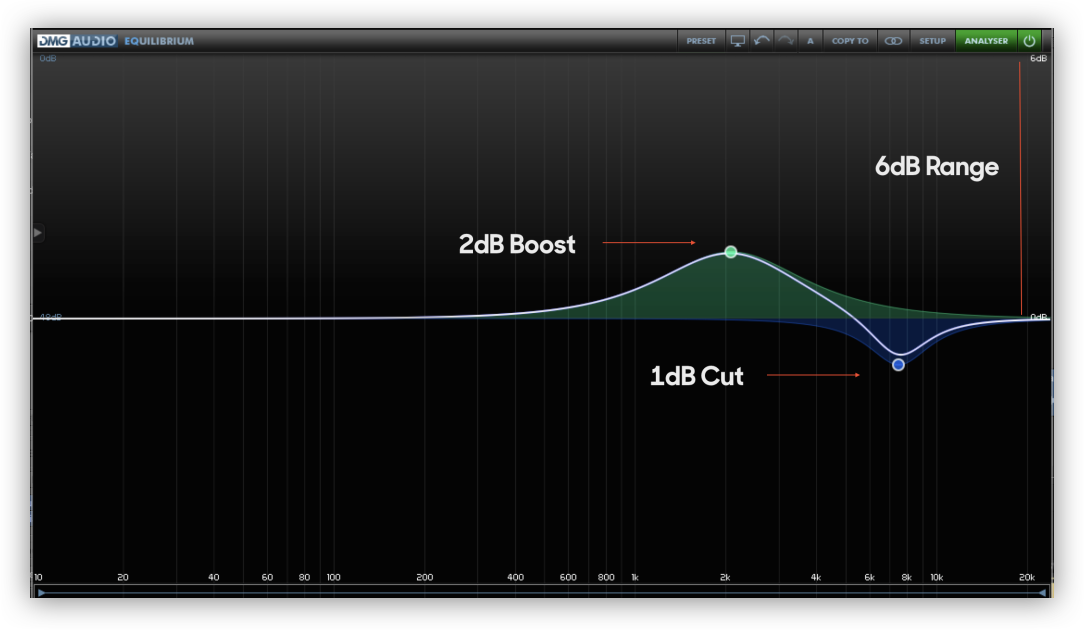
Another good practice is to set the range of your EQ to show no more than 9 dB. See the two images below, where one EQ setting shows a range of 6 dB, and the other shows a range of 18 dB.
 An EQ that displays a range of ±6 dB
 An EQ that displays a range of ±6 dB
An EQ that displays a range of ±18 dB
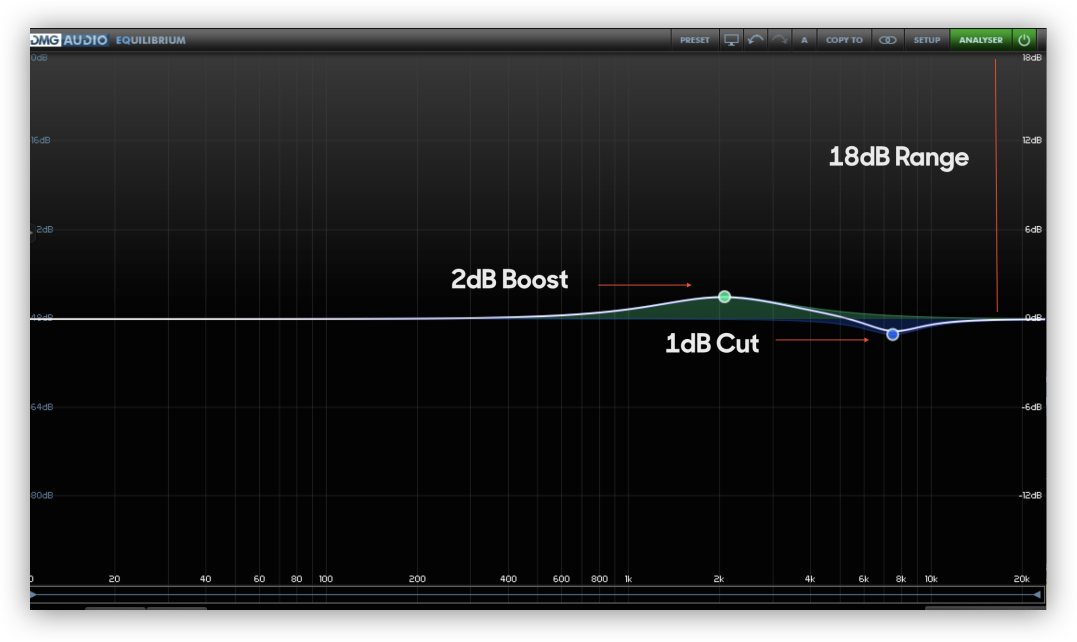
You can see how the range dramatically affects the way the EQ curves look, despite both of them having the same amount of boost and cut. Although we should definitely be using our ears and not our eyes, having a graphic representation that keeps you within certain limits is always a good idea. And since you shouldn’t cut or boost by more than 3 dB while mastering, setting an EQ range that’s lower will definitely be helpful.
2. Use wide Qs
Wider Qs (synonymous to bandwidths) sound more musical than narrow or surgical bandwidths. Thus, while mastering, you should use try using a wider Q and working on broad strokes rather than notching out resonant frequencies.
The different EQ types
Before we can start EQing, it’ll be good to know the different types of EQ and their respective pros and cons. This will allow us to use the right EQ at the right time.
1. Minimum phase (IIR) EQs
Minimum phase EQs are your typical analog-modeled EQ.
- The pros:
- They’re generally a low-latency EQ, meaning they don’t hog up CPU resources.
- They have a familiar sound, modeling analog EQs built from resistors and capacitors. You hear these all the time in your amps, analog mixing desks, outboard gear, etc.
- They’re great at handling low end frequencies. Boosting or cutting low end with minimum phase EQs doesn’t muddy the spectrum.
- The cons:
- A small phase shift occurs whenever a frequency is cut or boosted. Thus, extreme cuts or boosts, especially in the higher frequencies, can pull apart the time alignment of the frequencies and result in a smearing effect. Clarity will be affected and distortion may occur. That said, the resulting distortion may create a brighter sound that (at times) can be used as a creative effect.
2. Linear phase (FIR) EQs
Linear phase EQs were developed by programmers to combat the smearing effect of minimum phase EQs.
- The pros:
- The latency and phase shift for all frequencies are the same. Therefore, you can perform extreme cuts and boosts without pulling the waveform apart.
- They allow for extremely smooth highs and great clarity at the upper extremes of the frequency spectrum.
- The cons:
- They tend to be high-latency and CPU-intensive.
- You can often hear an audible delay with linear phase EQs. That said, most DAWs should have delay compensation to help counter this.
- They’re not as natural-sounding as minimum phase EQs when used on low end.
Putting our knowledge into practice
Now that we have some general guidelines for using EQs, here are some practical steps to get you going.
1. Work in 0.25 dB increments
Remember, mastering is all about subtle moves. In addition to using wide Qs, try to also work in 0.25 dB increments and listen carefully to the changes. Sometimes, the changes are felt and not heard.
2. Know your frequencies
Knowing what frequency ranges to cut or boost is critical to mastering. If a mix is muddy, try cutting the low mids (around 250 – 500 Hz). Sometimes, adding highs (I often use high shelves over bell-shaped EQs in the highs) will help brighten a mix without the need the cut any low mids. Remember, one move (a cut or boost) is relative and affects the other.
3. Combine linear and minimum phase EQs
We now know the advantages of both linear and minimum phase EQs. I often find myself using a minimum phase EQ to work on the lows and low mids, and then slapping on a linear phase EQ to tweak the mids, upper mids, and highs — combining their respective strengths often delivers the best results.
4. Use mid/side processing
Mid/side processing (M/S) can be a powerful EQ tool when used properly. All three of the filters mentioned above offer M/S capabilities within their plugins.
Use the mid channel to EQ the vocals in a mix; if you find that a vocal needs clarity, use a linear phase EQ to bring up the brightness around 2 – 4 kHz. Use the side channel to EQ reverbs and add detail to stereo sounds. I often find myself adding a touch of high shelf (8 kHz and above) to sweeten the sides of a mix, so that the mix appears wider.
5. Don’t over-process
I can’t stress the importance of avoiding over-processing enough. We all have the tendency to go overboard and EQ way too much. Take breaks when mastering — if you’re unsure of what you’re doing, move on to another song and come back later. In my opinion, you should refrain from spending longer than 30 minutes when mastering a song. If you’re spending significantly more time than that, you’re most likely over-processing.
Lastly, always check your master against the mix. A/B it thoroughly and make sure your master is complimenting the mix and not destroying it.
That’s all for EQ — in the next entry, we’ll focus on compression.
Explore royalty-free one-shots, loops, FX, MIDI, and presets from leading artists, producers, and sound designers:
December 24, 2019