.svg)
.svg)

Logic Pro’s Drum Machine Designer (DMD) is an incredibly powerful tool for quick and dynamic sampling capabilities in the DAW.
In the tutorial video above, veteran music producer Mr. Calderon overviews how to import samples into Drum Machine Designer to create your own custom kit. He also breaks down how to navigate the plugin’s interface and how to save a User Patch for easy future access.
Watch along above for his in-depth insights, and read highlights below—if you want to follow along with the same sounds that he used in the tutorial, you can find the complete collection here.
What you’ll learn:
- How to use Drum Machine Designer in Logic Pro
- How to add samples to Drum Machine Designer in Logic Pro
- How to edit your samples
- How to record your own samples
- How to save a custom kit in Drum Machine Designer
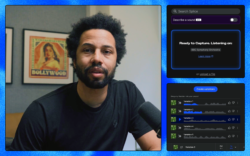
Bring Splice directly into your DAW with the Sounds Plugin (beta). Audition millions of samples, explore our latest search tools, and instantly create variations of any Splice sample.
How to use Drum Machine Designer in Logic Pro
To access Drum Machine Designer, start by creating a new software instrument track (Track → New Software Instrument Track). In the channel strip on the left, go to the Instrument slot and assign Drum Machine Designer.
Drum Machine Designer’s interface looks similar to its previous iteration, but under the hood it now uses Logic Pro’s Quick Sampler as its primary engine. Beyond dragging and dropping samples into the pads, you can also add effects and even trigger instruments from within the pads.
How to add samples to Drum Machine Designer in Logic Pro
There are a few ways to start building your own kit. The first option is to simply drag and drop one-shot samples directly onto the pads. The second is to press F to open Logic’s Browser, locate your samples, and drag them onto a pad.
A third, more advanced approach—press F again to open the Browser, select a batch of multiple samples, and drag them directly onto the track header. A window will appear asking what type of track to create; select Drum Machine Designer. This will create a new kit populated with all the samples at once.
How to edit your samples
Each pad in Drum Machine Designer represents an individual subtrack, visible in the track header list. For quick edits, a micro-editing toolbar appears beneath the selected pad right inside the plugin’s UI. For deeper editing, select the subtrack in the track header, double-click the Instrument slot, and the full Quick Sampler window opens with a complete set of sound design tools.
Aside from audio samples, you can also add an instrument plugin to any pad. For example, adding Logic’s Drum Synth lets you shape your own kicks, snares, percussion, hi-hats, and cymbals directly from within the pad. Third-party plugins work here too.
To add an audio effect to a specific sound—for example, an instance of Space Designer reverb on the snare—select that instrument’s subtrack in the track header to access its channel strip, and then add the effect to the Audio FX slot.
How to record your own samples
If you’re a beatboxer or want to capture a live performance, you can also record your own sample directly onto a pad. To do so, add a new pad, select it, go to the Instrument slot, and choose Quick Sampler.
In the Quick Sampler window, go to Recorder, set the input to whichever one your mic is connected to, and hit the red button to begin recording. From there, use the anchors to trim the start and end points of the sample. You can also pinch in and out on your trackpad for more precise editing.
How to save a custom kit in Drum Machine Designer
Once you have something you like, you can save it as a User Patch for easy access in a future project. To do so, press Y to open the Library, and then open Drum Machine Designer in the Instrument slot. This opens the path in your Library for Drum Machine Designer; select Save in the bottom right and name the kit whatever you’d like.
To recall it later, open a new instance of Drum Machine Designer, go back to the Library, and navigate to User Patches. The saved kit will be there, ready to load.
And there you have it! Hopefully this tutorial helps you get started with Drum Machine Designer in Logic Pro—once you get the hang of it, it’s a deceptively powerful tool for producers across all genres.
Do you have any questions on a specific concept that was covered in the tutorial? What would you like to see us explore next? Let us know in the comments section of the video, and subscribe to the Splice YouTube channel for more producer-led tips, tutorials, and insights.
Explore royalty-free one-shots, loops, FX, MIDI, and presets from leading artists, producers, and sound designers:
August 5, 2026