Learning to successfully collaborate with fellow artists and musicians is one of the most effective ways to boost your creativity and get more work done. Think Skrillex and Diplo or Lennon and McCartney. Each contributes their own sense of musicality and brings something different to the table that ultimately adds to the realization of a finished track. This series will focus on ways to streamline the process of working with other musicians so that you can focus on the music. Last week we looked at collaborating using Ableton Live but will turn our focus to Apple’s Logic X this week.
Keep Things Neat
We can’t stress this enough. Organizing your work and keeping things tidy will benefit both you and everyone else involved in the project as it’ll make it easier to recognize where and how the pieces fit together, enabling collaborators to quickly identify what they’re hearing and locate the appropriate place to get started without much effort. You can achieve this in a few ways in Logic X:
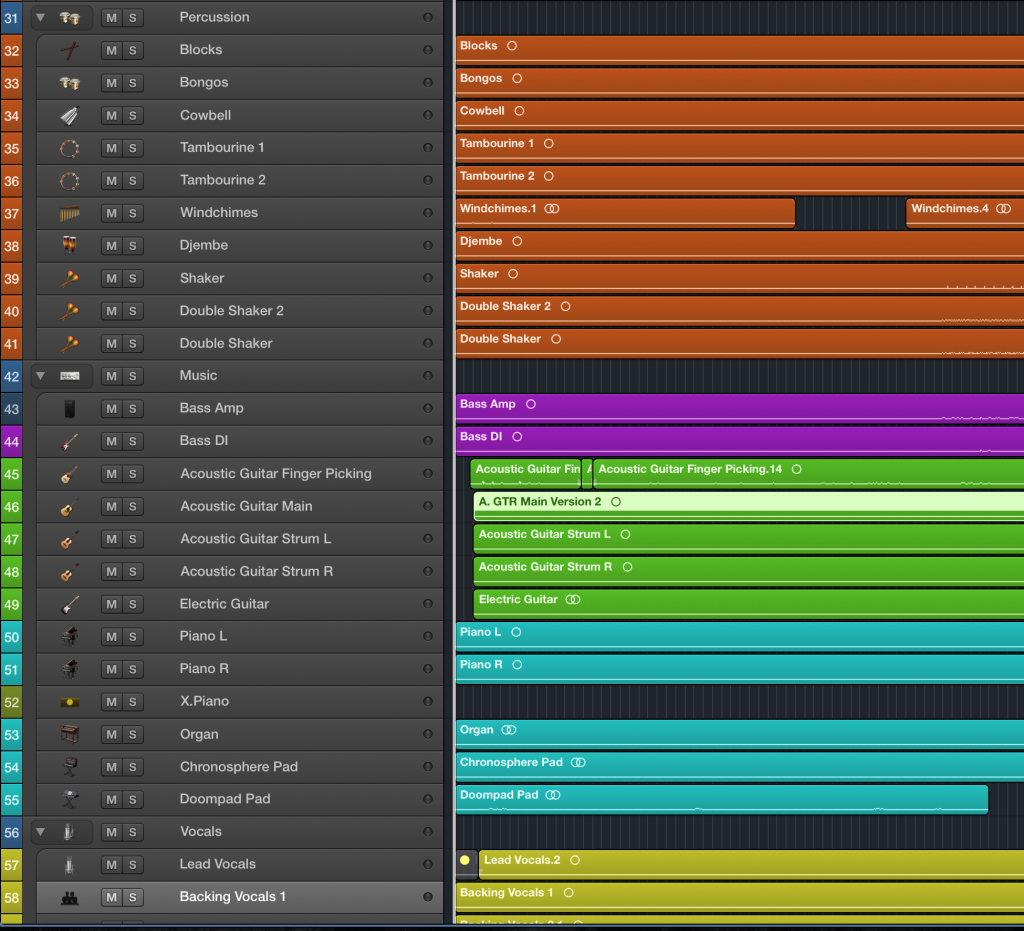
- Color Your Regions & Tracks: Having a standard color scheme for different instruments / categories would be useful. For example in the session above, drums and percussion are in orange, bass in purple, guitars in green, keys and synths in light blue. Hence, at one glance you’ll be able to identify an instrument group quickly.
- Name Your Regions & Tracks: No one likes tracks given to them without proper names. Naming them well would save you and your collaborator time in figuring what a sound is. If the sound is too “weird,” try describing it in Logic’s comment box.
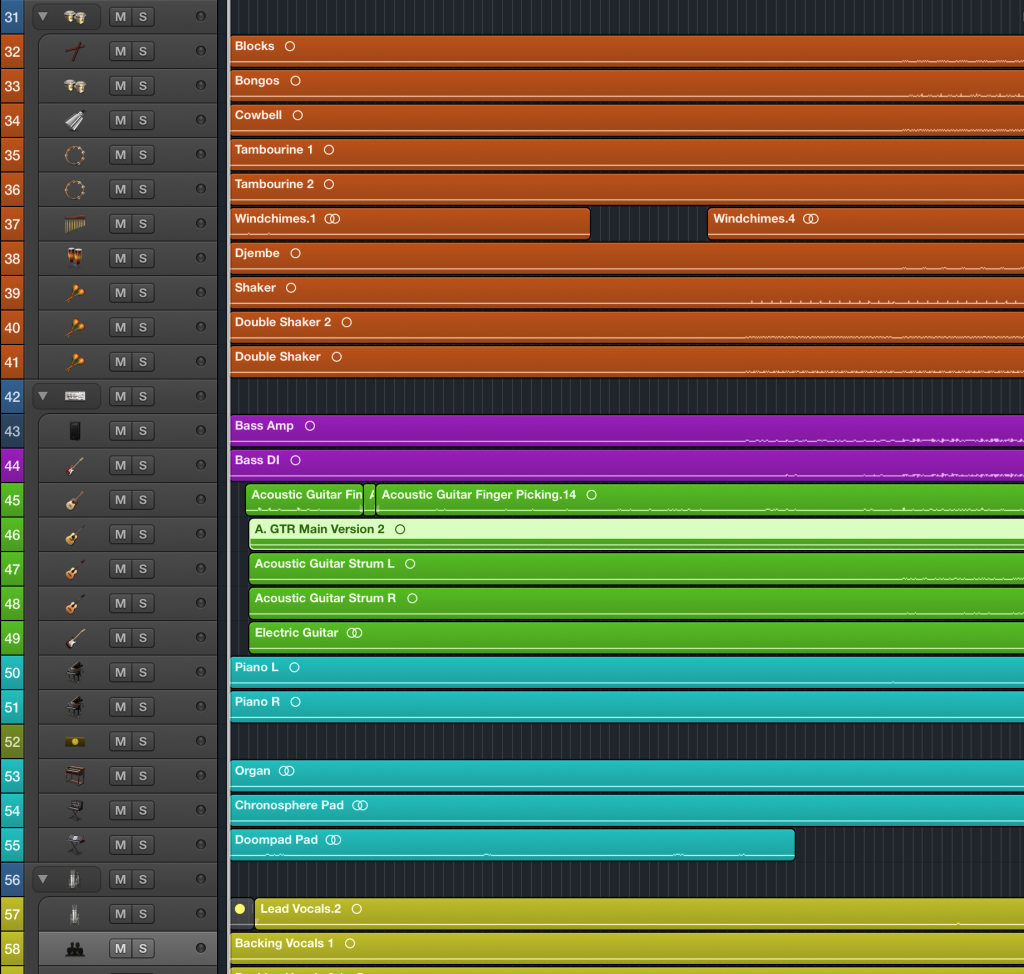
Logic X without Track Names
- Take Advantage of Logic’s Icons: In Logic, you can put an icon to every track (choose from either Logic’s stock icons or upload your own). This comes in handy when you need more screen real-estate and a more compact track layout. This way you can easily identify your tracks via the track icon and track names on the regions.
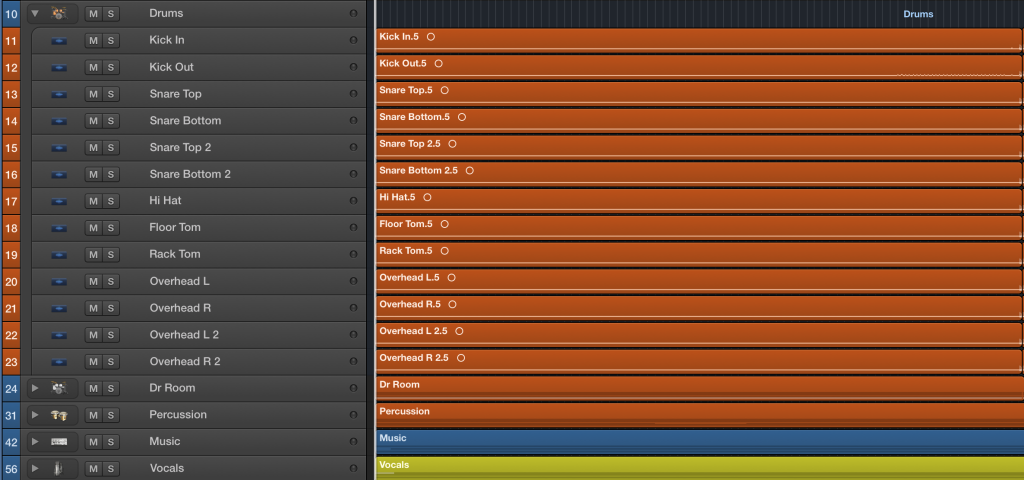
- Clean up with Track Stacks: Make use of Logic’s Track Stacks to put your tracks into groups. Not only will it allow you to collapse the folder when you are not working on it, but Track Stacks can be used like a group buss to do all kinds of processing. In the project above, we’ve organized the tracks according to drums, drum room, percussion, music and vocals.
Prepare The Session
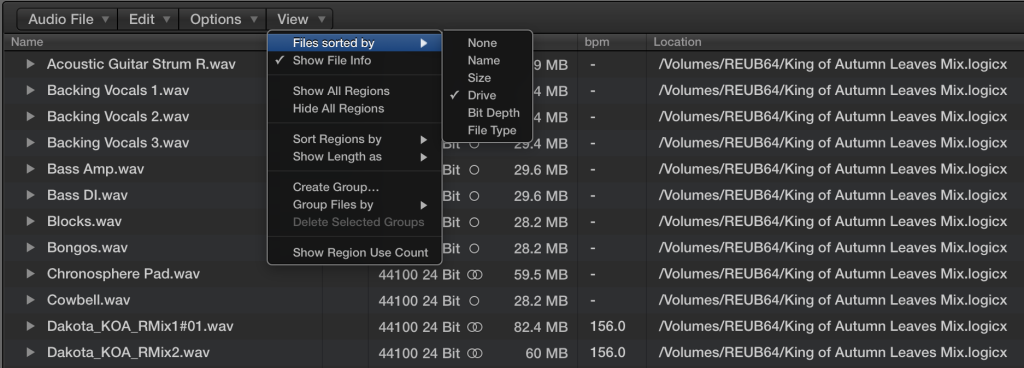
- Check Your Audio Files: The last thing you would want is to send a project file over and realize that there are audio files missing. In Logic, open your Project Audio Window, navigate to View and Sort Files by Drive. This way, you will be able to see if your files are in single or multiple drives. If the latter is true, you can easily remedy it by going to File –> Save Copy As and make sure the Audio Files box is checked. By doing that, Logic will consolidate your audio files from multiple drives and save it into a single project folder in a drive of your choice.
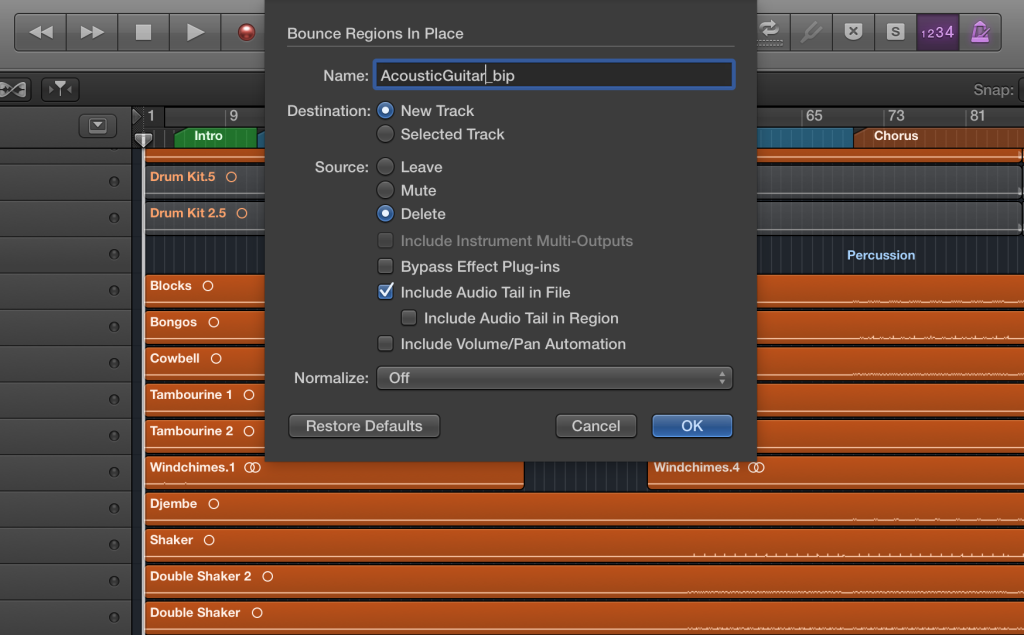
- Bounce in Place: If there is a plugin or virtual instrument that your collaborator does not have, you may use Logic’s Bounce in Place (BIP) feature to render these tracks. The BIP process bounces your track as an individual wave file and with or without automation and plugins.

- Add Markers: The cool thing about Logic is that you can set up a key command to cycle through your markers to fly to different parts of your song. You can find it under Key Commands -> Global Commands -> Go to Next Marker / Go to Previous Marker.
Use The Right Tools

Splice is hands down the best tool for staying connected and collaborating on your music projects. With features like unlimited storage space, uploads up to 10x faster than dropbox, powerful version control, and in-line track annotations, it provides the perfect working environment for everyone involved in the project to stay focused and up to date with the very latest project revisions.
Sign up for a free Splice account today to see how it can revolutionize your workflow.
Explore royalty-free sounds from leading artists, producers, and sound designers:
February 26, 2016

.svg)
.svg)


