.svg)
.svg)

Anyone who has used Pro Tools knows just how extensive its range of tools is.
As one of the original DAWs, Pro Tools is powerful in its use cases, yet consistently professional-grade. And as you use it more and more, there’s something else you may have found out: speed matters. Every extra mouse click means less time sparking and following your inspiration.
This guide will walk you through Pro Tools shortcuts that will save you hours, improve your efficiency, and keep your creative flow uninterrupted. We’ll also cover Pro Tools mixer shortcuts and show you how to customize them to fit your workflow.
Why shortcuts matter in your workflow
Shortcuts are simply a must-know for music producers, and they’re not just for pros—they’re also an essential skill for beginners to hone in their earliest experiences using a DAW. Getting comfortable with Pro Tools basics quickly also involves learning where you can work quickly. While it’s possible to bounce quality tracks going the long way around for every DAW function, the cost simply isn’t worth it; there’s no valor in intentionally limiting yourself.
Shortcuts serve a few key purposes for music producers:
- Improving efficiency: This is especially important when working with deadlines, whether they’re strict professional ones or your self-made goals.
- Reduce repetitive, unimportant tasks: When recording, mixing, and mastering, there are certain actions that you might take thousands of times for a large project. Each is important, but not worth three clicks. Keep your eyes, ears, and brainpower for the larger considerations of your project.
- Most simply, shortcuts keep your hands on the keyboard: This allows your focus to remain on the project, giving you a better chance at achieving creative flow.
Creative flow is likely not an unfamiliar term to you, or at least, you know the experience. It’s that state where time seems to disappear, your focus locks in, and ideas pour out effortlessly. Often described as being “in the zone,” neuroscientists define it as a transient state of hyper-focus and optimal performance where multiple brain systems synchronize. In a continuously distracting world, there may be no human experience that’s more precious than creative flow.
Essential Pro Tools keyboard shortcuts
We covered a first few shortcuts in our beginner’s guide to Pro Tools, but for ease of access we’ll cover these again here. With each of the below shortcuts that you master in Pro Tools, you’ll save precious minutes per project, enabling you to keep creating and meet the pace of your production goals. Let’s get into where the real superpowers begin.
Single-key shortcuts
You’ll find that there are already a few shortcuts which utilize a single keystroke. In other words, the shortcut doesn’t require you to hold down a modifier key like command, control, return, and so on. These are also referred to as “hotkeys,” though not directly in the DAW.
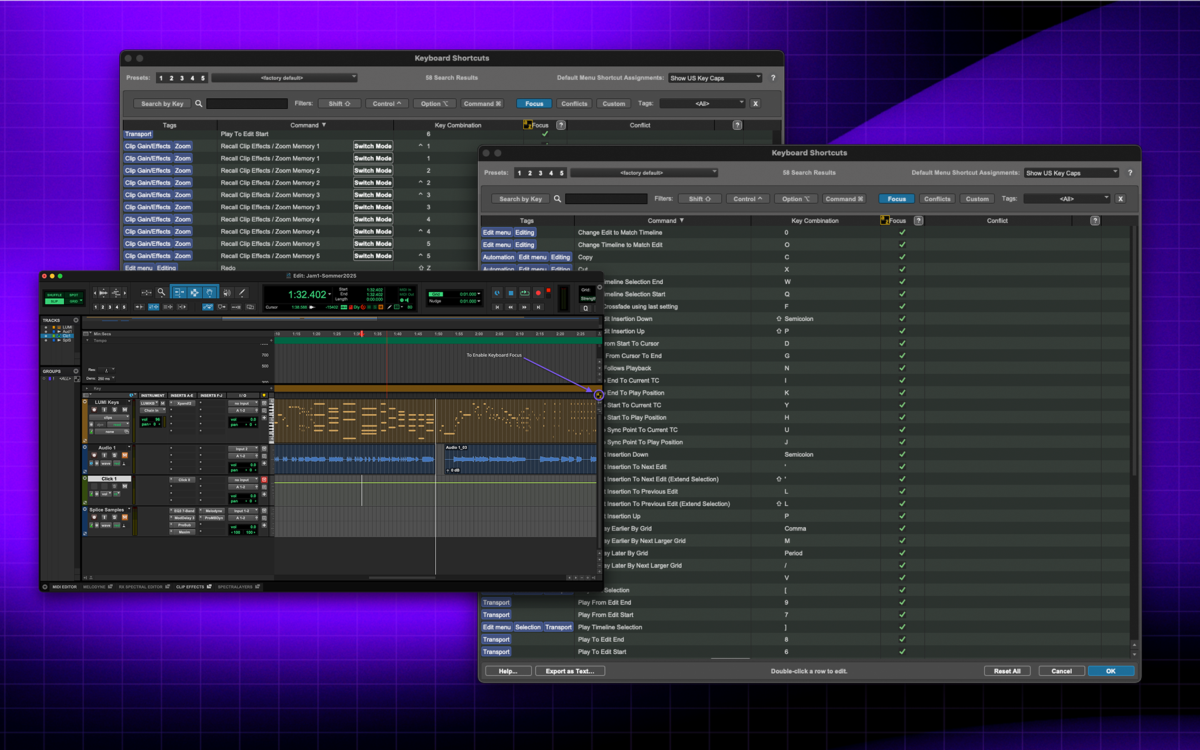
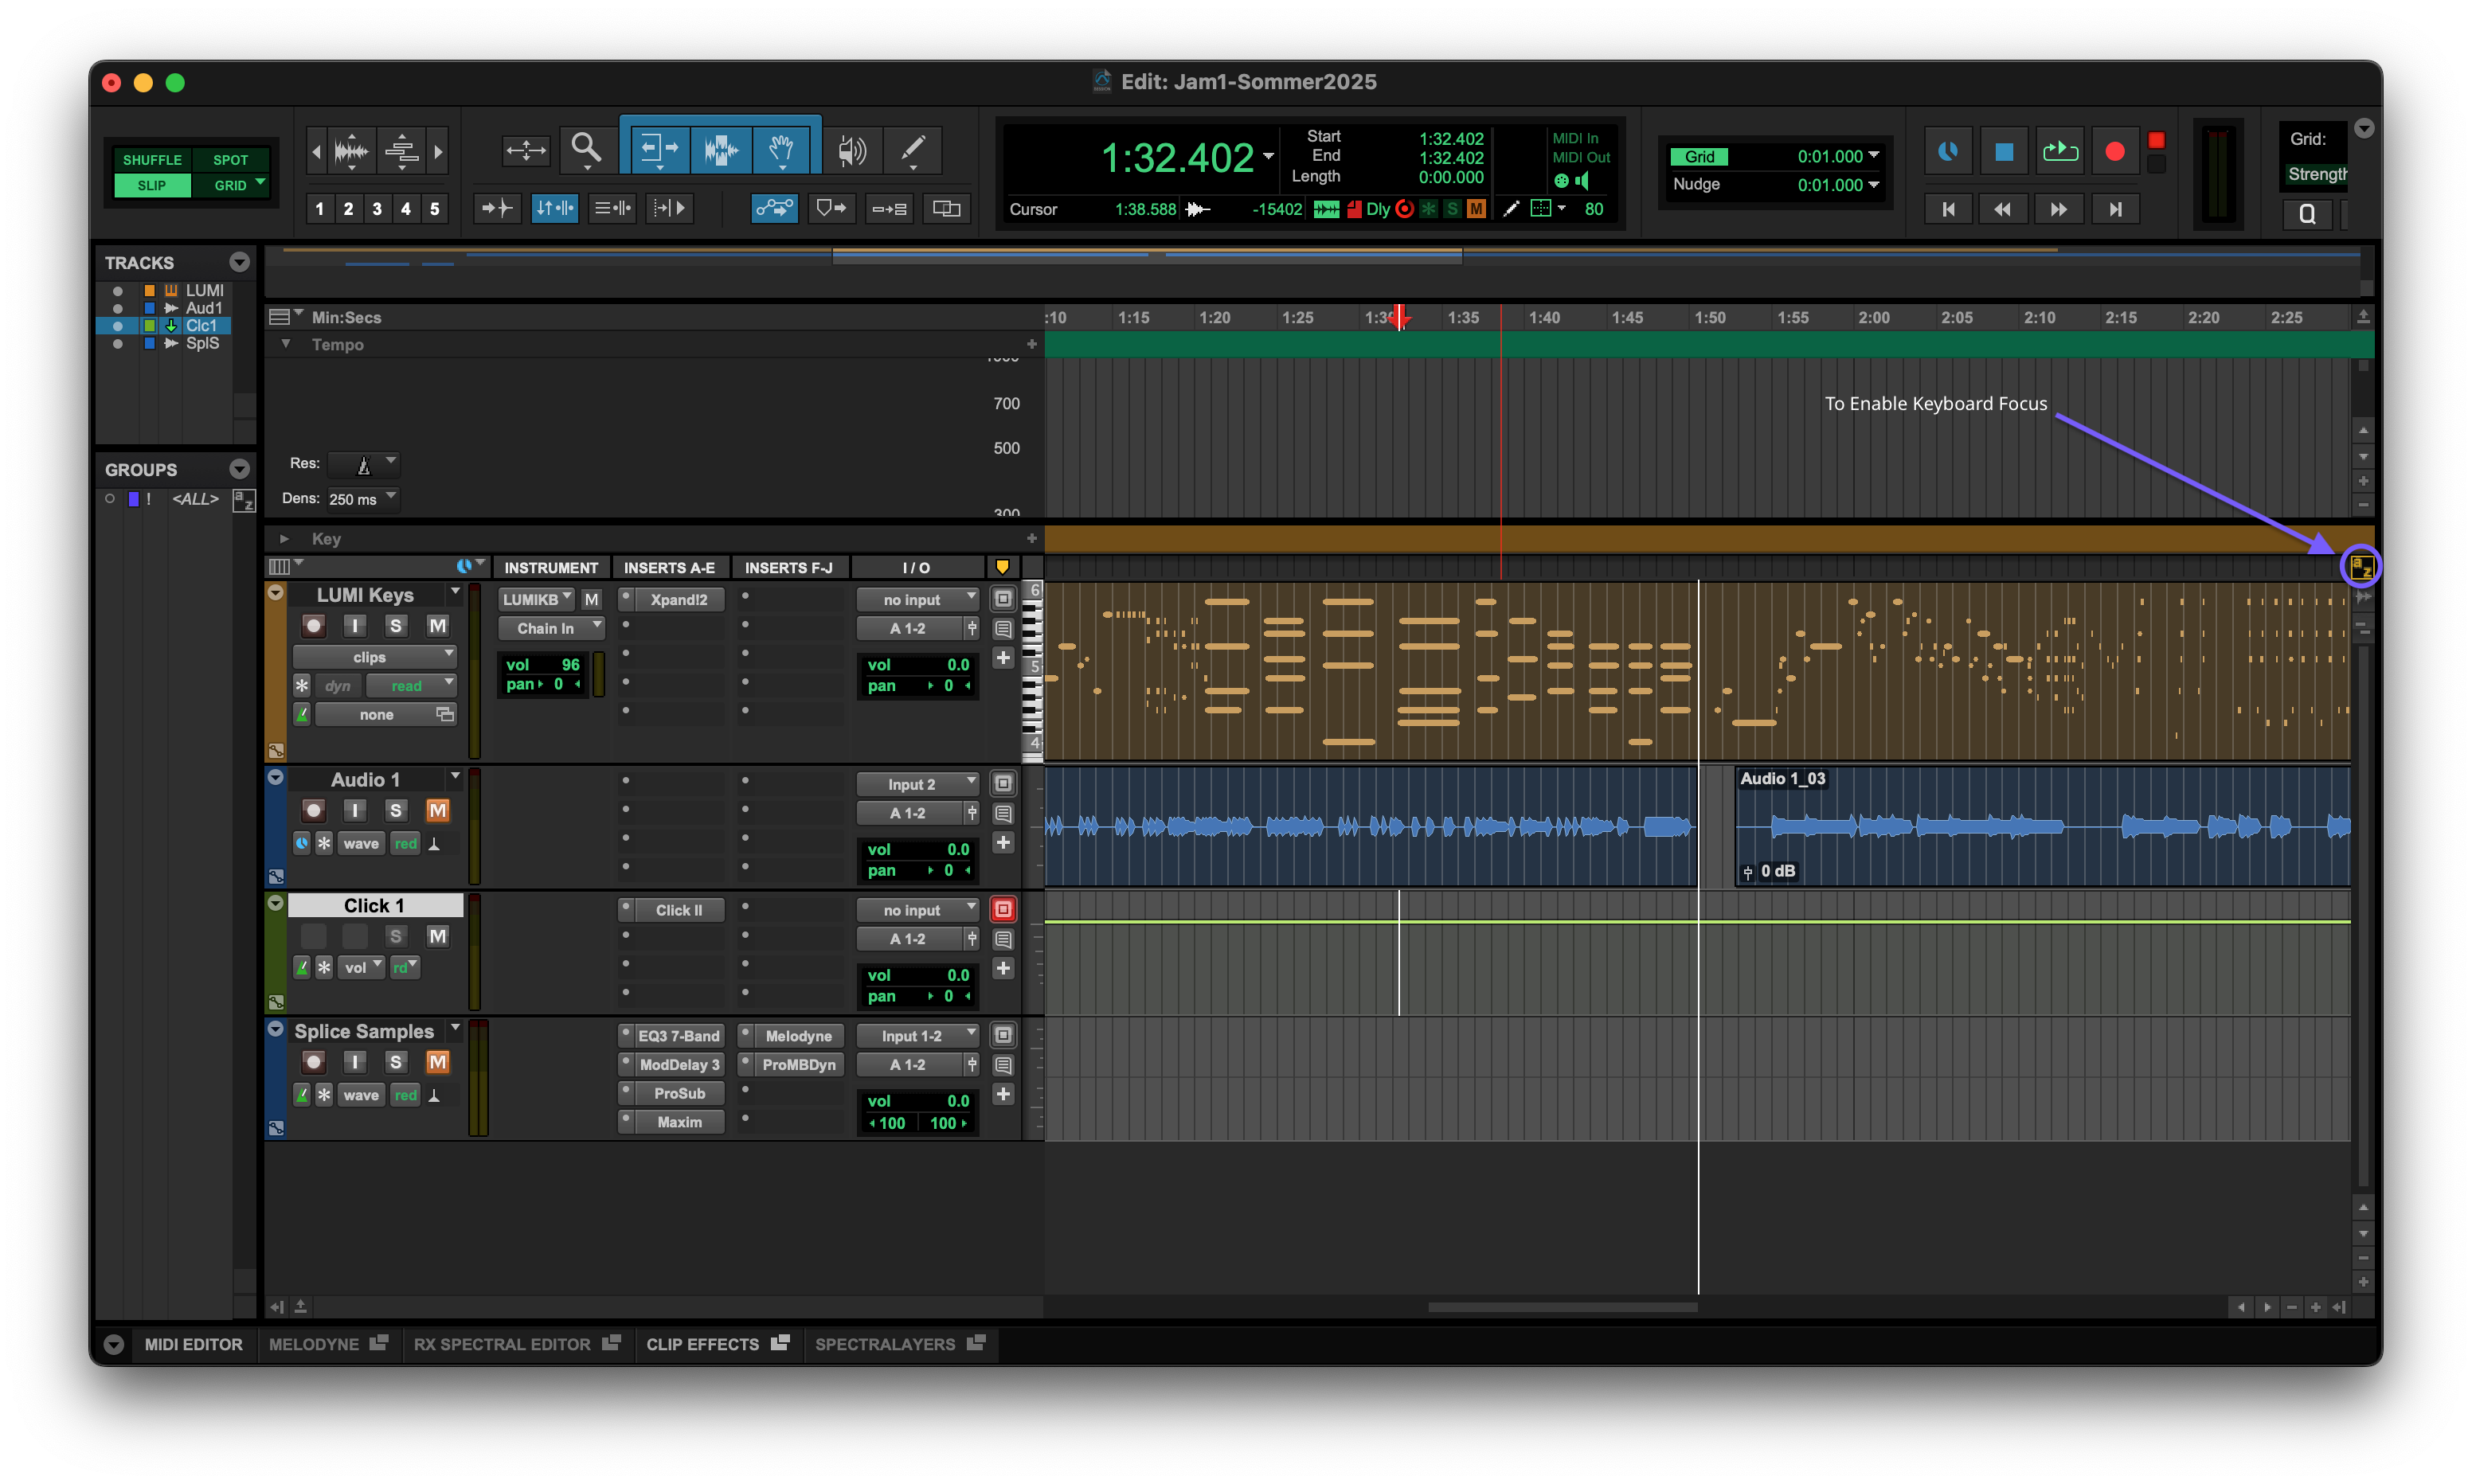
To enable this function, you’ll need to go into the mode referred to as “Keyboard Focus,” which you’ll find labeled “a/z” on the upper right of the arrangement view.
Here’s a shortlist of the most simplistic keyboard shortcuts with these single-stroke options. Let’s start with actions that have a direct opposite or alternative:
| A: Trim clip start to the cursor (deletes everything left of the cursor) | S: Trim clip end to the cursor (deletes everything right of the cursor) |
| C: Copy selection | V: Paste into selection |
| D: Fade in from start of clip to cursor | G: Fade out from cursor to end of clip |
| K: Move clip end to play position | H: Move clip start to play position |
| P: Move selection up one track | ; (semicolon): Move selection down one track |
| R: Zoom out | T: Zoom in |
| , (comma): Nudge clip left by the set amount | . (period): Nudge clip right by the set amount |
Here are a few more important hotkeys that act as more of a singular purpose:
- B: Separate clip at the selection (split)
- F: Execute a crossfade using the last / default setting
- X: Cut (delete selection)
- Z: Undo last edit in the Edit window
- [: Play Edit selection
- ]: Key Play timeline selection
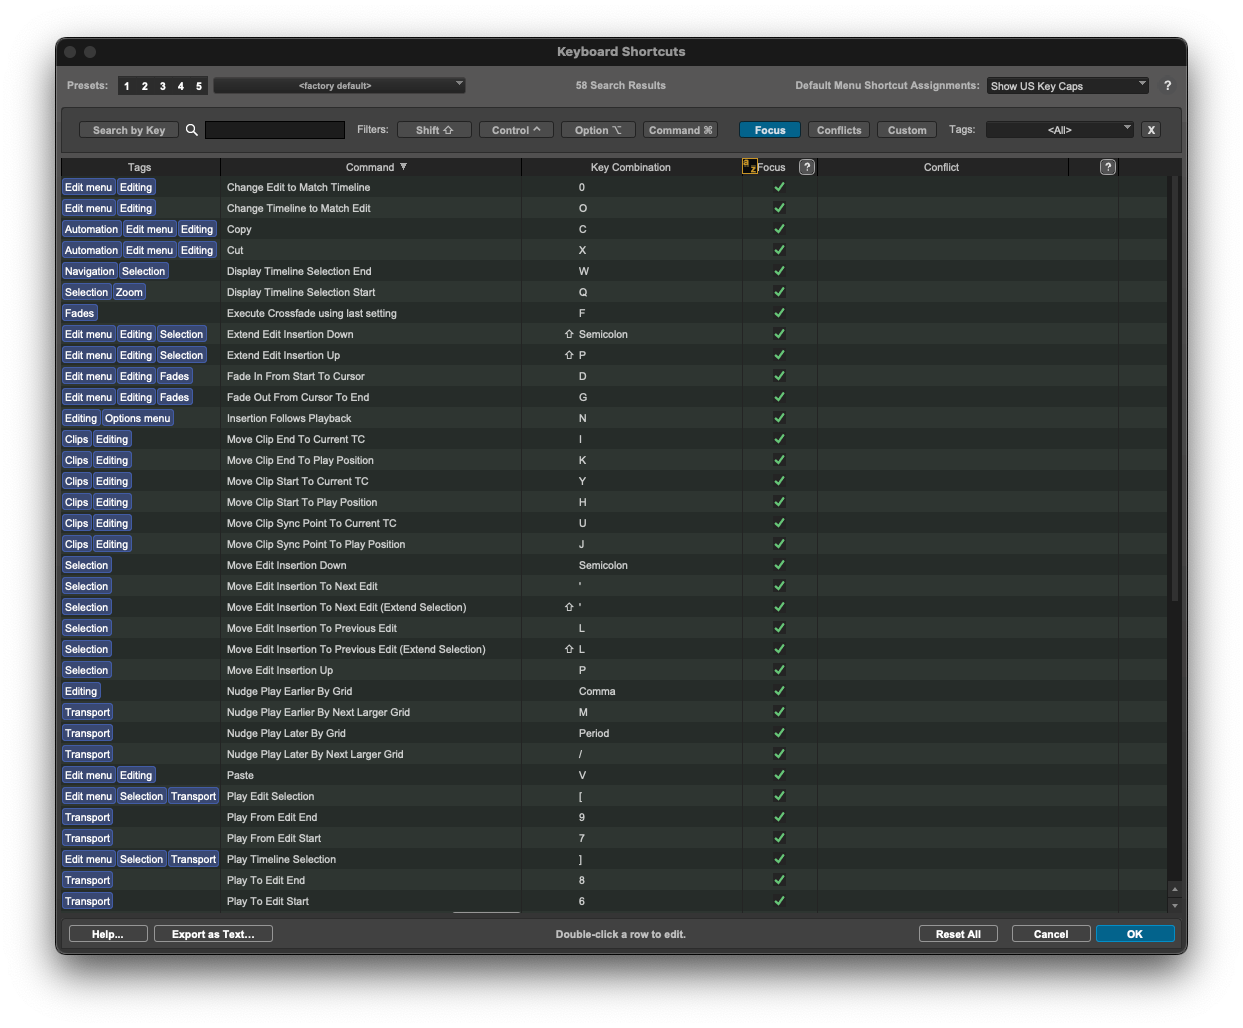
As a default, every single key will have a hotkey assigned to it, all of which are changeable. You can see all of these within Pro Tools by navigating to “Setup > Keyboard Shortcuts,” which of course, also has a shortcut (^ + shift + K).
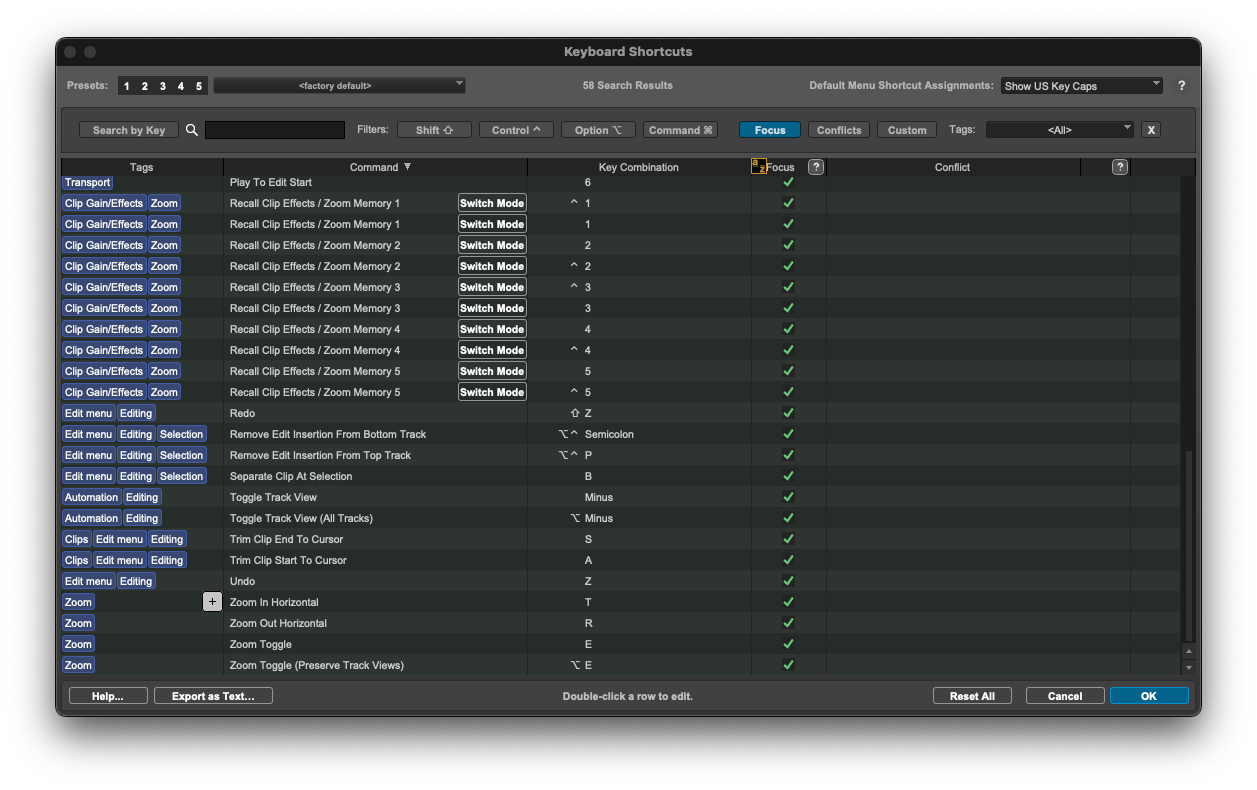
Customizing your hotkeys and more complex shortcuts
Referencing the shortcuts menu is often incredibly useful, especially as you get into the more complicated shortcuts. As you build your practice, you can also customize these however you’d like. You might quickly notice just how many actions are not assigned a shortcut by default, such as changing tempo and meter, adding a key change or section of cut time, copying audio as MIDI, or even closing your session.
By tailoring shortcuts based on your unique workflow, you can make these already crucial tools work even better for you. Here are a few use cases to consider customizing shortcuts in Pro Tools:
- There’s a shortcut you don’t use, located near some others that you often use. You can slowly build all of your favorite shortcuts to be around one another, for easier access and memorization according to your specific preferences.
- There’s a shortcut you use regularly, but often forget it or guess it wrong. You can re-assign it to something easier to remember.
- There’s a shortcut you use which requires a modifier key, and you would like it to be a hotkey.
While many producers never go to the lengths to customize shortcuts, it’s a tool at your disposal which creates a level of flexibility to your needs. As is the case in your musical genre, your song’s form, or the instruments you use, just because there’s a standard mold, it doesn’t mean you have to fit into it.
Specialized Pro Tools shortcuts for navigation
In navigating the DAW, there are a number of functions which you’ll use regularly just so the program is set to the right beat and measure in your arrangement, selecting the right track, and overall knows where your focus is. We can think of these as functions of core playback navigation, transport navigation, timeline navigation, track navigation, window navigation, scrolling, and zooming.
Here are the must-know shortcuts for navigation:
- Spacebar: Start / stop playback
- Shift + S: Solo a selected track
- Shift + M: Mute a selected track
- Delete: Remove a selection or clip within a track
- Return (Enter): Move playhead to the session’s starting point
- Shift + Tab: Extend selection to next boundary
If you’re using Mac or Windows, take note of the following examples. Generally speaking, this is how shortcuts will differ for your operating systems:
- Option + Tab (Mac) / Alt + Tab (Windows): Move to previous clip boundary
- Option + A (Mac) / Alt + A (Windows): Zoom to show the entire session
- Option + F (Mac) / Alt + F (Windows): Zoom to fit your exact selection
- Command + = (Mac) / Ctrl + = (Windows): Toggle between the Edit and Mix windows
Specialized Pro Tools shortcuts for editing and mixing
Pro Tools shortcuts become more important with each step of your process, especially in the mix where your attention is precious. A quicker workflow also means needing less breaks for your ears, those moments where you need to distance yourself from a track for a little while before returning to it fresher.
Here are a few useful shortcuts in this stage:
- Up and down arrows: Transpose selected MIDI data by a half step
- Left and right arrows: Select next or previous MIDI note
- Command + E / Ctrl + E: Separate audio clip at cursor (standard shortcut)
- Command + H / Ctrl + H: Heal separation (remove split)
- Command + D / Ctrl + D: Duplicate selection
- Shift + Command + F / Ctrl + Shift + F: Activate a batch fades, or a way to create multiple fades (fade-ins, fade-outs, or crossfades) across a selection of clips all at once, instead of applying them one by one
- Command + 4 / Ctrl + 4 (numeric keypad): Automation window
- Command + Option + U / Ctrl + Alt + U: Clear all automation
- Command + Control + Click / Start + Ctrl + Click: Enable / disable automation on a parameter
- Option + Click / Alt + Click: Reset fader to default value in the mix window
- Command + G / Ctrl + G: Create group
- Command + Shift + G / Ctrl + Shift + G: Suspend all groups
- Option + Shift / Alt + Shift: Apply setting to all selected tracks
- Option + Click send/insert / Alt + Click: Assign across all selected tracks
Final customization considerations
Especially if you’re new to Pro Tools, some of the above may not entirely make sense to you. Take your time and remember that music production is a skill which calls for regular discipline, experimentation, and yes, making mistakes. Sometimes, those mistakes are actually your next creative spark, so embrace all of the moments!
Your experience with Pro Tools shortcuts will also differ if you’re using a physical mixer as well as if your keyboard has a numerical keypad. This is the separate block of numbers on the right side of a full-size keyboard, often not present on laptops with a QWERTY-based or specific country’s keyboard layout. As Pro Tools has been the standard for physical recording studios for decades, this type of keyboard is generally available, but this is not the case for most producers at home.
Both of these cases are ones where you might consider the customization process outlined above. While we only listed one shortcut using the numeric keypad (to view the automation window), you might find there are a few others you’d like to use that can easily be reassigned to an option accessible to your keyboard.
And there you have it! Do you have any tips for Pro Tools shortcuts of your own that you’d like to share? What other topics in music production would you like to see us explore next? Start a conversation with an ever-growing community of music creators via the Splice Discord.
Discover, build, and create with Splice—right inside Pro Tools:
September 16, 2025