Regroover Pro is accusonus’ beat machine that uses artificial intelligence to extract stems from full drum loops.
The plugin works with astonishing precision and opens up countless rhythmic possibilities, allowing you to get your hands on previously inaccessible one-shots, remix an existing beat, or craft entirely new grooves with the built-in editor. This feature guide will overview these features and more, so that you can get the most out of Regroover Pro.
Getting started

When you first open up Regroover Pro, you’ll be greeted by a window that prompts you to drag or load a clip into the LAYERS tab. Let’s drop this beat in as an example:
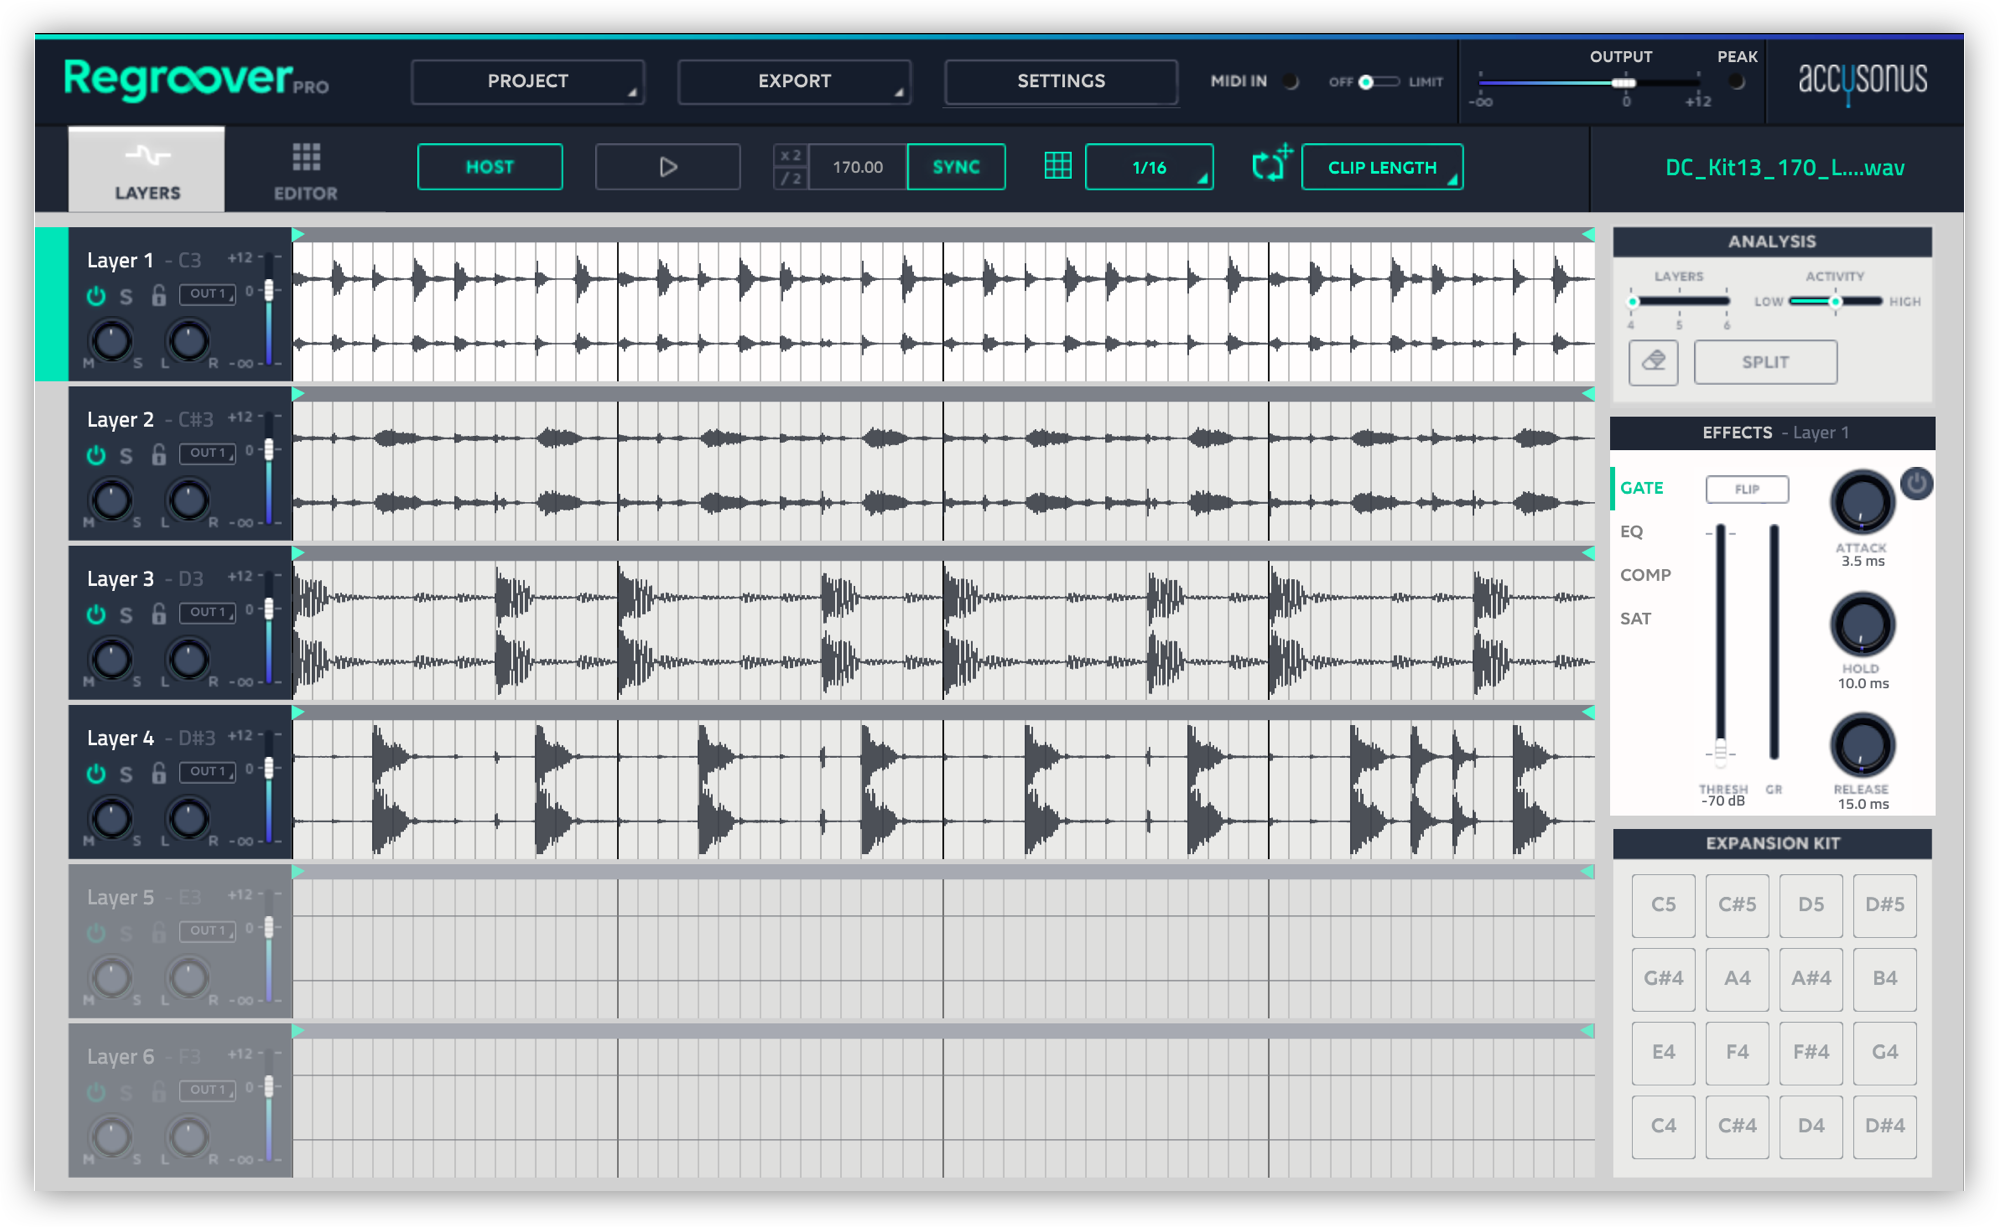
Once you load a drum loop into Regroover, it’ll automatically analyze the waveform and segment it into several stems. You can listen to each individual stem by either soloing the particular layer, or by pressing command + shift while clicking on any area of any clip. Check out how Regroover intelligently separated key elements that made up the drum groove:
The kick:
The snare:
The shaker:
The hi hats:
Pro Tip: Regroover is in Sync mode by default, which means it’ll warp the beat to align with your DAW’s tempo. You can revert the groove to its original tempo by turning the Sync button off in the top bar.
Editing the layers
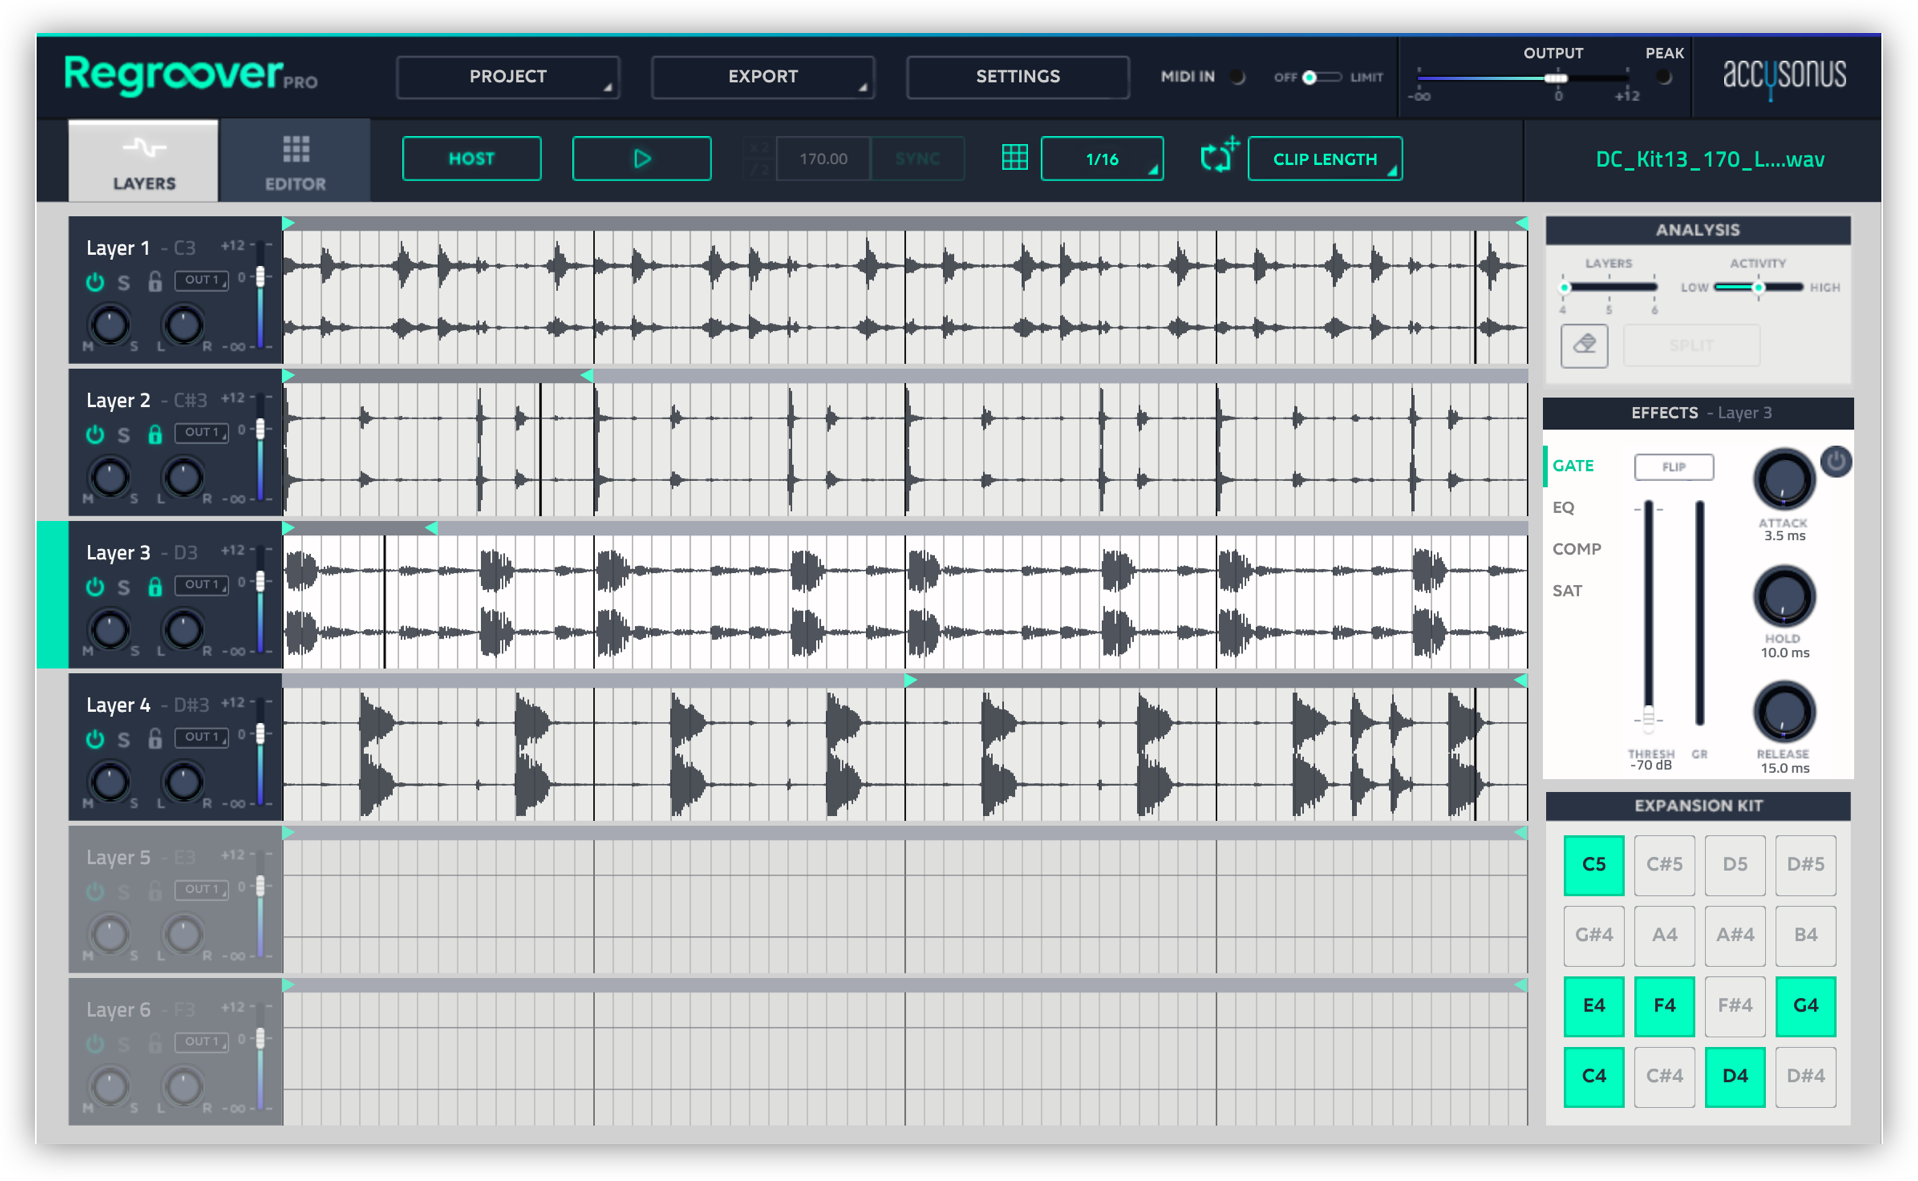
Though these stems often sound great as they are, they can be tweaked further to better align with your needs. For example, the snare stem from our groove has some small percussive accents in between each hit – maybe we would prefer to have just the main snare hits on that particular layer. If we so desire, we can use the ANALYSIS section to not only remove these accents from the snare layer, but transfer them to an entirely different stem.

Click on the eraser icon to activate the annotation tool. Now, you can double click on any layer to create green annotation regions.

Once you’ve identified all the regions you want to transfer, hit the SPLIT button to have Regroover’s A.I. engine restructure the layers. The snare layer now consists of just the main snare hits, perfectly isolated:

Pro Tip: If you want annotation regions to be transferred to a specific layer, just lock all of the other stems using the padlock icon.
Remixing an existing groove
Now that we have our layers, we can easily create variations and remixes of the original groove. Adjusting the volume of each layer can allow you to fine-tune the overall mix. Alternatively, you can mute layers to produce some neat stripped-down breaks.
You can also change the loop lengths for each layer independently to create unique rhythmic variations. To do so, simply drag the green triangular makers located on the left and right corners of each layer.
Creating your own kit
If you’re looking to take things a step beyond remixing, one of the most compelling features of Regroover Pro is its ability to let you design your own drum kit to create new beats with. To do this, double click on a layer to highlight a one-shot (or larger region) of your choice.
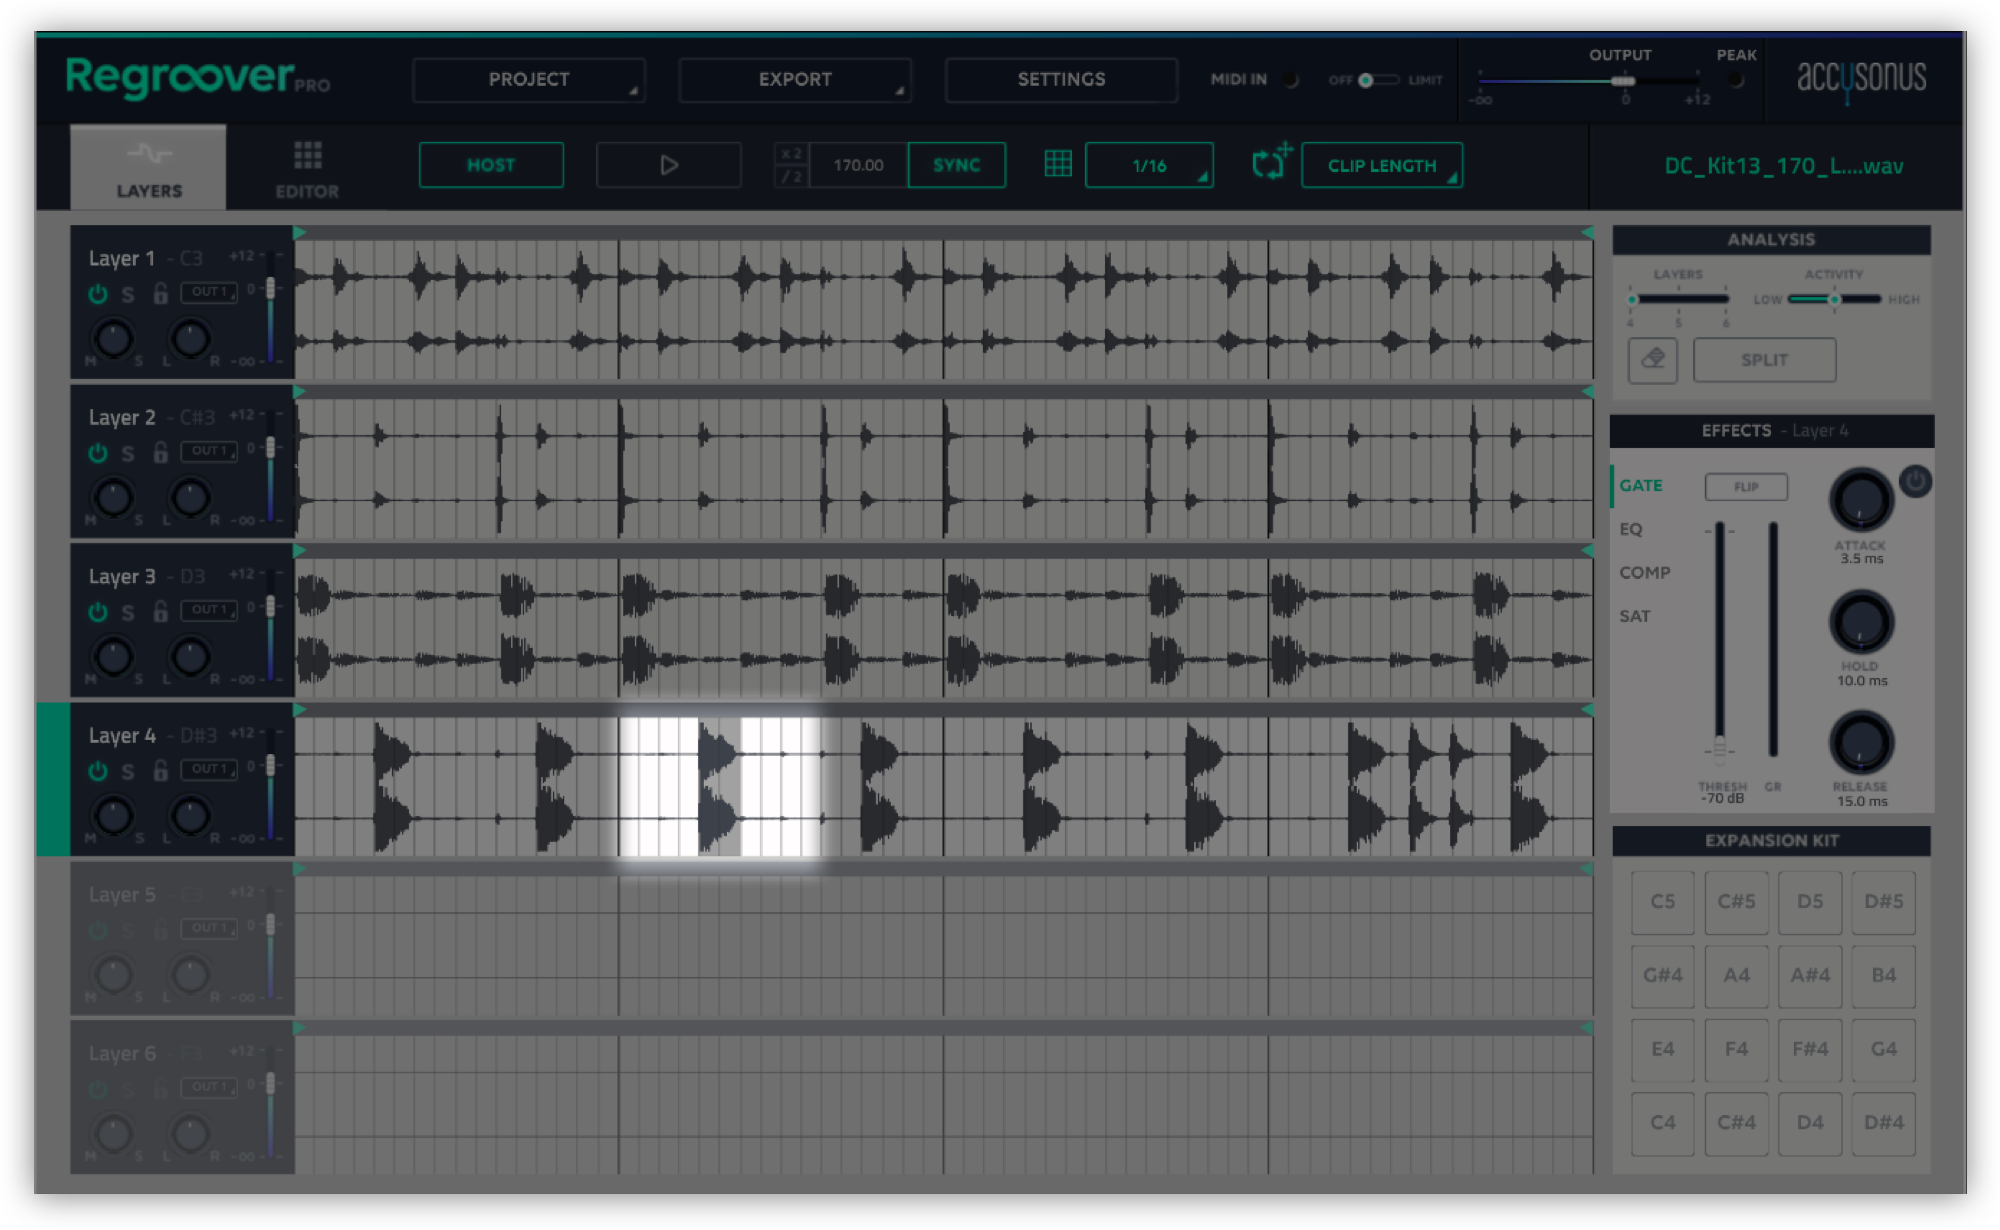
Then, move your cursor to the lower area of the highlighted region until the waveform icon is revealed. Once this happens, just drag-and-drop the sample onto any pad on the Expansion Kit:

Once you’ve loaded some samples into the Expansion Kit, you can edit them in the EDITOR tab of Regroover Pro. Parameters such as volume, envelope, compression, EQ, and forward / reverse can be manipulated for each sample independently.
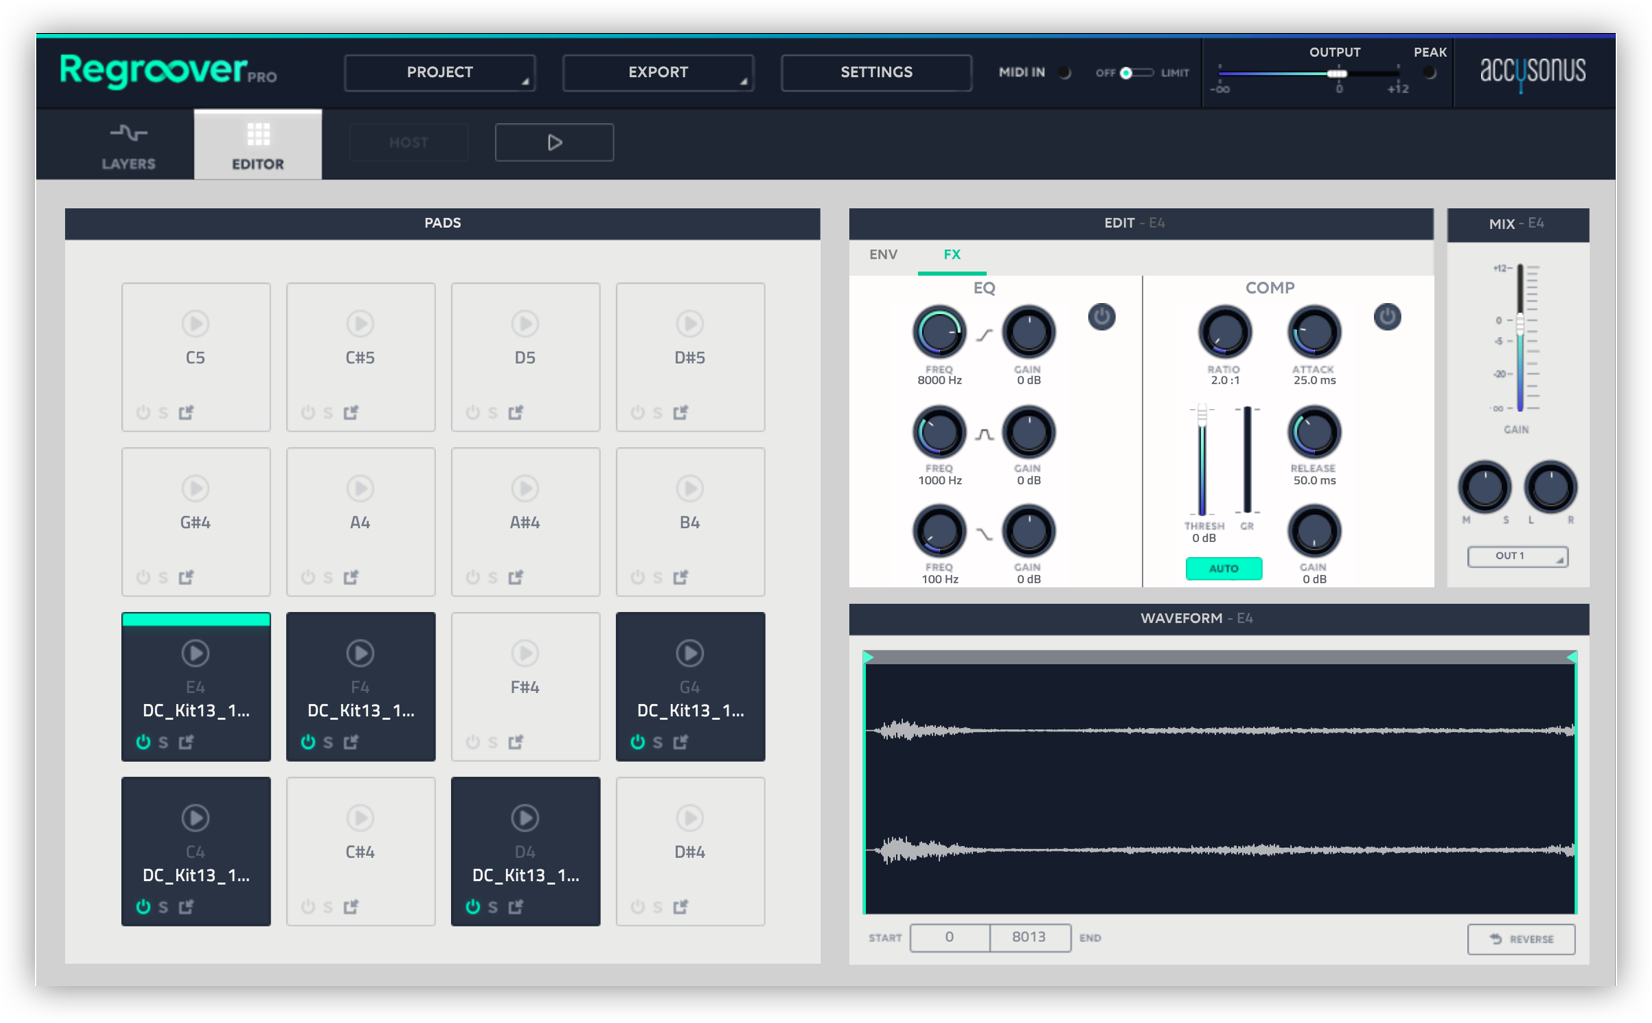
You’ll notice that each pad is mapped to a MIDI note, which means you can tap out rhythms on a controller or keyboard, or just draw sequences directly within your DAW. This feature allows you to create a truly infinite quantity of new rhythms from just one original sample, and showcases Regroover doing what it does best: expanding your creative options by unlocking the full potential of a rhythmic loop.
That’s all there is to it – go forth and edit, remix, and create some awesome grooves. If you have any questions about Regroover Pro, leave them in the comments below.
February 12, 2019

.svg)
.svg)


